Waiting for a batch of delicious homebrew to properly carbonate can feel endless, like the wait between Star Wars sequels. But if you know how to keg homebrew, force carbonating beer can cut that time considerably.
Getting started is easy. And like the rest of the homebrewing process, you can find and use multiple methods for force carbonating beer that meet your schedule, budget, and needs.
How Force Carbonation Works
It might sound like you’re harnessing Jedi powers to bubble up your brew, but force carbonation is really just a fast and easy alternative to traditional methods.
Instead of waiting for your homebrew to condition in the keg, or for priming sugar to bottle-condition your brew, you inject CO2 directly into your beer from a gas cylinder.
Fed by a line into the keg, the gas dissolves into your beer. Depending on the method you use, you could be drinking your beer in mere hours instead of weeks.

A simple 5-pound tank to hold Co2. Perfect for kegging, bottling with a beer gun, or pressure transfers.
CO2 is Best Served Cold
Temperature plays a critical role in force carbonating. The lower the temperature, the more quickly CO2 dissolves into your homebrew, and the lower the volume of gas you’ll need to reach the proper volume of carbonation. Ideally, you’ll carbonate your beer at the same temperature you’ll be serving it.
You can use a force carbonation chart to choose the right amount of pressure to achieve the target volume of CO2 for your beer. (Click chart to enlarge)
Give it a Rest: Dealing with Diacetyl
While speed is the name of the game when force carbonating beer, incorporating a diacetyl rest into your brew schedule is important, especially for lagers. Diacetyl is a compound naturally produced by all yeasts, and too much of it can give your beer a funky, dairy-heavy flavor.
It can be tempting to go straight from the fermenter to the keg for carbonation. But if you carbonate too soon, you might find yourself with a beer that doubles as popcorn topping.
Let your homebrew rest for a day or two after it’s reached its final gravity. Then chill it to serving temperature before carbonating. This will give the lingering yeast in your beer time to convert some of the diacetyl they’ve produced into flavorless compounds and help you avoid buttering up your brew when you carbonate.
Equipment for Force Carbonating Beer
Getting started with force carbonation requires only a few pieces of standard equipment. Midichlorians and lightsabers are optional, but awesome.
You’ll need:
- A Kegerator
- A keg of homebrew, unpressurized
- Post liquid and gas line fittings for your keg
- A full CO2 cylinder
- A gas regulator
- A force carbonation chart
- A spray bottle with brewing sanitizer solution
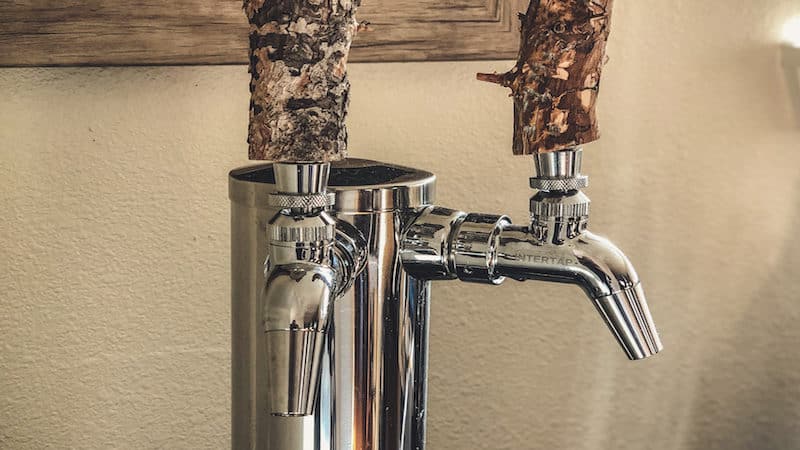
This is the PERFECT homebrew kegerator. Why? Because it comes with Intertap faucets, a digital temperature controller, rolling casters, tower cooling fan, robust MKIII regulator, and more.
Ready to improve your all-grain brewing process and dial in your system?
This video course covers techniques and processes for water chemistry, yeast health, mashing, fermentation temperature, dry-hopping, zero-oxygen packaging and more!
Click Here to Learn More
Methods for Force Carbonating Beer
Depending on how soon you want to drink your beer, and how predictable you want the results to be, you can choose one of three approaches to force carbonating beer.
Setting aside your keg at a set pressure takes the longest, but is the most predictable. Shaking your homebrew under high pressure yields fast results, but can create overcarbonation. And an inline carbonator requires more equipment, but balances the two other methods to create a functional compromise.

Before You Begin
Whichever method you choose, start things off right. Sanitize all your gear with a quality brewing sanitizer, and work in an area where it’ll be easy and safe to clean up any leaks or spills.
The basic preparation for two of the three methods is the same.
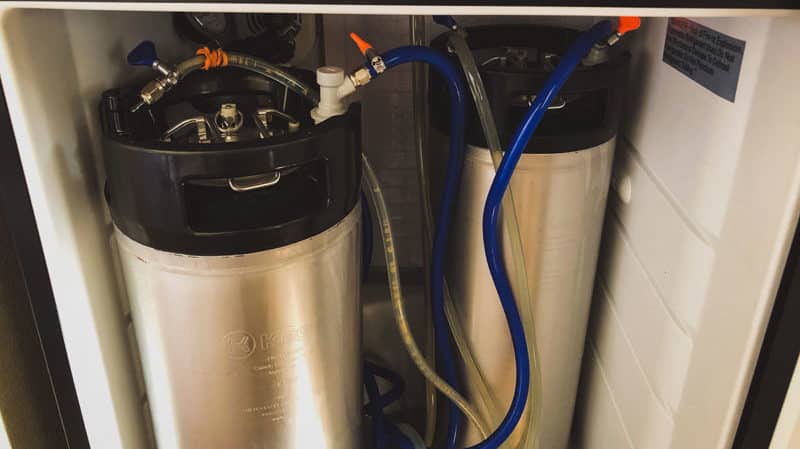
First, install a ball-lock fitting to your kegerator lines, if necessary. This will let you use ball-lock kegs to carbonate your beer.
Our recommended corny ball lock kegs for kegging your homebrew. Simple, lightweight, and easy to clean.
Second, you’ll do a bit of tinkering with your keg’s posts. Homebrew kegs have two posts. One is for adding gas, and one is for dispensing liquid. The dispenser post is attached to a long tube running all the way to the bottom of your keg.
Normally, the gas added through the gas post pushes down on the liquid as the keg empties, making it easier to get all your beer out of the keg.
When you carbonate, the process is reversed because you want to push gas, not pull liquid. You’ll be sending CO2 gas down into the keg through the dispenser post. The gas will rise from the bottom of the keg and dissolve into your beer. Pushing the gas up from the bottom increases efficiency, speeding up carbonation.
Remove the gas socket from the gas line. Set it aside. Remove the liquid socket from the liquid line, and then attach it to the gas line. The keg’s sockets are made to fit their respective posts only. Swapping them lets you push gas through the liquid line.
The final step is to turn on the gas and check for leaks. Dial your gas cylinder to 5 psi. Check for any leaks in the keg lid, the kegerator line, and around the dispenser post.
Tip: You can check for leaks with a spray of brewing sanitizer solution. Visible air bubbles will help you track down any leaks.
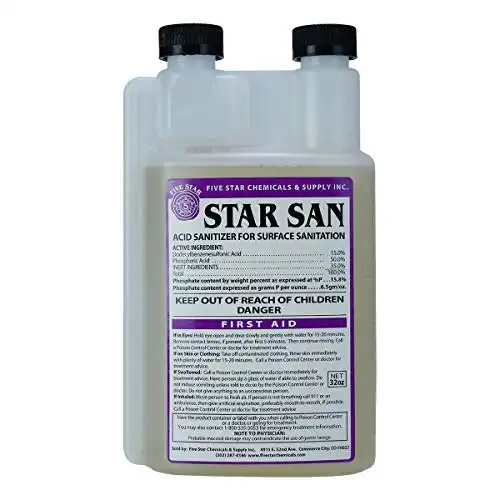
Our recommended NO-RINSE brewing sanitizer (acid-based) of choice with easy measurement built in. Plus, the foaming action helps sanitize all the nooks and crannies. Don't fear the foam!
Set It Aside: Slow and Reliable
This method is perfect if you’re looking to drink your homebrew in just a few days instead of waiting two weeks (or more) for it to condition in the keg.
Using the keg’s pressure release valve, bleed off some CO2. Listen for both the hiss of gas and the sound of bubbling. These sounds mean the gas is flowing properly from the cylinder through the regulator and gas line, and making its way through the tube before rising up to carbonate your beer.
If you’re hearing the good stuff, set your gas regulator to the recommended pressure for your recipe and serving temperature. Allow the keg to carbonate in your kegerator for three to four days, then test it. You may need to let it carbonate for up to ten days, depending on the recipe you use and the style of beer you’re brewing.
Important: Don’t forget to swap your gas and liquid lines back to their proper places, and adjust your CO2to serving pressure, before testing.
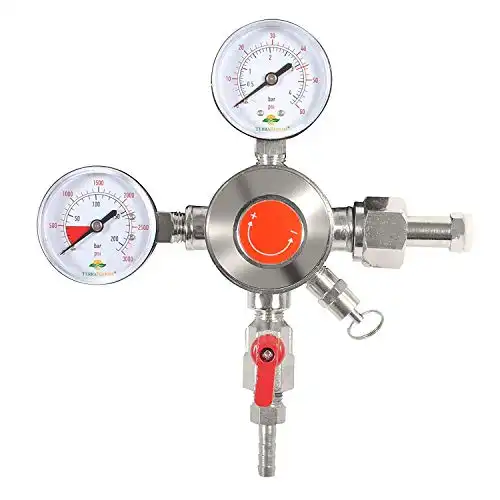
A heavy-duty unit made with two gauges to measure working pressure and tank pressure. Fits all standard CO2 tanks with CGA-320 inlets. Includes a shut-off valve pressure relieve valves to prevent beer from backing up into the gas lines.
Shake Things Up: Fast But Unpredictable
For this method, you’ll be setting metaphysical considerations aside, young Padawan. You and your friends are thirsty, and it’s time to shake a leg. And a keg.
Follow the same steps as in the slow method to connect your gas supply to the dispenser tube on your keg. Test it for leaks, then turn the pressure up to 30 psi.
Holding your keg firmly, shake it gently. Listen for the sound of bubbling as the beer sloshes around inside. Don’t worry, you’re not about to shotgun this keg. You’re actually accelerating the rate of diffusion by bringing more CO2 into contact with more of the beer.
Shake your keg for 20 minutes, stopping every 4 minutes to listen to the keg. The bubble sound should stop after only a few seconds at the end of the shaking period. This means the CO2 is dissolving into your beer. Lower the pressure to 20 psi. Wait an hour or two to let it settle, then test your beer.
Important: As with the slow method, don’t forget to swap your gas and liquid lines back to their proper places, and adjust your CO2to serving pressure, before testing.
While your beer will likely be drinkable in just a few hours, it’s important to note that force carbonating beer using this method greatly increases your chances for an overcarbonated brew.
If you find you’ve overdone things just a bit, you can use your keg’s pressure relief valve to lower the pressure and allow the beer to release some of the gas back into the keg. Then you can set your beer to the proper pressure level for your specific brew and let it continue to carbonate over the next two to three days.
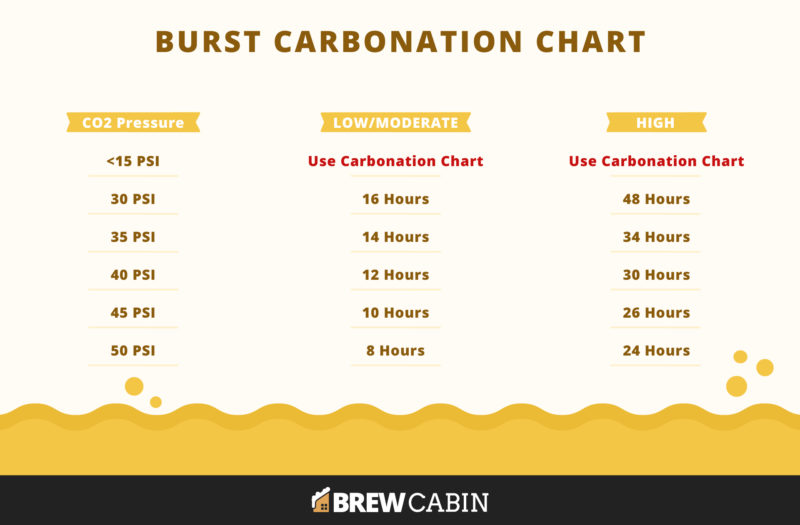
Burst Carbonation
This idea is similar to how a Soda Stream carbonator works. If you hit your kegged homebrew with high CO2 pressure, it’ll carbonate more quickly without you having to shake the keg.
To burst carbonate your homebrew, crank up your CO2 regulator to 30 psi for 24 hours. Then reduce down to normal serving pressure, which is around 12 psi to15 psi (depending on your beer line length and altitude). That should leave your beer 75% carbonated. It should take another 3 to 4 days to reach peak carbonation.
Burst carbonation has a few pros and cons:
Pros
- faster carbonation
- carbonation can take place in or out of the keezer or kegerator
- it’s faster than the set-aside method
Cons
- increased risk of overcarbonation
- the extra pressure increases the risk of CO2 leaks
- it’s slower than the shake method
If you decide to use this method, a burst carbonation chart will help you determine how long to carbonate at different pressure levels.
Force Carbonating Beer with an Inline Carbonator
Combining the speed of the shake method with the predictability of the slow approach, an inline carbonator gives you the best of both sides of the, er, force.
It incorporates a nifty little gadget known as an aeration stone, also called an air stone, to incorporate the CO2 into your beer quickly and efficiently.
You might recognize aeration stones if you own a fish or grow your own tomatoes on a windowsill. They’re used to dissolve gases and nutrients into water for aquariums and hydroponics.
Some commercially produced inline carbonators use special stainless steel aeration stones that last longer and are easier to maintain than traditional ones.

A simple 2-micron carbonation stone to carbonate your beers faster. This is not the same as an oxygen aeration stone. Those are 0.5-micron.
Instead of following the steps outlined in the other two force carbonation methods, you simply add the inline carbonator to your setup and pump your beer through. Your brew will be carbonated and ready to drink in as little as 30 minutes. This method also keeps your brew from overcarbonating into a foamy mess.
An added bonus of using an inline carbonator is that it doubles as a wort aerator. You can use it to add oxygen to your wort before fermentation to help your yeast thrive.
You can buy an inline carbonator, of course. Or, if you’re the type of homebrewer who prefers to craft your own protocol droids, thank you very much, you can build one yourself.
Why Wait When You Can Have Your Beer Now?
Force carbonating beer is the perfect solution when you’re in a hurry to enjoy your homebrew. Armed with the right gear and techniques, you can have your latest batch ready to serve and savor in less time than it took the Millennium Falcon to do the Kessel run—or at least, faster than waiting on Mother Nature.
Happy Brewing!

![How to Build a Keezer for Homebrewing [Step-By-Step Guide]](https://www.brewcabin.com/wp-content/uploads/How-to-Build-a-Keezer-for-Homebrewing-800x450.png)