Making a mistake, especially at something you love, like homebrewing, is about as much fun as a swift kick to the nethers. And like any long and complex process, homebrewing gives even seasoned homebrewers a hundred different opportunities to ruin an otherwise wonderful batch of beer. But as Jake, the wise and slightly weird dog from Adventure Time once said, “Suckin’ at something is the first step to being kinda good at something.” Learning comes from correcting our mistakes and soldiering on to awesomeness.
Better still, though, is avoiding those mistakes in the first place. Knowing how to dodge homebrewing mistakes can save you time, money, and heartache in your quest for the perfect brew.
1. Not Cleaning Properly
The first step to amazing beer is clean gear. Brewing is a messy process, and keeping things clean not only keeps things tidy, but helps protect your homebrew’s quality and flavor.
Important: Note the important difference between cleaning something and sanitizing it. Cleaning tackles dirt, grime, and crud, plus fats, proteins, and assorted gunk that could ruin your beer’s flavor, finish, or fermentation. Sanitizing doesn’t lift a finger against any of those things, but kills off unwanted bacteria, which mere cleaning can’t do.
2. Not Sanitizing Properly
From funky flavors and unsettling growths to stalled fermentation, improperly sanitized equipment leaves your precious homebrew open to serious problems caused by unwanted microbes. Everything—and we do mean everything, including your hands—that will be coming into contact with your beer during the brewing process needs to be thoroughly sanitized.
A no-rinse brewing sanitizer is an absolute essential in your homebrewing toolbox. Thoroughly sanitizing your clean equipment puts you squarely on the path to a successful beer.
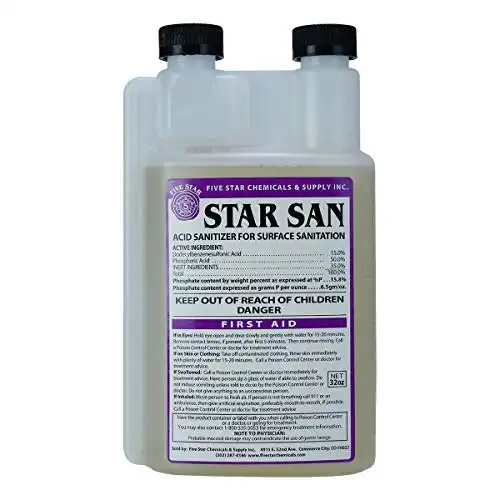
Our recommended NO-RINSE brewing sanitizer (acid-based) of choice with easy measurement built in. Plus, the foaming action helps sanitize all the nooks and crannies. Don't fear the foam!
Ready to improve your all-grain brewing process and dial in your system?
This video course covers techniques and processes for water chemistry, yeast health, mashing, fermentation temperature, dry-hopping, zero-oxygen packaging and more!
Click Here to Learn More
3. Using Low-Quality Water
Your local tap water may be perfectly tasty straight from the tap, but it might be doing more harm than good when you add it to your brew. Unfiltered, chlorinated water can give beer metallic or plastic flavors. Plus, depending on your area’s water table, the pH and ion profile might alter your beer’s final gravity, pH, and finish.
Your local tap water may not have the minerals or pH balance needed to produce the recipe you’re using. As beer styles developed around the world, many of them were built in part around the type of water available in the area where they first appeared. For example, Bohemia’s Pilsen, the birthplace of pilsner, has soft water with very few minerals.
If you’re looking to replicate a specific style, or just want to correct the eccentricities of your local water to make sure your beer has a generally balanced flavor and finish, use a water test kit to see what you’re working with. You can fine-tune your recipe and make sure your beer has the minerals and balance to look and taste great.

Great for doing at-home water tests specifically for brewing beer. We've tested this product and it works perfectly!
4. Not Measuring Properly
While it takes a fair degree of artistry to produce an exceptional beer, homebrewing is definitely a science, too. Following recipes faithfully and using precise measurements will help you avoid costly homebrewing mistakes and produce better beer that hits the marks for flavor, gravity, and finish.
Always measure all your dry ingredients by weight—never by volume. Get yourself a high-quality brewing scale for maximum convenience and accuracy in the brewhouse, and you’ll reduce the risk of unpredictable results in the keg.
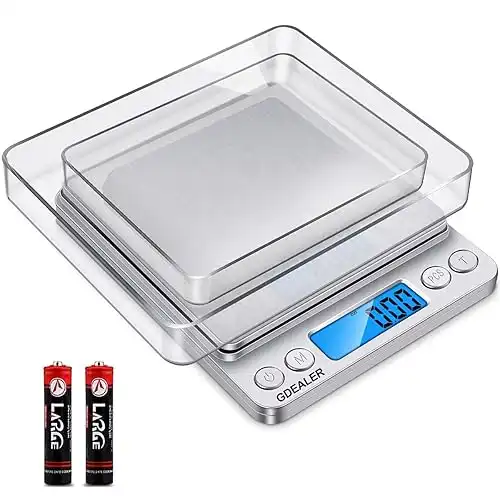
This scale is perfect for measuring hops, minerals, brewing salts, and other small amounts. It's super accurate and feels like it never runs out of battery power.
5. Using Old Ingredients
Beer is created from organic compounds, and every component, including any grain and all hop varieties, will break down and spoil over time, especially once they’ve been opened.
Fresh-tasting beer begins with fresh, tasty ingredients. Follow the usage and storage directions on all your ingredients to make sure you’re not setting yourself up for flat, funky, or skunky beer before you begin to brew.
6. Squeezing the Grain Bag
Do you brew in a bag? Are you steeping specialty grains for extra flavor and color? Channel your inner Mr. Whipple and resist the urge to squeeze the bag too hard.
A gentle squeeze is part of the brew in a bag process. But over-squeezing to harvest every drop of flavorful juices from the bag can also release compounds known as tannins that will take your wort to Bitterville.
Sparge your main grains using hot water to extract your wort, and for specialty grains, drain the bag and then let the grains drip-dry before discarding.
7. Burning Your Extract
Some homebrewing mistakes are more avoidable than others. Malt extract has a tendency to settle on the bottom of your brew kettle and burn. But if you stay vigilant, you can avoid scraping your ruined beer into the waste bin.
Remove your kettle from heat before adding any extract. As you add the extract, stir it constantly until the extract is totally dissolved. If you use a kettle with an internal heating element, rather than external heat, keep the element clean. This will help keep sediment from attaching itself to the element and adding unwanted flavors to your brew.
8. Creating a Boil-Over
Few things strike fear into the heart of aspiring homebrewers like the prospect of a boil-over. All the sugars and other chemical compounds that make wort such a fantastic base for beer can quickly become a sticky, goopy mess if they escape the kettle.
Keep an eye on the temperature of your wort as you boil, and stir it regularly. You can also reduce the chance of a boil-over by adding glass marbles to the bottom of the pot. They’ll break big bubbles into small ones, reducing big “burps” from the pot. They’re also inert, are safe to boil, and won’t flavor your beer.
9. Covering Your Boiling Wort
As it boils, your wort releases an assortment of sulphur compounds present in the ingredients. If you keep the kettle covered, these compounds will condense on the lid and drip back into the wort.
Some sulphur compounds are “good guys,” adding antioxidants to the brew, but in general, the whole sulphur family is unwelcome at the beer party. Sulphur can show up in your finished beer as cabbage, corn, or even fish or rubber flavors. Blech. Keeping the kettle covered also increases the odds of a boil-over.
Keep things light, airy, and open as you boil for tastier beer.
10. Cooling Your Wort Uncovered
If leaving the lid on during the boil is bad for your wort, taking it off while it cools is a disaster waiting to happen. Yes, your wort will cool more quickly, but without a lid, foreign particles, bacteria, or the neighbor’s cat might fall into the wort, contaminating it.
Leave the lid on for a safe, if slow, method of cooling. In a hurry? Grab a wort chiller and accelerate the process without risking unwanted contamination.
11. Using Unfiltered Wort
In addition to delicious sugars for your finished beer, your boiled wort contains a sludgy blend of hoppy, malty residue. This substance can clog your wort chiller and alter the flavor and fermentation of your homebrew.
Filter hops as it enters the primary fermenter. This will prevent excess starches, proteins, and other goop from affecting the taste and finish of your beer. You’ll also avoid overfeeding your yeast during bottle conditioning, and the messy explosions that can come with it.
12. Underpitching Your Yeast
One of the more common homebrewing mistakes, failing to use enough yeast can leave you with an underfermented beer that’s too sweet and below its target gravity. It’s easy to underpitch yeast, especially if you’re new to brewing, are making a large volume of beer, or crafting a high-gravity brew like barleywine or Imperial stout.
Pay close attention to the cell count on your yeast package, and follow the recommended amount for the recipe you’re using. If you’ll be brewing with the same strain regularly, consider creating a yeast starter to save money and ensure you always have plenty of good yeast on hand.
13. Pitching Yeast into Hot Wort
Temperatures above 70°F (21°C) can shock or even kill brewer’s yeast. Should they survive, the yeast will probably fail to complete fermentation properly, leaving you with weird flavors and sugary beer.
Cool your wort to the proper temperature before pitching.
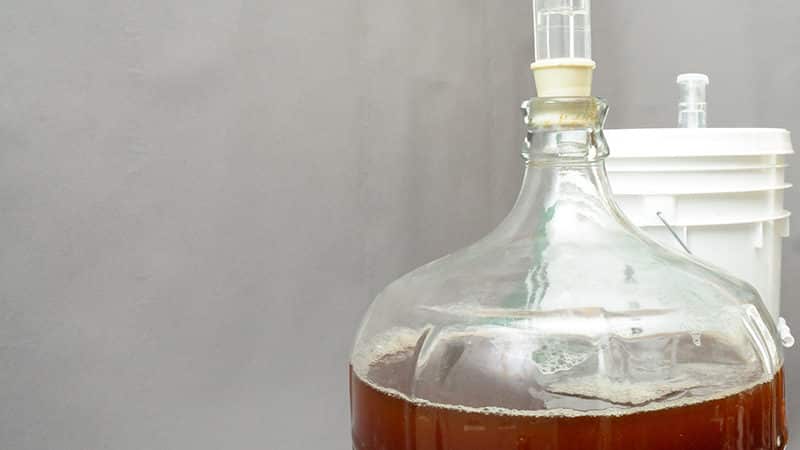
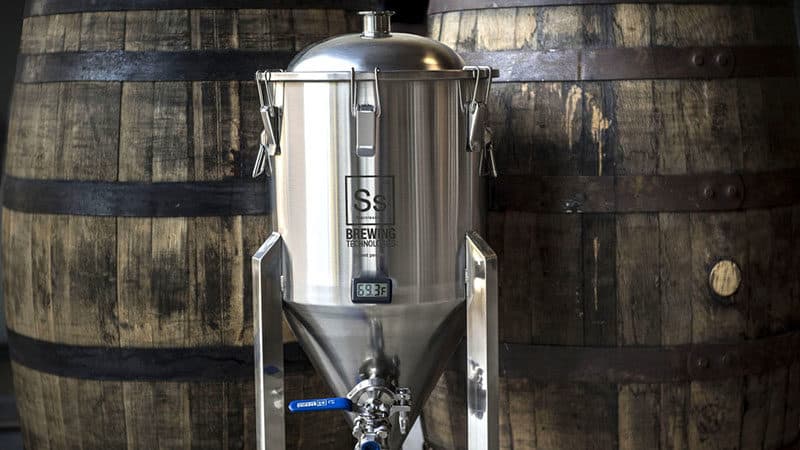
14. Using an Undersized Fermenter
Yeast create foam while they’re turning your wort into beer. And whether you’re dedicated to the carboy or prefer a state-of-the-art conical fermenter, your beer needs room to expand while it ferments. Without it, you can find yourself facing a messy eruption.
Use a fermenter that’s around 20% larger than the volume of your batch. If, for example, you’re brewing a 5-gallon (19 L) batch, your fermenter needs a volume of 6 gallons (23 L).
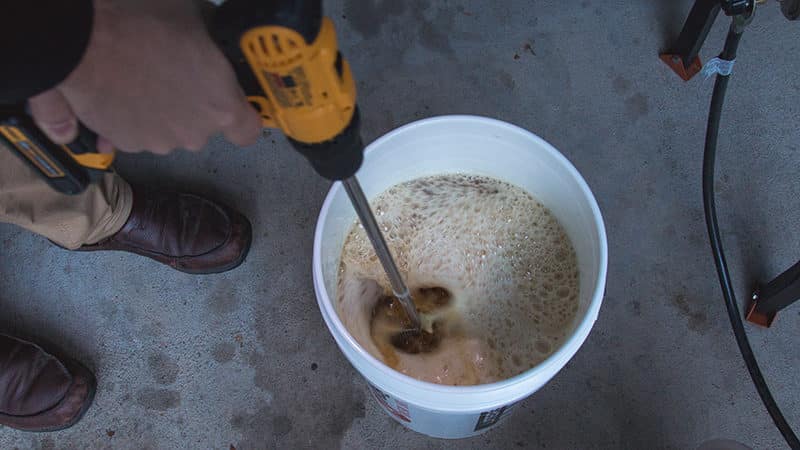
15. Not Aerating Your Wort Thoroughly
The yeast in your beer need oxygen to thrive. Adding air to your wort after you cool it, but before you add the yeast, is essential for proper fermentation. The recommended concentration of oxygen for ideal fermentation of most beers is around 10 parts per million (ppm).
You can reach 8 ppm of oxygen in your wort by shaking your fermentation vessel vigorously for around 40 seconds. Or, if you have a sanitized air pump and a 2-micron aeration stone, you can reach 8 ppm in around five minutes.
16. Oxidizing Your Beer
Air is a blessing before you ferment. But if oxygen infiltrates your brew after primary fermentation, you’ll find yourself cursing an assortment of unwanted, flavor-ruining compounds created by oxidation .
You can reduce the chances of oxidation by carefully siphoning your beer from vessel to vessel during all stages of fermentation. As you’re siphoning, keep the siphon below the surface of the wort in the transfer vessel. Take things slow to avoid splashing, which can pull air into the wort.
17. Starting the Siphon with Your Mouth
Your mouth is ideal for drinking beer. But it’s so jam-packed with unsavory bacteria that using it to start your siphon is just asking for skunky, funky beer.
Use an auto-siphon to transfer your wort to keep things safe and sanitary. In addition to keeping the critters in your mouth from invading your beer, it will help you avoid oxidation during fermentation.

18. Exposing Your Beer to Direct Sunlight
When sunlight hits your fermenting beer, a series of photochemical reactions take place. The heat and light interact with the hops in your beer to create a nasty, skunky flavor that’s more Pepe Le Pew than tasty homebrew.
Like mushrooms or Gollum, your beer does best away from the sun. Make sure your fermentation chamber protects your wort from the sun. And if you’re bottling beer, choose amber bottles. They filter out the ultraviolet wavelengths which cause skunking. Blue, green, and clear bottles don’t.

19. Bottling Your Beer Too Early
This homebrewing mistake is usually caused by impatience. The exciting parts of brewing are broken up by long stretches of time while you wait for yeast to convert wort into beer. As the days pass, you might be tempted to bottle your beer before it’s ready. But your beer continues to ferment during bottle conditioning, and bottling too early can allow pressure to build up, and your bottles to explode. That’s a little too exciting.
Always follow the guidelines and recipe for your particular beer. Measure the final gravity of your wort with a refractometer before you bottle. If it matches your target, you’re ready to roll. If not, give your wort another day or two in the fermenter and test it again. Repeat until you’re at target gravity.
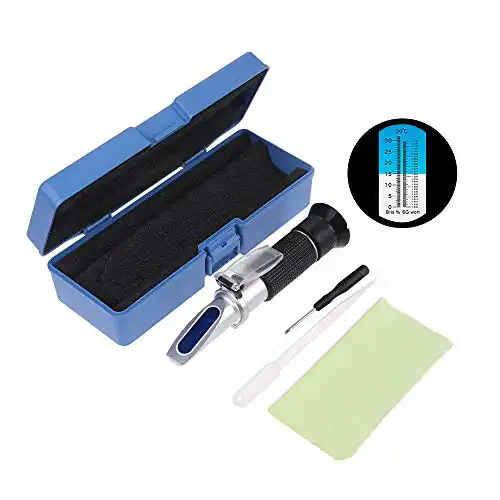
This handy refractometer makes it easy to measure the sugar content of your beer. It includes automatic temperature compensation, so you can get accurate measurements. Plus, it has a dual scale that measures both Brix and SG, so you don't have to do any conversions.
20. Not Adding (Enough) Priming Sugar
If you’d rather bottle your beer than keg it, you’ll soon become well acquainted with priming sugar. Since this special sugar feeds the yeast that carbonate your beer, skimping on it (or forgetting to use it) will leave you with under-carbonated, overly sweet beer.
If you’re the DIY type, be sure to use an online calculator to determine the right amount of priming solution you’ll need to make for a successful conditioning. If the thought of math drives you to drink, you can use priming sugar tablets to make sure every bottle gets the perfect amount.

21. Adding Too Many Flavors
We love playing with our brews. It’s exciting to experiment and create a tasty, tempting homebrew with herbs and spices. But too much of a good thing can ruin an otherwise great beer.
Unless you know exactly how the seasonings and flavors you’re adding will interact, it’s best to start with just one or two extras. Once you’ve mastered the basics, you’ll be ready to tackle that boysenberry milkshake IPA you’ve had your eye on.
22. Selecting a Recipe That’s Too Advanced
Brewing beer is an adventure. And when you’re just starting out, it can be tempting to try to do everything you want to accomplish in a single go. But Rome wasn’t built in a day, and award-winning beer isn’t crafted in a week.
Start small. Try basic recipes and styles as you learn the ropes, and when you’ve mastered them, move on to more technical brews.
23. Taking Shortcuts
This may be the easiest of the most common homebrewing mistakes to avoid, and they can be a catastrophe for budding brewmasters.
Keep things simple. Stay on top of your boil. Measure precisely. Keep things clean, sanitary, and organized. Common sense and patience will carry you much further than cut corners ever will.
24. Setting Unreasonable Expectations
As a wise man once said, “Donoby’s ferpect.” The occasional hiccup is part of what makes homebrewing so fun and exciting. That’s not to say that you should throw caution to the wind and hope the Butterfly Effect finishes your beer for you, but don’t let one little mistake ruin an awesome hobby.
In brewing, as in life, expect the best, but plan for the surprising. Leave perfection to the commercial brewers. Embrace a little bit of chaos as necessary to a happy, healthy homebrewing career.
25. Not Taking Good Notes
The foundation of science is producing results that can be readily reproduced by others. Notes make it easy for you to keep track of what works—and what doesn’t. Recipes, brew temperatures, fermentation schedules … if it has to do with your brew, write it down, or risk losing your best work to the mists of unreliable memory.
Start a homebrew journal, either on paper or electronically. You’ll be more organized, have reliably reproducible recipes to consult, and a handy way to chronicle your growth as a homebrewer.
If at First You Don’t Succeed …
Into every life a few homebrewing mistakes must fall. But by understanding the most common challenges, keeping things sanitary, and staying mindful of proper techniques, you can give yourself an edge.
You’ll soon learn to avoid the worst errors, and quickly recover after minor ones while you perfect your homebrewing skills.
Happy Brewing!