I spent three years brewing one style of beer: The Hazy IPA. My goal was to homebrew a “perfect” hazy IPA recipe. Or at least one that would rival my favorite breweries.
I believe I figured out the ingredients and processes to make a damn near-perfect unfiltered hazy/juicy/New England IPA at home. But first, I want to outline what makes an excellent example of this style.
And show you this video 👇.
Heads Up: For the rest of this article, I’ll use Hazy IPA, New England IPA (NEIPA), and Juicy IPA, unfiltered IPA, interchangeably.
What Makes a Good Hazy IPA?
I based my recipe on a few examples I considered a “perfect” craft beer. These are my favorite NEIPAs from the craft beer industry.
- Julius from Tree House (Massachusetts)
- Juicy Bits from WeldWerks (Colorado)
- In The Steep from Outer Range (Colorado)
I also love any version made by Hill Farmstead (Vermont), Trillium (Massachusetts), Tired Hands (Pennsylvania), and Monkish (California).
There are many variations of the Hazy IPA style. But all these have similar qualities I wanted to achieve. I needed to know what I wanted the final beer to look, smell, and taste like.
The Look and Feel of a Hazy IPA
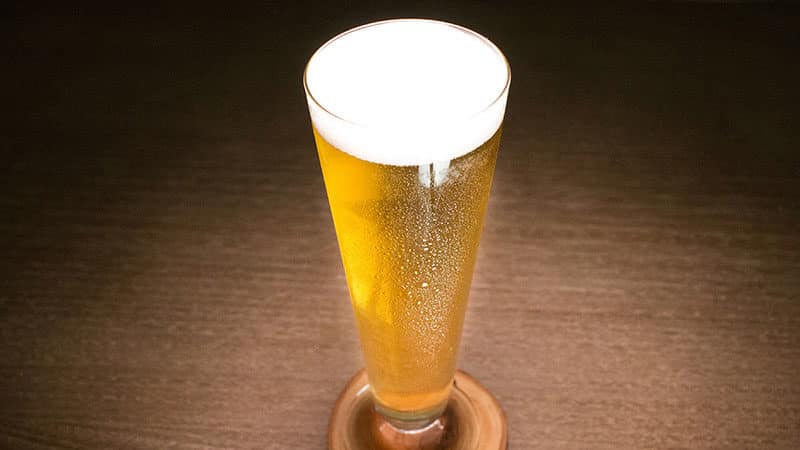
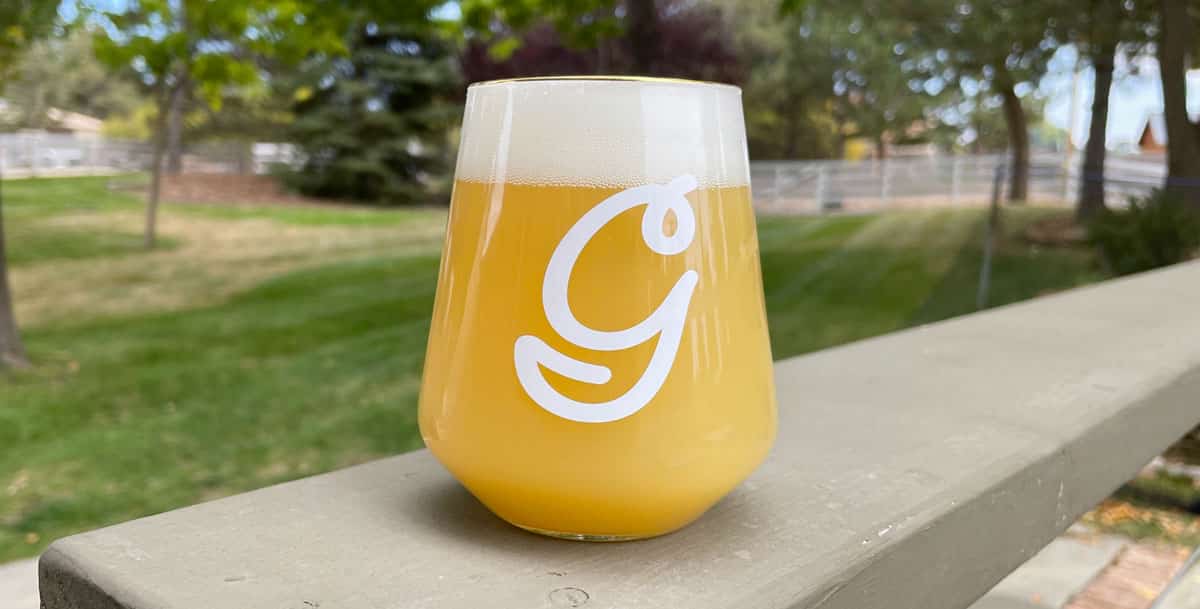
The color of these beers ranges from pastel yellow to orange juice. I like the pastel-yellow look. The ingredients, the boil, and the packaging determine the color of the beer. More on this later.
Then, there’s haziness. I like the beer to have a cloudy appearance. I’ve found you can achieve this even if you use clarifying agents.
The haze factor should not be caused by suspended yeast or lazy brewing practices. I believe the haze comes from a reaction between the protein and hops. I don’t know how, but it seems true.
When it comes to “feel,” I’m talking about body or mouthfeel. I’ve heard terms like “pillowy” and “soft.” But I don’t know how to make something pillowy without adding cotton. I interpret these descriptors as viscous with sugar and protein.
I think of Cream of Wheat or oatmeal cookies. When I eat these foods, they leave a slickness on my palate. And when I drink orange juice, it’s thick. It isn’t pulp; it’s all sugar! Getting the final gravity to land between 1.015 and 1.020 results in a sweeter beer.
On top of that, you can make the water feel “thick” by adding calcium chloride, which is commonly used as an electrolyte in sports drinks. I’ll dive a lot more into brewing water chemistry later.
The Flavor and Aroma of a Hazy IPA
I think NEIPAs taste like mimosas – orange juice with Champagne. But I can’t just add orange juice and sparkling white wine to a beer and call it an IPA.
The malty flavor needs to take a back seat. Malt doesn’t taste like oranges or tangerines. Malt plays a role in the sweetness, color, and mouthfeel.
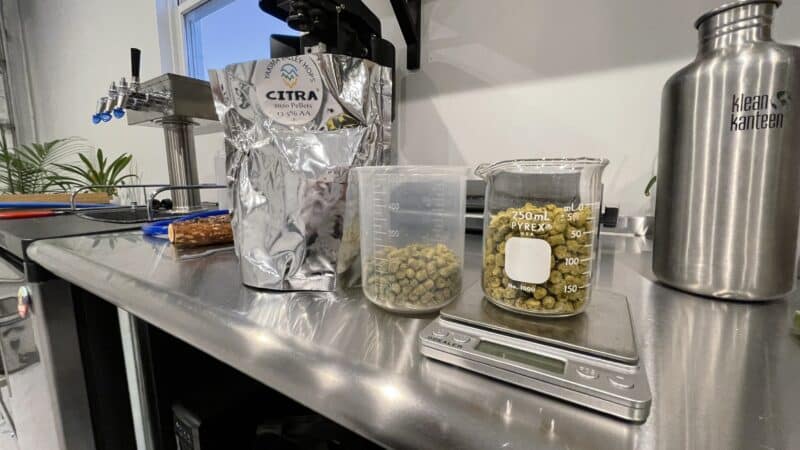
To get the citrus flavor, we need lots of hops. And by “lots,” I typically add 12 ounces to a full pound per 5-gallon batch. The byproduct of adding all these hops will produce a strong aroma that lends to the beer’s flavor without increasing the IBUs.
To avoid creating a super bitter beer with a metric ton of IBUs, you must add the hops at certain times, including post-boil and post-fermentation.
The Crucial Ingredients of a New England IPA Recipe
When I started experimenting with creating my ultimate NEIPA recipe, I started with a SMaSH beer (Single Malt and Single Hop). If you want to go down the same path, I recommend starting with basic pale malt and Citra®. That’ll get you a decent beer. But it won’t be a NEIPA.
Let’s start with building up the grain bill to get the base of a lightly colored, full-bodied beer. Then, we’ll move into hops and yeast choices. And finally, we’ll talk about water.
Heads Up: At the end of this section, I’ll provide you with the final exact NEIPA recipe I use. But first, I want to break down every ingredient and why I think it works well in this style.
The NEIPA Base Malts
For the base malt, I started with pale malt (2-row). But that gave me color between pastel yellow and orange juice. I later started blending pale malt (2-row) and pilsner malt. This gave me a much paler beer that I enjoyed with more flavor from the pilsner malt.
These two malts are the backbone of the recipe. They provide most of the sugar and color. They only account for roughly 60% of the total grain bill.
You can choose all pale (2-row) or pilsner malt. You can also try a heritage variety like Maris Otter or Golden Promise, but I found these beers to have too much malt flavor and dark color.
I avoid using Pale Ale Malt, Vienna, and Munich for the same reasons.
The NEIPA Specialty Malts
I use a lot of specialty malts and grains to achieve a big mouthfeel. These will add viscosity to your beer and help with haze later on. I use a mix of flaked wheat and oats for roughly 30% of the grain bill.
You can also use all wheat or oats instead of blending them. I recommended going with all oats because that’ll give you a better mouthfeel. Wheat will provide you with more of an acidic bite on your palette and not a lot of thickness.
I like using both because I get a slight acidic bite from the wheat, which aids in the orange juice feel. And I get the thickness from the oats.
You can try flaked and non-flaked versions. I like the flaked versions because I don’t have to mill them.
And finally, for added sweetness, I like to use a little dextrin malt – roughly 10%. You can use Carapils from Briess, too.
Dextrin malt adds unfermentable sugar to your beer. This leftover sugar in the final product will lead to a sweeter and thicker beer. And I think this is a MUST! You could add lactose or maltodextrin for added sugar, but I don’t like using them.
Speaking of which, if you were to build your NEIPA grain bill, I think the bare minimum would have to be:
- 65% pale malt
- 30% oats or wheat
- 5% dextrin malt
Everything else you add would be a bonus. However, I would personally avoid using crystal and roasted malts. I’ve heard people experimenting with honey malt and other lightly colored malts to add more flavor and complexity. But when it comes to complexity, I save it for the hop bill.
The NEIPA Hops
There are a few varieties that shine in a juicy IPA. And here’s a list of my favorite hops loaded with tropical fruit and citrus:
- Citra® (oranges & mango)
- Galaxy™ (passionfruit)
- Mosaic™ (ripe mango)
- Simcoe® (lemon & pine)
- Amarillo® (oranges)
- El Dorado® (pineapple)
- Sabro™ (coconut)
- Nelson Sauvin™ (diesel & white grapes)
Before you disagree with me, these fruit flavors are just what I perceived. So take these suggestions with a grain of salt.
When I make a NEIPA, I like to use either one hop or blend an equal amount of 2-3 varieties. This keeps things easy. Once you have a great base recipe nailed down, you can do all kinds of hopping blends and get a bunch of different beers.
My favorites are using all Citra® or a blend of Galaxy™ and Nelson™.
Keep in mind that all these hops are solid choices. Every beer you brew with these hops will be a banger, so it’s like cheating. It’s what Michael Tomsmiere and Scott Janish refer to as “Cheater” hops.
For example, my Bowie in Space recipe, which I featured in the video below, uses mainly Galaxy™ and Nelson Sauvin™. Six ounces are added after the boil for 20 minutes, and another six ounces are added after fermentation for three days (dry hop).
But you don’t have to stick to these choices. You could blend “cheater” hops with “cheaper” or dank hops like Comet, Idaho 7, Lemondrop, Cascade, Columbus (CTZ), etc. Or whatever’s in the back of your hop freezer.
We’ll get deeper into the brewing process later on. But it’s important to know when to add hops and how much.
You can add bittering hops at First Wort Hopping (as the wort is coming to a boil) or right at the beginning of the boil. I haven’t found any benefit of adding hops during the boil. I only add hops post-boil (hot side) and post-fermentation (cold side).
After reading Scott Janish’s book, The New IPA, I added a big hop charge post-boil (or during the whirlpool stage) for flavor and aroma. This also gives me plenty of bitterness for the style. And another hefty dry hop charge for aroma and a little bit of bittering.
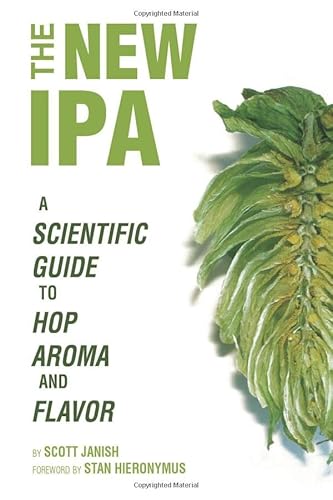
If you're interested in brewing Hazy or New England IPA (NEIPA), then you need this book handy in your library. It'll be filled with highlighter ink before you know it!
My goal is not to make the beer taste bitter. But instead, take advantage of all the juicy components.
The NEIPA Yeast Strains
The main goal with the yeast is to get fruity esters to contribute to the juicy hop flavor. But you also want good attenuation because NEIPAs tend to be 6-7% alcohol by volume (ABV).
What about biotransformation? This is when your yeast helps transform hop compounds into new flavors and aromas that don’t currently exist. And it’s a pretty common practice for NEIPA brewers.
However, for me, it’s been hit or miss. It depends on the hops you use and when you add them. I would invite you to look at the science in Scott Janish’s book. But I don’t strive to achieve biotransformation when I dry hop.
Instead, I like to dry hop after fermentation is complete to harvest the yeast for my next batch (save a little bit of money). I also like to soft crash before dry hopping – more on this later when we talk about the process.
I use English Ale yeast strains, which is typical for the style. My go-to’s are:
- Wyeast London Ale III 1318
- Imperial A38 Juice
I think any English ale strain will work. You could also experiment with Kviek strains, as they give off a fruity ester.
I would avoid clean ale strains and lager yeast strains.
The NEIPA Water Profile
Finally, the water profile helps mouthfeel and soften the bitterness from the hops. We aim for a water profile with a 2:1 ratio of Chloride to Sulfate.
Confused? Let’s simplify!
Why are the bagels and pizza crust in New York City so good? Water chemistry. Why are the hoagie rolls in Philly so good? Water chemistry? Why is sourdough bread in San Fransisco so good?
You get the point.
Anyone who says you can’t make good bagels in Wisconsin because they don’t have New York water is full of shit!
You can copy the water profile of any New York bagel shop. You need to test the water. Once you know the minerals, you can start with distilled or reverse osmosis water and add them.
Think of the water profile as a water recipe. And the ingredients to make it are brewing salts like:
- Gypsum (Calcium Sulfate)
- Epsom Salt (Magnesium Sulfate)
- Calcium Chloride
- Salt (Sodium Chloride)
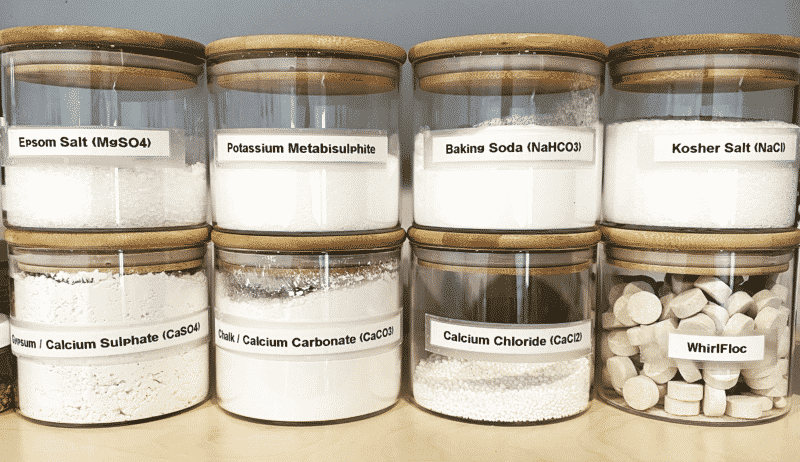
For example, if you want to add more Sulfate, you can use Gypsum or Epsom Salt. If you’re going to increase the Chloride, you can add Calcium Chloride or salt.
For amounts, everything is measured in parts per million (ppm). To measure out the mineral additions, it’s common to use weight in grams (since you’re adding such a small amount).
You can Google the water profile of your favorite brewery or beer. If you want to copy the water recipe for Tree Houses’ Julius, look no further than this post.
The water recipe (profile) I use for Bowie in Space comes from the Hoppy NEIPA profile found in the BrewFather app—roughly 200 ppm of Chloride and 100 ppm of Sulfate. There’s your 2:1 ratio!
- Calcium: 100 ppm
- Magnesium: 18 ppm
- Sodium: 16 ppm
- Chloride: 186 ppm
- Sulfate: 93 ppm
The Chloride comes mostly from adding Calcium Chloride and a hint of Kosher salt. The Sulfate comes from a mix of Gypsum and Epsom Salt.
Adding all these brewing salts means that NEIPAs are packed with electrolytes. Both good and bad for a hangover.
Heads Up: Epsom salt is the same stuff we use in bathwater and to help constipation. Yes, Epsom salt is a laxative! So keep that in mind. Maybe it’s why NEIPAs cause gas? I don’t know; I’m not a doctor.
Developing a New England IPA Recipe From Scratch
We got all the ingredients we need to make a perfect Hazy IPA. All we have to do is put them all together.
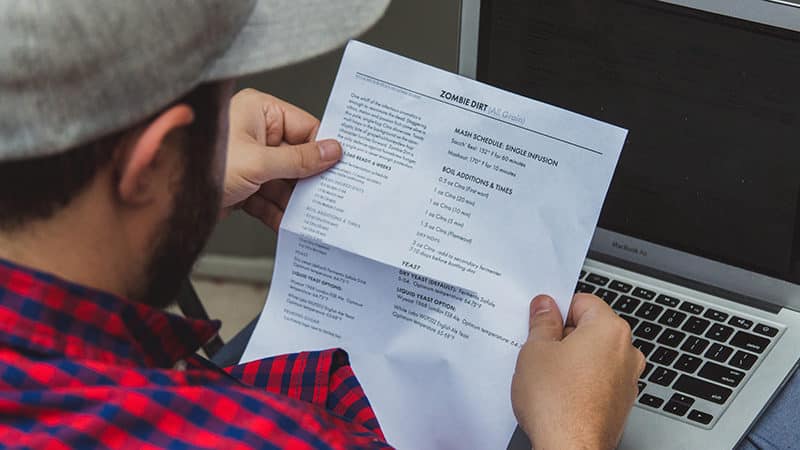
This is my base NEIPA recipe. I keep the same grain bill and change out the hops when I want something different. You can download the PDF or
If you want to build your own, here are the key components:
- Water: 2:1 ratio of Chloride to Sulfate.
- Grain: 65% base malt, 30% flaked adjuncts, 5% dextrin malt.
- Hops: 1-3 hop varieties added post-boil (whirlpool) and post-fermentation (dry hop).
- Yeast: British Ale or Kviek strain.
The Process For Brewing a New England IPA at Home
Now let’s get into brewing, fermentation, and packaging. Most of the work is in the brewing process to make a perfect hazy IPA.
The Mashing Process
First, I heat my strike and sparge water in the same vessel. I do this because I like to add all my brewing salts at once.
I start heating the water, measure my salts, and add them once the water is over 100ºF. The warm well helps them to dissolve better.
I always use Reverse Osmosis or Distilled water because my water profile is essentially blank. It makes it easier to get my water recipe just right. But if you’re using tap water, get it tested first to know where to start.
At this point, I’ll also adjust the pH using Lactic Acid. I aim for a mash pH of 5.2 – 5.4.
I’ll fill up my mash tun with hot strike water so that when I add the grain, my mash thickness will be 1-1/4 quart of water per pound of grain.
Heads Up: I have a large amount of high-protein grain, so I add some rice hulls to the mash to help with water flow. This prevents a stuck mash and low efficiency.
My goal is to mash at 154ºF. This is a little on the higher side of the beta-amylase rest. This produces less fermentable wort, leading to a sweeter beer with more body.
Usually, I mash for no less than 60 minutes. Sometimes, I’ll mash for 90 minutes if I want a higher efficiency for double IPA versions.
Finally, I fly sparge into my boil kettle as slowly as possible to reach higher efficiency. For NEIPAs, I usually get around 75% mash efficiency because of the higher protein grain bill.
The Boiling Process
Once I’ve collected all my sweet wort in the boil kettle, I immediately bring it to boil without adding any hops.
I boil for 60 minutes to sanitize and drive off any DMS precursors. This is the easiest part of the brew day.
At 45 minutes into the boil, I’ll add my immersion chiller to sanitize it, yeast nutrients, and a whirlfloc tablet. Even though this is a hazy IPA, I still like to start with the clearest wort possible in the kettle.
Once the boil is over, I turn off the heat and chill it down to 180ºF. I add my only hop charge and let it steep for 20 minutes. You’ll notice the wort gets super hazy after adding the hops.
Then, I chill it down to 70ºF and transfer it into my fermentor.
The Fermentation Process
Once my beer is transferred, sometimes I’ll add some pure oxygen with an oxygen stone. I don’t always have pure O2 on hand. That’s why I always add yeast nutrients as a failsafe.
Then, I pitch the yeast.
Sometimes, I’ll make a yeast starter beforehand if I have time or if my yeast packet is a little old. With Imperial Yeast having 200 billion cells in a package, I rarely make a starter. I sometimes find underpitching stresses out the yeast and causes more fruity ester development.
I ferment the beer for roughly seven days at 68ºF – 70ºF.
I don’t turn up the temperature for a diacetyl rest because it’s already a reasonably high temperature. Although, there is no harm in bumping it up a few degrees near the end of fermentation.
Once primary fermentation is complete, I do a soft crash. This is where you drop the temperature a few degrees to force the yeast to stop working and settle out.
Doing a soft crash allows me to harvest the yeast for my next batch and avoid hop creep when I dry-hop the beer.
“Hop creep” is a phenomenon when you dry hop after fermentation, and MORE fermentation happens.
How is this possible?
Dr. Shellhammer (brewing scientist) claims dry-hopping frees up more fermentable sugars. This means your beer may finish at a lower gravity, resulting in a higher alcoholic beer than intended.
For some styles, this may not be a problem. I don’t mind my West Coast IPAs having a bigger hit. But I like my East Coast (New England) IPAs to be sweeter at a higher gravity.
So to prevent hop creep, I lower the temperature of my fermentation vessel after fermentation is complete to 58º F (14.5º C).
I read about this in Scott Janish’s The New IPA book, and it completely changed how I make hoppy beers. Plus, it improved my recipe creation accuracy.
If you’re still curious about this phenomenon, you can read more here.
A Quick Note About Oxygen and Hazy IPAs
We need to do everything to avoid introducing oxygen to our beer. Hazy IPAs oxidize fast! Think about leaving a cut apple or avocado out on the kitchen table. It’ll turn brown seemingly before your eyes. Well, the same thing happens to a hazy IPA.

The Zero-Oxygen Dry-Hopping Process
I’m a psycho when it comes to doing everything I can to limit cold-side oxidation. And I’m not the only one. The fellas at Brulosphy have done some experiments, specifically on New England IPAs.
One of the hardest things to do in this style is dry hopping without letting any oxygen in. Even opening the fermenter lid for a split second can introduce oxygen!
So here’s what I built to stop it.
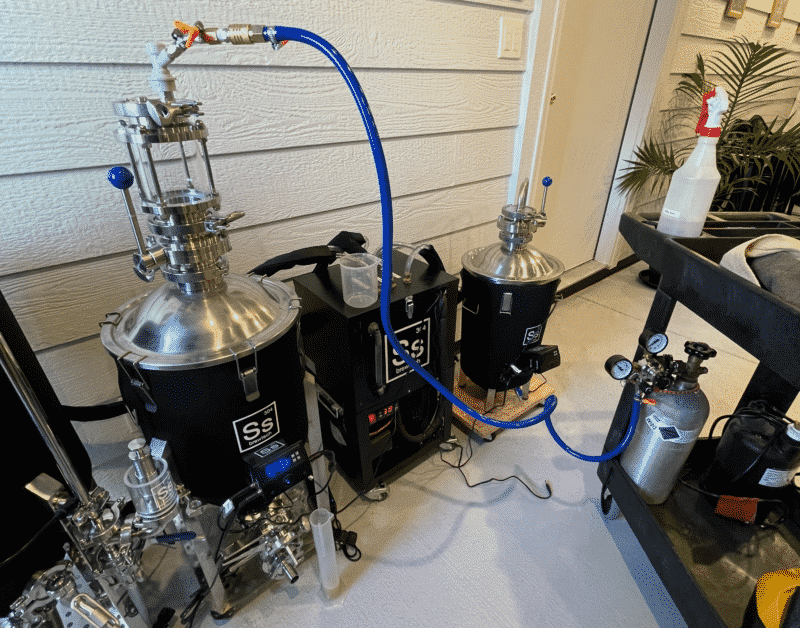
This is my hop dropper. It sits on top of my fermenter lid, which has a 3″ tri-clamp butterfly valve, a 3″ massive sight glass, and a lid with a gas quick disconnect and pressure relief valve.
Maybe it’s a bit overkill, but there’s no oxygen getting into my beer when I dry-hop after fermentation. Sure, I could dry hop while it’s fermenting and avoid all this, but where’s the fun?
- Close the butterfly valve.
- Add the hop dropper.
- Add the hops.
- Purge the hop dropper with CO2.
- Open the butterfly valve and drop the hops in the beer.
- Close the butterfly valve and get the blow-off tube back on. Also, purge the blow-off tube with CO2.
If you want to see this setup in action, check out my latest video course called Level Up All Grain. This course is jam-packed with modern techniques and processes, including water chemistry tutorials, improving yeast health, advanced mashing techniques, fermentation temperature control, and more!
Ready to improve your all-grain brewing process and dial in your system?
This video course covers techniques and processes for water chemistry, yeast health, mashing, fermentation temperature, dry-hopping, zero-oxygen packaging and more!
Click Here to Learn More
I let the hops steep at 58ºF for about 3-4 days. Then, I’ll use my conical fermentor to dump the hops before transferring the beer to a keg.
I usually don’t cold crash the beer where I drop it down to 35ºF. I found it was just another step that didn’t see any benefit in my process.
But if you want to soft crash or cold crash your beer before packaging, make sure you avoid suck-back from your blow-off tube or airlock. This will introduce unwanted oxygen into your beer as well as a sanitizing solution.
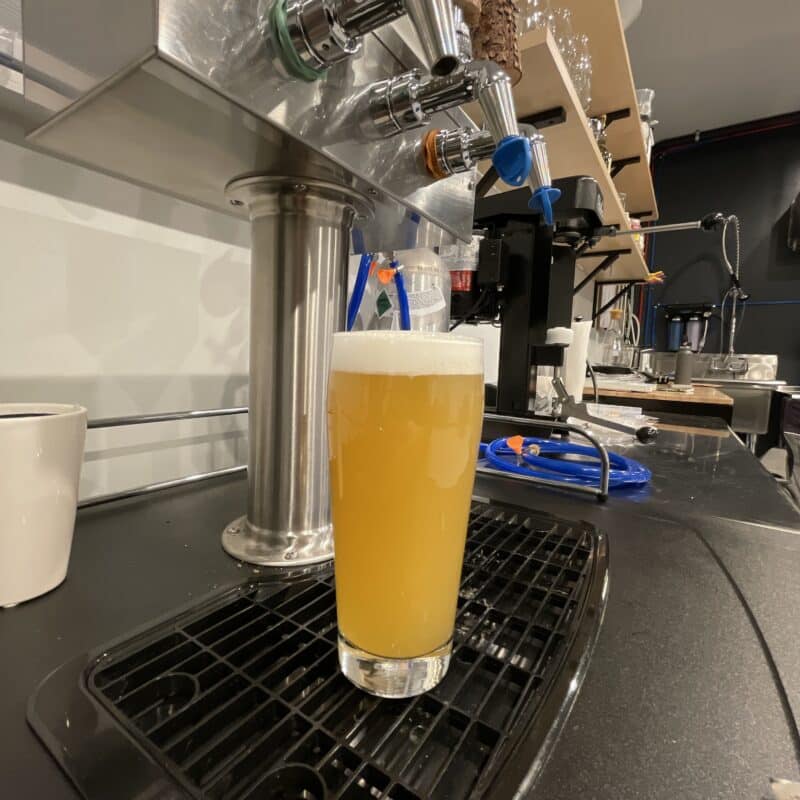
The Kegging Process
This process will make or break your NEIPA. The goal is to transfer from your fermenter to a keg without introducing oxygen to the beer.
At this point, I think kegging is the only packaging option for homebrewed Hazy IPAs. Bottling or canning straight from the fermenter without introducing oxygen is difficult, if not impossible.
First, I will fill up a corny keg with a Star-San solution and let it sit for 5-10 minutes to sanitize. Then, I hook up my transfer hose to the output and CO2 tank to the input and push out the sanitizing solution to another keg.
This purges the keg and the transfer hose of oxygen.
Heads Up: I use a Bouncer in-line filter on my transfer hose. This helps keep leftover hop debris from clogging up my transfer hose and corny keg dip tube.
I hook one end of my transfer hose to the fermenter, and the other stays connected to the keg. I use my CO2 tank connected to the top of my fermenter to push one PSI of gas into the fermenter.
Before you push the beer from the fermenter into the keg, you need a place for the gas to escape. You can either disengage the pressure relief valve or hook up a gas quick disconnect to the input on the keg.
Once the beer is transferred, I add about 20-30 psi of CO2 into the sealed-off keg and pull the pressure relief valve a few times to purge the keg’s headspace. I probably don’t need to do this step since the keg was already purged, but it’s a good measure.
Finally, I chill the beer down to 38ºF, carbonate it to 2.4 volumes of CO2, and consume it as fresh as possible.
I put the keg in my kegerator, hook it up to serving pressure, and let it carbonate and condition for about 7-10 days. Then, I drink it!
I like consuming it slightly undercarbonated. It has a better mouthfeel, like it’s served from a cask or on nitro. If you notice a slight hop burn in the back of your throat, it may be a little too early to drink. Let it condition for a week and try again.
The Best Resources for Homebrewing Hazy IPAs
I hope this article was a good resource for you as you set out to make your hazy IPA at home. If you have any questions I didn’t answer in this article, please email them to me at [email protected].
Even though I’ve been actively brewing Hazy IPAs for over six years now, I didn’t learn everything by trial and error. I had a lot of help through online and offline resources I’d like to share with you:
- The New IPA by Scott Janish: By far the best resource on brewing this beer style.
- Scott Janish’s blog is full of super helpful tips.
- WeldWerks Juicy Bits New England-Style IPA Recipe by Neil Fisher from Beer and Brewing Magazine.
- Water: A Comprehensive Guide for Brewers by John Palmer and Colin Kaminski
Happy Brewing!