Are you looking to move on up from extract brewing to all-grain brewing? You’ll need something to help you prepare those grains. You need a mash tun.
Sure, you could buy one of those professional-grade, stainless steel mashing containers. But you’re a homebrewer. You like to do things yourself. You know it’s just as much about the journey as it is the result. So why not build your own mash tun?
You can build a functional, effective mash tun using basic tools and fairly inexpensive parts. The construction is easy enough that just about anyone can do it. While the cost will vary depending on where you buy your parts and which tools you have on hand, you should be able to build a mash tun for less than $225.
That may be a little more than the cost of buying one, but look at it this way: You can buy a premade bookcase and assemble it at home, or you can build a custom one with your own hands. It may cost more, but you also gain the satisfaction of having made it yourself. So buy one or build one—it just depends on how you like to do things.
Mash Tun Basics
If this will be your first time using one, or if you’re not really clear on why you need one, now is a good time to learn a little bit about the anatomy of mash tuns and how they work. Because they can be made from a few different types of containers, understanding the ins and outs can help you choose the version that will best suit your needs.
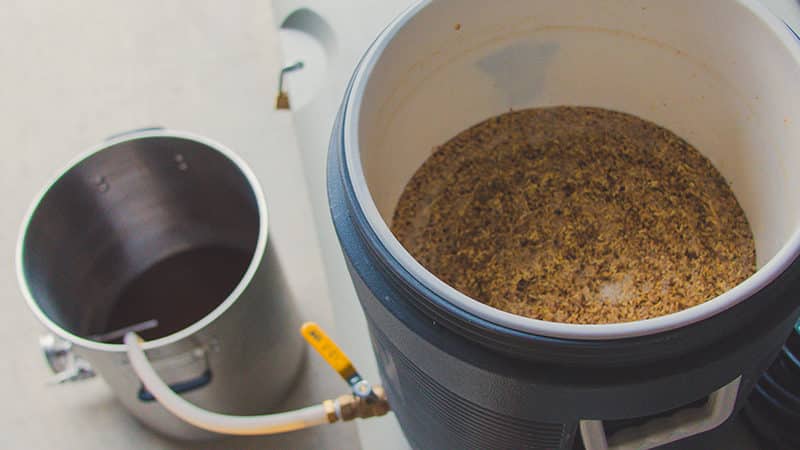
A mash tun is a container that holds hot water and grains during the mashing process. You can build your own mash tun from a round or rectangular plastic cooler or a converted keg.
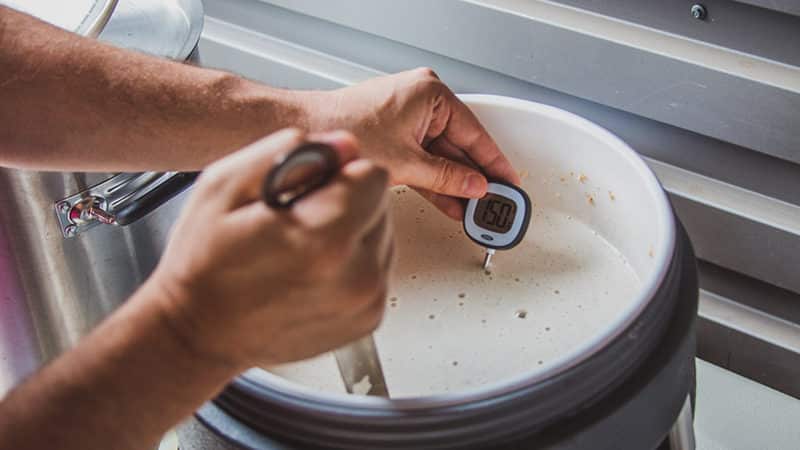
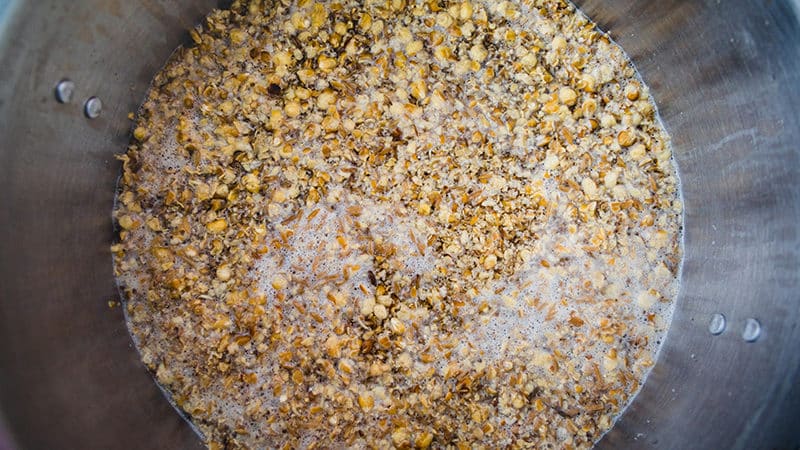
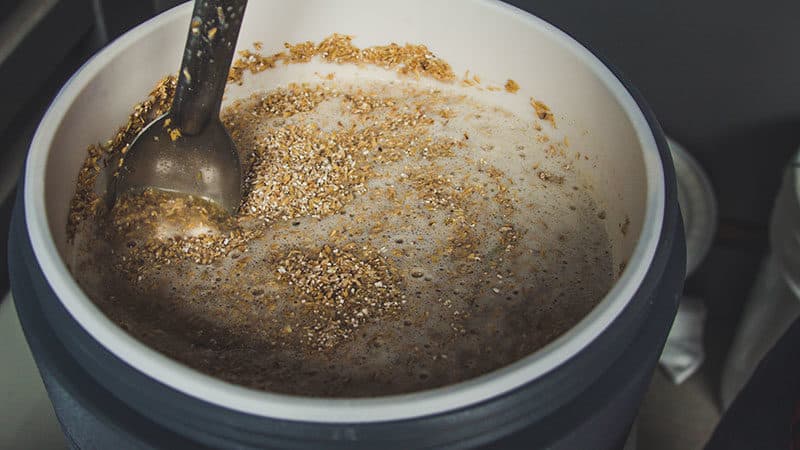
For all-grain brewing, you need to crush your grains before adding them to the mash tun so the hot water can reach all the good stuff inside them. When hot water and grist (the crushed grains) are in the tun, the starches from your grains will convert to sugars for fermentation.
The main purpose of your mash tun is to keep your grist and hot water at an even temperature so the mixture is ready for the next step—sparging. This is why you’ll need to use something insulated, such as a cooler, or add insulation to the container you choose for building your mash tun. If your tun can’t prevent heat loss, it won’t be able to do its job.
Is a Plastic Mash Tun Safe?
You won’t get very far into the Internet of DIY mash tuns without finding someone wondering about the safety of putting very hot water into a plastic cooler. You may even be concerned about this yourself, especially with widespread concern in recent years over plastic leaching potentially hazardous chemicals, such as Bisphenol A (also known as BPA), into food and drinks.
The manufacturers of these types of coolers do not rate them for high temperature liquids, as they’re aimed at keeping drinks cold for long periods. However, the interior is made from food-grade materials, which are not toxic to human beings unless ingested in massive amounts, unlike the PVC some homebrewers use to make their own hop spiders. For those, we highly recommend using stainless steel. But for mash tuns, coolers can work just fine.
Build a Round Cooler Mash Tun
Approximate Cost: $100
Choose either stainless steel or copper for all your plumbing parts so you won’t introduce any contaminants to your mash.
You’ll need:
- 5- or 10-gallon cylindrical beverage cooler
- ½-inch ball valve and 1½-inch-long pipe nipple
- ½-inch coupling
- ½-inch hose barb fitting
- 90-degree street elbow
- ½-inch quick disconnect fitting, also known as a cam lock
- ¾-inch silicone gasket
- large washer
- straight-threaded lock nut
- thread seal tape (plumber’s tape)
- ½-inch silicone tubing
- braided stainless steel supply line
- hose clamp
- socket wrench or screwdriver to adjust hose clamp
- awl
- needle-nose pliers
- wrenches
- hacksaw
- Remove the cooler lid, then find the gasket nut on the back of the spigot and remove it.
- Pull out the spigot.
- Wrap half the pipe nipple with thread seal tape. Be sure it’s covered, but don’t go crazy with the tape.
- Tip: Always apply thread seal tape in a clockwise direction to prevent it from unraveling when you screw a fitting into place.
- Slide the gasket to the center of the pipe nipple.
- Place the washer against the gasket on the untaped side, then screw the lock nut on right behind it.
- Insert the taped end of the pipe nipple through the spigot hole and out the front of the cooler.
- Place the ball valve on the pipe nipple and hand-tighten. Use a wrench to hold the inner lock nut in place, then use a second wrench to fully tighten the ball valve.
- Pour some water into the cooler to check that the assembly doesn’t have any leaks. If it does, tighten the valve a bit more. Don’t forget to empty the cooler before moving on.
- Cut the ends off the stainless steel supply line with the hacksaw.
- Remove the plastic tube from the braided stainless tube. You can use pliers to grab the plastic tube if needed. This supply line is used instead of a false bottom, which would raise your cost quite a bit. It will prevent grains from coming out through your supply line.
- Use the pliers to fold over one end of the stainless braid and crimp it down, effectively sealing off this end.
- Keeping the other end open, turn in the frayed parts so you have a clean edge.
- Install the coupling on the hose bar fitting, then place it inside the cooler and screw the coupling onto the pipe nipple.
- Slide the hose clamp over the open end of the stainless steel braid. Place the supply line on the hose bar, then use the socket wrench to tighten the hose clamp until the braid is secure.
- Wrap thread seal tape around the threads of the male and female quick-disconnect fittings.
- Screw the male (A style) fitting onto your ball valve.
- Stretch one end of the silicone tubing over the male end of the 90-degree elbow.
- Install the female (B style) quick disconnect fitting onto the 90-degree elbow.
- Connect the male and female sides of the cam lock, and you’re ready to mash.
Ready to improve your all-grain brewing process and dial in your system?
This video course covers techniques and processes for water chemistry, yeast health, mashing, fermentation temperature, dry-hopping, zero-oxygen packaging and more!
Click Here to Learn More
Build a Rectangular Cooler Mash Tun
Approximate Cost: $75
The supplies and steps involved here are pretty much the same as for converting a round cooler. It even uses the braided tube to save you time and money. You’ll still want stainless steel or copper for all your plumbing parts for this build as well.
You’ll need:
- 48-quart picnic cooler
- rubber mini-keg bung
- two ¼-inch hose clamps
- ½-inch hose clamp
- ⅜-inch inline nylon valve
- 7⁄16-inch vinyl tubing
- braided stainless steel supply line
- food-grade sealer
- scissors
- socket wrench or screwdriver to adjust hose clamp
- needle-nose pliers
- hacksaw
- Open the cooler and remove the nut on the back of the spigot. Pull the spigot off the cooler.
- Pull the plastic plug out of the mini-keg bung, then place the rubber bung into the opening where you removed the spigot. If necessary, apply food-grade sealer around the bung to prevent leaks.
- Run the vinyl tubing through the keg bung, leaving some hanging outside and some inside the cooler.
- Saw off the ends of your stainless steel supply line, and remove the inner plastic tube. If it’s hard to get hold of, use the pliers.
- Fold one end of the stainless braid, and pinch it shut with the pliers.
- Turn in the frayed steel around the open end to make it neat.
- Slip the ½-inch hose clamp on the open end of the supply line, then fit the line over the end of the vinyl tubing inside the cooler. Tighten the hose clamp to secure the stainless braid to the tubing.
- Place one ¼-inch hose clamp on the vinyl tubing outside the cooler, then place the nylon valve into the tubing. Slide the clamp down and tighten it to keep the valve snug.
- Slip the other ¼-inch hose clamp onto a section of vinyl tubing. Slip the tubing over the other side of the nylon valve and secure with the hose clamp. This will allow you to control the flow of liquid to your brew kettle when mashing is complete.
Build a Converted Keg Mash Tun
Approximate Cost: $225
If you have a bit more advanced brewing (and building) skills, you can convert a keg into a keggle. The term comes from keg and kettle because this conversion makes a combination mash tun/kettle.
You’ll need:
- 15.5-gallon stainless steel keg
- Weldless mash conversion kit
- 12-inch stainless steel or glass lid
- Dremel or other rotary sanding tool
- 6 metal cutting blades and a grinding stone attachment for rotary tool
- nail
- flathead screwdriver
- keg coupler (tap), recommended
- tape measure
- permanent marker
- earplugs
- protective gloves and goggles
- 120 grit sandpaper
- drill
- ¼-inch drill bit
- 1-inch step bit (Note: this must match the hole size required for your conversion kit)
- 3-in-1 oil
- crescent wrench
- vise grip pliers
- hammer
- twine

Warning: Kegs are pressurized. You must relieve the pressure before cutting into the keg or you risk serious injury.
- Attach the keg coupler and open it to release the pressurized air inside. If you don’t have a tap available, you may press a flathead screwdriver into the valve to open it, but you will mostly likely get sprayed with old beer. Just be aware that method can be gross, and more importantly, potentially dangerous.
- Tie a length of twine to one end of the marker, then wrap the other end around the valve on the top of the keg. Adjust the twine length so that the marker tip is six inches from the center of the keg, then tie off the twine.
- Draw a guideline in the top of the keg, keeping the marker fully extended on the twine to ensure a perfect circle.
- Put on the gloves, goggles, and earplugs.
- Cut along the line using the metal cutting blades on the rotary tool. Expect to use several blades during this process as they’ll wear out quickly. Remove the top after cutting.
- Switch to the grinding stone on the rotary tool, and smooth out the cut edges. Use the sandpaper to finish the edges.
- Set the glass lid on the opening you made to ensure it fits properly. If you need to tweak things using the grinding stone, now is the time to do it. When you’re sure it fits, you can set the lid aside. Now you’re ready to drill.
- Measure 3 ¾” from the bottom of the keg and mark a spot using the permanent marker. The hole must be high enough from the bottom so the slope inside doesn’t interfere with your valve. While this distance should work for almost any keg, if you think you need to go higher, do it.
- Use the ¼-inch drill bit to drill a pilot hole in the spot you marked.
- With the step bit on your drill, begin drilling straight into the hole you marked. You’ll want to keep your drill speed about medium. Apply some 3-in-1 oil as needed to help keep the metal well lubricated and cool. Drill until you have a 1-inch hole.
- Use the rotary tool with the grinder attachment and sandpaper to smooth the hole.
- Open the weldless mash conversion kit. Make sure your kit came with threaded parts pre-wrapped with thread seal tape. If it didn’t, wrap the connections now.
- Insert the larger end of the bulkhead through the hole you made at the bottom of the keg.
- Reaching inside the keg, place the gasket and washer, then thread the lock nut onto the back of the bulkhead. Tighten with the channel locks.
- Fill with water to check for leaks. If you see water, use your pliers to tighten the thread lock nut more.
- Replace the compression fitting.
- Twist the screen onto the pick-up tube, then slide black gaskets onto the tube to secure the screen in place.
Congratulations, you just built yourself a keggle!
An alternative way to use a keg as a mash tun involves an almost identical process, except you’d wrap the keg with insulation to make it into a sort of cooler. Because the homebrew crowd loves to tinker and improve, you’ll find lots of minor variations and tweaks other brewers have made to plans just like these to mold their mash tun to their specific needs.
Mash Tun Maintenance
Whichever one you choose to make, you’re going to have to clean your mash tun after using it. Preferably, you’ll get everything out of there after every use. Why? Well, do you really want to put a new batch of mash in there with chunks of old, stinking mash stuck in the false bottom? Didn’t think so.
The great thing is that cleaning your mash tun properly isn’t a complicated process.
How to Clean Your Mash Tun
Because you’ll be boiling what comes out of there, you don’t need to be deeply concerned with sanitizing every nook and cranny of your mash tun. You’ll really just want to ensure no mash is hanging around in your lines, or around the hardware inside your mash tun.
- Rinse the inside of the mash tun with warm water.
- Allow it to fill with clean water, then flush it through the supply line to clean out any lingering debris.
- Use a cloth or your hand to inspect around the stainless braided line and hardware for any lingering grist.
- Rinse out any grist you do find.
- Wipe out any remaining moisture with a towel before putting it away.
Now you know how to build, use, and maintain your very own mash tun. All that’s left is to get to work!
Happy Brewing!