No matter your homebrewing budget or goals, extracting the most usable wort while keeping expenses and time investment low is probably an appealing prospect. Sure, you don’t mind putting money and time into your homebrewing hobby. But you also want to be able to enjoy the finished product as soon and as often as possible, right?
If you’re mashing your own grains to create your homebrew, consider using a batch sparge not only to increase the efficiency of your mash and brewhouse, but to create yet another delicious homebrewed masterpiece. It’s a lot easier than you may think.
Batch Sparge: What is It?
A descendent of a nineteenth-century method known as parti-gyle brewing, batch sparging is a technique used to extract sugars and create wort from the grains used during a mash. Sparging is essentially another word for rinsing.
It’s most commonly associated with all-grain brewing. Extract brewing, which starts with liquid or powdered malt extract, may or may not include other actual grains that require a mash. But most all-grain brewing methods rely on a sparge to squeeze out every bit of usable sugar possible.
Once your grains have been mashed, they’re full of the sugars and other compounds necessary to create a great beer. The water you add to the grains pulls those sugars out, creating the golden pre-beer liquid we call wort.
The challenge that comes with using a batch sparge is the potential for less-than-optimal efficiency because, as the name implies, it’s done in batches. This differs from fly sparging, which uses a steady stream of sparge water to soak the grain bed. For this reason, it’s sometimes called continuous sparging.
Compared to fly sparging, batch sparging takes less time, requires no special equipment, and is a simple solution if you want to make great beer, but don’t want to buy extra gear or lengthen the homebrewing process.
A Tale of Two Efficiencies
As a homebrewer, getting the biggest return for your investment of money, time, and effort is a major priority. Making your brewing process as efficient as possible not only keeps your brewing budget in the black, but helps you make better beer with less waste.
Two of the most important ways to measure your overall brewing efficiency are mash efficiency and brewhouse efficiency.
Mash Efficiency
Grain contains starches that are washed out as sugars during your mash. These sugars are known as potential fermentables, and yeast turn them into alcohol during fermentation.
Mash efficiency is a measurement of the percentage of these fermentables that actually reach the boiling kettle. High mash efficiency is the key to an effective mash and batch sparge.
Your goal is to ensure that as many of those delicious sugars make it to their destination as possible, making it easier to hit the numbers your recipe specifies to make a great-tasting beer.
Brewhouse Efficiency
When you compare potential fermentables in your recipe to the final amount of convertible sugars in your wort across the entire brewing process, you determine your brewhouse efficiency. This helps you make the most of your ingredients when you homebrew.
In general, your target brewhouse efficiency will fall between 65% and 80%. Depending on the method and ingredients, a recipe might have a brewhouse efficiency of 75% for a batch-sparge homebrewer. But that same recipe, using the same ingredients, might have a brewhouse efficiency of 80% or even 85% with a fly sparge.
Large breweries rely on fly sparging because even a modest improvement in efficiency can translate to millions of dollars at the scale they brew.
But as a homebrewer, you can batch sparge to help those sugars reach your boiling kettle, and still get solid brewhouse efficiency from your grains.
Ready to improve your all-grain brewing process and dial in your system?
This video course covers techniques and processes for water chemistry, yeast health, mashing, fermentation temperature, dry-hopping, zero-oxygen packaging and more!
Click Here to Learn More
Batch Sparge Equipment
You don’t need much to get started:
- Mash tun, with completed mash
- Sparge water
- Kettle for brewing
- Heat-resistant pitcher
- Heavy-duty aluminum foil
- Thermometer

How Much Sparge Water Do You Need?
As the poet once said, into every life, some math must fall—and it falls pretty heavily in the land of homebrewing. Before you begin to sparge your mashed grain, you’ll need to make some calculations.
Or, if the mere idea of math makes your brain scream in protest, you can let a calculator do the work for you, and then skip to the next step. We won’t tell.
Calculating Sparge Water Volume
To make sure your batch sparge is as efficient as possible, the runoff volume from your mash and batch sparge should be equal. Runoff volume refers to the amount of water in your mash, less the water absorbed by the grain.
The batch sparge is done in two runoffs—which makes this a double batch sparge—collecting half of your target pre-boil volume each time.
To figure out how much sparge water you’ll need, you’ll use two equations:
R1 + W = 0.5V
and
R1 + W + S1 + S2…+ S(X) = V
Where:
R1 is the initial runoff volume. In this example, we’ll assume each pound of grain absorbs.1 gal. (.38 L) of water.
S is the batch sparge water volume.
V is total boil volume, or the amount of wort needed in your kettle during the boil to produce the beer in your recipe.
W is the volume of the water infusions used for a step mash.
So let’s say your recipe calls for 10 lbs (4.5 kg) of grain with a target volume of pre-boil wort set at 7 gal. (26 L). Your recipe has a mash ratio of 1.25 quarts of water for every pound of grain (2.5 L/kg), so you’d need 12.5 qt. or 3.125 gal. (12 L) of strike water for your ten pounds of grain (1.25 x 10 = 12.5).
Since your grain will absorb .1 gal. of water for every pound of grain, your mash is going to absorb 1 gal. (3.8 L) of water (.1lb./gal x 10 lbs. = 1 lb.)
This leaves you with 2.125 gal. (8 L) of water for your initial runoff volume. You’ll be collecting the wort in two batches, so before you lauter for the first time, you’ll add 1.375 gal. (5.2 L) of water to your mash tun to bring your first runoff volume up to 3.5 gal., or half of our total target pre-boil volume of 7 gal. Plugged into the first equation, we see:
2.125 gal. +1.375 gal. = 3.5 gal.
Plugging the numbers into the second equation gives us:
0 gal. + 3.5 gal. = 3.5 gal.
Since you’re starting with only grains for the second batch sparge, you only need to add 3.5 ga. of water to hit a total of 7 gal., since the grains will not absorb an appreciable amount of additional water.
How to Efficiently Perform a Double Batch Sparge
When your calculations are complete and your equipment is set up, it’s time to batch sparge.
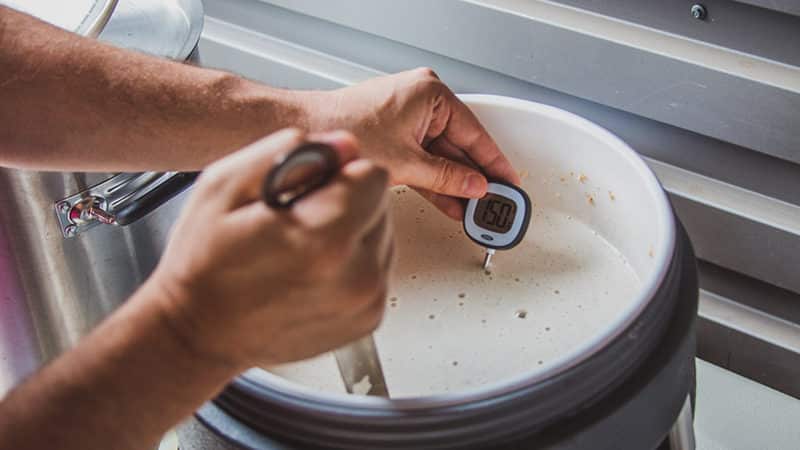
- Make sure your mash is at mashout temperature: 170°F (76.7°C).
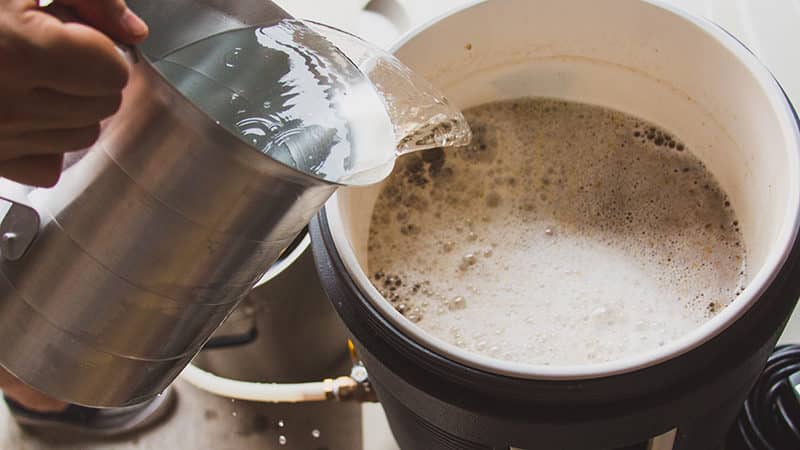
- Add the water needed to create half of your target pre-boil volume, based on the calculations you did before mashing. Using the values in the example, you’d add 2.125 gal. of water. You can heat the water to bring your mash up to mashout temperature if necessary.
- Stir your mash and allow it to rest for 10 minutes.
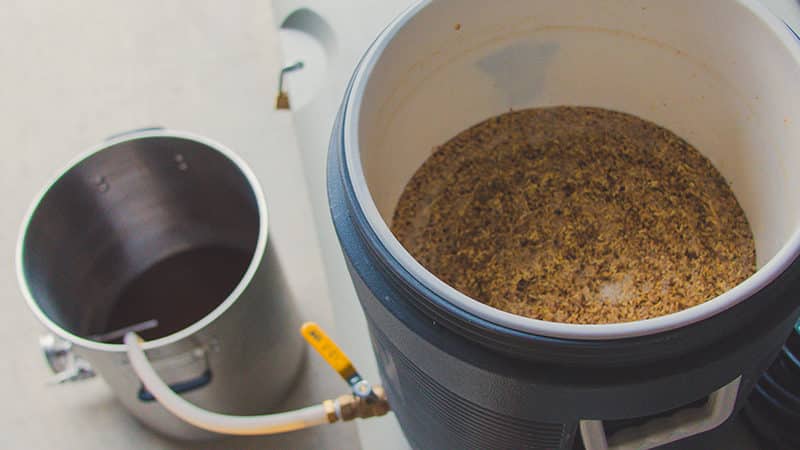
- With a sterilized fork, poke holes in a sheet of heavy-duty aluminum foil large enough to cover the grain bed. Ensure the holes are evenly distributed across the entire sheet.
- Slowly open the valve on your tun and draw off enough wort to fill the pitcher.
- Recirculate the wort, carefully pouring the liquid over the sheet of aluminum foil to allow it to flow in without disrupting your grain bed. This process is also known as the Vorlauf step. (If you don’t have, or simply prefer not to use aluminum foil, you can carefully and slowly pour the wort back in to avoid disturbing the grain bed.)
- Drain and recirculate into the pitcher until the runoff is clear.
- When the wort is clear, direct the runoff to your kettle. Slowly return the liquid in the pitcher to your mash tun.
- Remove the aluminum foil and discard.
- Completely drain the mash tun into the kettle. Start slowly and gradually open the valve all the way.
- While your first runoff is lautering into the kettle, heat your batch sparge water. To get the second half of your 7 gal. pre-boil volume, you’ll be adding 3.5 gal. (13 L) to the grain bed in your mash tun. Heat the water to around 185 °F (85 °C). This will help maintain the grain bed temperature of 168°F–170°F (74°C–76.7°C).
- Once the first runoff is complete, perform your second batch sparge. Add the water, stir the grain thoroughly, close the mash tun, and let it rest for a few minutes.
- Using a new piece of aluminum foil, repeat the Vorlauf process with your pitcher until the wort is clear once more.
- Drain your remaining wort into the kettle and prepare for your boil.
By carefully and slowly recirculating your wort, keeping your grain bed at mashout temperature, and allowing for a rest with a thorough stirring to get as many sugars as possible into solution before lautering, you can make sure your brew has the highest efficiency possible.
Fire Up That Brewhouse Efficiency Even More
While solid calculations and careful sparging definitely improve your brewhouse efficiency, you can goose it even higher if you:
Reduce Wort Loss
Every drop of wort you lose to dead space, leaks, or spills means less available sugar for your yeast to convert into alcohol during fermentation.
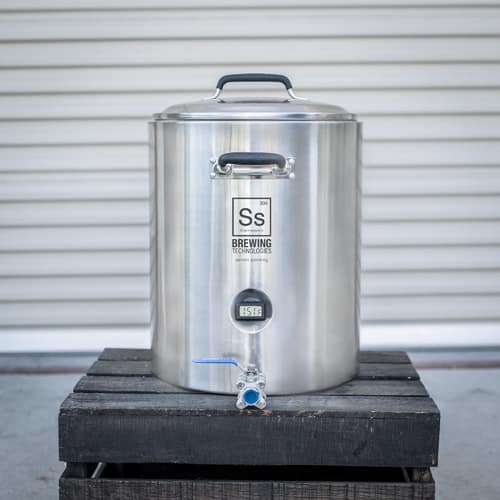
Repair or replace leaky equipment, and find ways to reduce potential loss by choosing a mash tun and brew kettle that can handle your recipes with room to spare.
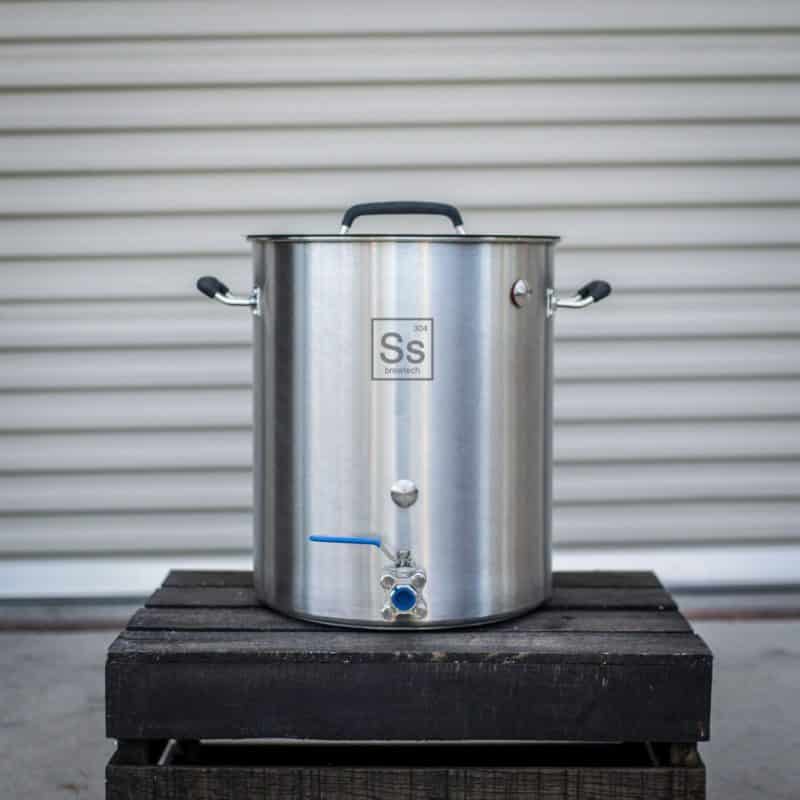
These are a premium lineup of feature-rich all Stainless Steel Brew Kettles, designed to keep you brewing for a lifetime.
Avoid Improperly Crushed Grains
Your local miller is no doubt on the ball when it comes to crushing grains for beer. But if you’re crushing malts with your own mill at home, it’s all too easy to under- or overdo things. This is especially true if you’re new to all-grain brewing or crushing your own grains.
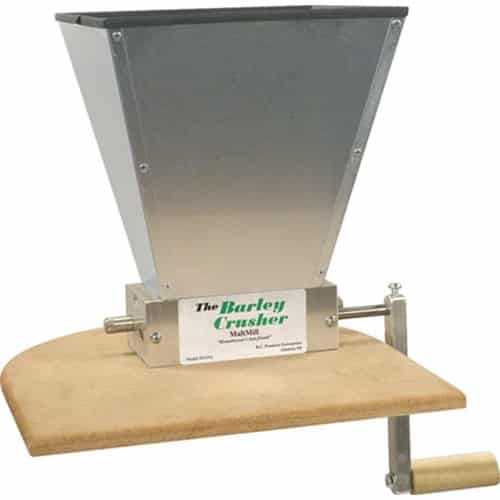
A trusty grain mill for new and advanced brewers. Go old school and use the built-in hand-crank to crush your malt. Or hook it up to a power drill. I recommended getting the bigger hopper to hold more grain.
Over-crushed malts can create a powdery base that has too much flour and not enough grist, and turns into glue when you mash it. Think adding water to that “instant snow” powder.
Under-crushed malts, on the other hand, can hurt extract efficiency by not releasing the sugars that will turn into alcohol during fermentation.
Note: If you’d prefer to pulverize your grains but don’t want a stuck sparge, you can use a large filter bag. This would be the same kind you’d use for the brew in a bag process.
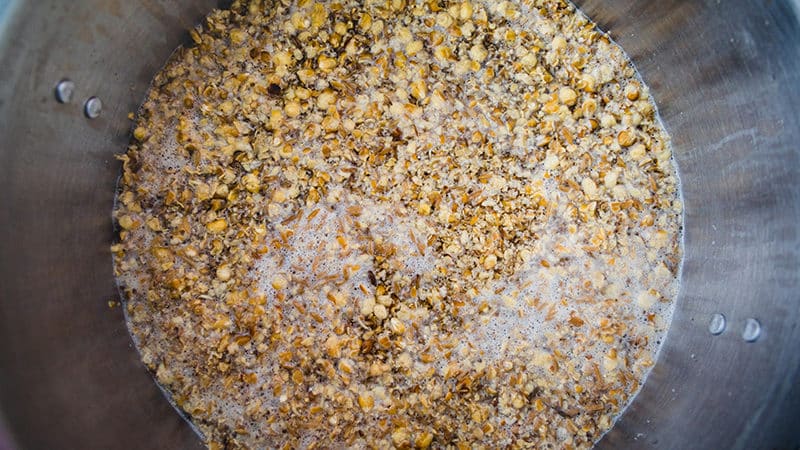
A “perfect” milling produces crushed grain kernels but intact husks. The husks help create bulk and space in the grain bed during mashing, allowing for water flow and providing built-in filtration.
Ask your miller to adjust their mill for your preferred grain consistency and target efficiency, as they often default to a crush size that allows for only 60% to 75% efficiency.
If you’re crushing your own, consider buying a roller mill to get that perfect grind and produce the best results. A useful rule of thumb when setting up your grain roller is to set the mill rollers at or near .038 inches (.965 mm) apart, or just a bit thicker than a standard credit card.

Level up your grain milling with this super-powerful, hands-free grain mill from Ss Brewtech.
Prevent a Stuck Batch Sparge
Other than The Blob, you probably don’t think of gelatin as menacing. But when the grain bed in your mash undergoes chemical changes due to temperature, improperly crushed grains, or simple user error (hey, it happens to all of us), you can find yourself dealing with locked-up, goopy grains.
This hot mess has a terrifying zero percent extract efficiency, because you can’t get any wort to flow out of your mash tun.
The best way to tackle the sticky issue of a stuck batch sparge is to prevent it from happening in the first place. You can keep things flowing with a few simple preventive measures.
Maintain High Temperatures
Grains begin to gelatinize at any temperature below 145°F (62.8°C), locking up your grain bed. You can prevent this by keeping your mash tun insulated with a heavy blanket or insulating mats.
Heating your sparge water to around 185°F (85° C) before pouring also keeps your grain bed at mashout temperature so your wort flows smooth and steady.

Hands-down the best digital thermometer for brewing. Period. Worth the price 100 times over. Plus, you can use it for cooking 👍
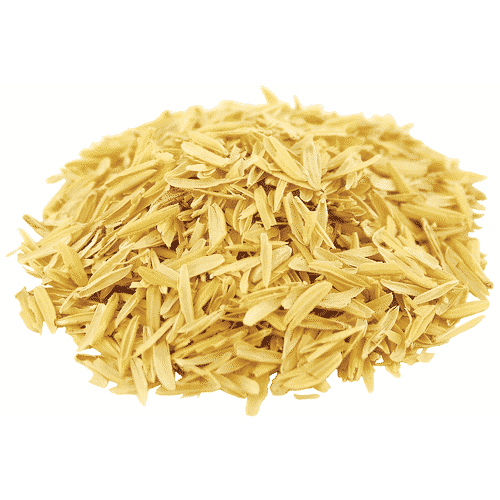
Use Rice Hulls to Enhance Flow
The discarded husks from grains of rice can be added at no more than 5% of your total grain bill to open up the grain bed. Rice hulls will encourage optimal flow and extraction efficiency.
Rice hulls don’t affect the flavor profile of the beer, so adding the recommended ½ lb. (.23 kg) to a 5-gal. (18.93 L) batch of beer is a win-win.
Slow Your Lauter
When you’re ready to lauter, be sure you start out slowly, since high rates of wort flow can pull too much liquid and create a “vacuum lock” in your grain bed, preventing any flow.
Begin with a modest flow and gradually open the valve all the way to ensure you get every drop of wort needed to brew your beer as intended.
Who Says You Don’t Need No Stinkin’ Batches?
Getting optimal efficiency from your batch sparge doesn’t take a miracle. It does take careful attention to your recipe. Properly crushed grains help, too.
Add some precise calculations while carefully avoiding the dreaded stuck sparge, and you’re on your way to optimal mash and brewhouse efficiency from your all-grain brewing.
Happy Brewing!