As homebrewers, we tend to focus a lot of time and effort on heat. Is our boil on target? Are we hitting our mash temps? Why, exactly, did we decide to brew a ten-gallon batch in the middle of a Phoenix parking lot in mid-August? But when it comes to your wort, chilling out is just as important as the boil.
Cooling your wort as efficiently as possible before you pitch your yeast is essential to successful fermentation. In the past, you were stuck with slow, messy ice baths or dilution. Today, you can get the best of the worts (so to speak), with a wort chiller. No matter what kind of beer you’re brewing or the budget you’re working with, you can find a reliable option that’ll get you to pitching temps fast.
Wort Chillers Protect Flavor and Reduce Haze
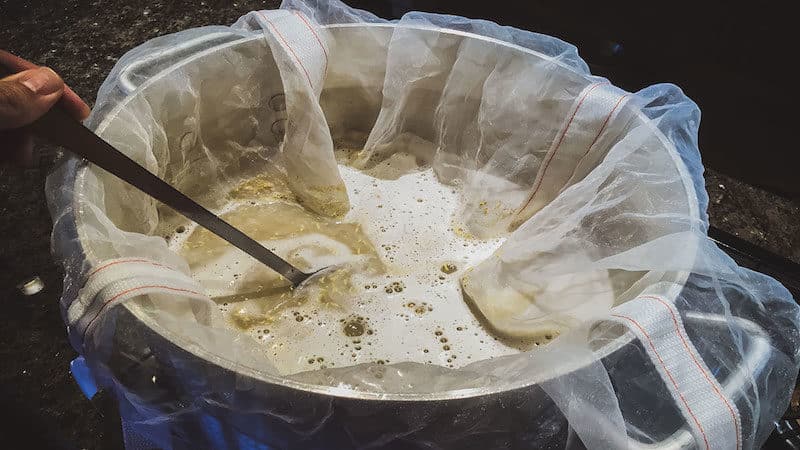
When you’re brewing small batches, it’s easy enough to cool your wort by diluting the hot wort with cold water or using an ice bath. But when you’re trying to bring a full-sized batch of 5 gallons (19 L) or more down to pitching temperatures, those methods can take hours.
The faster you can chill your wort, the better. As wort’s temperature falls below 140°F (60°C), its susceptibility to invasion by wild yeasts and bacteria increases dramatically. Get your wort down to pitching temperatures as quickly as you can, and minimize the time your wort spends between 80°F (26°C) and 140°F (60°C).
Spending a lot of time in this “lukewarm zone” is never a good idea because it invites invasion by microscopic critters. Also, allowing your wort to linger in this range increases the production of dimethyl sulfide (DMS), a chemical compound best known for giving the beer a distinctively disgusting canned-corn taste. Blech.
Zooming through to pitching temperatures is your best bet. The optimal pitching range for ale yeasts is 60°F to 70°F (15°C to 21°C), and the optimal range for lager yeasts is 40°F to 50°F (4°C to 10°C). To get your wort to these ranges safely and quickly, a wort chiller is the way to go.
Rapidly cooling wort to optimal pitching temperature also improves the cold break or the precipitation of proteins and tannins from your wort during cooling. You definitely want these materials to condense and fall out of the solution before you ferment because leaving them in the wort can cause chill haze, leaving you with cloudy beer.
Chilling your wort quickly can also help get it down to the right temperature before using a wort aerator to introduce oxygen to help the yeast reproduce, thereby producing a better beer.
The Science of Wort Chillers
You have three options when shopping for a wort chiller: immersion chillers, counterflow chillers (or CFC) and plate chillers. All three operate on the principle of heat exchange. They use both convection, or fluid heat transfer, and conduction, or energy transfer from direct contact, to cool your wort.
Wort chillers use one substance—water—to absorb and carry away heat energy from another substance, in this case, your wort.
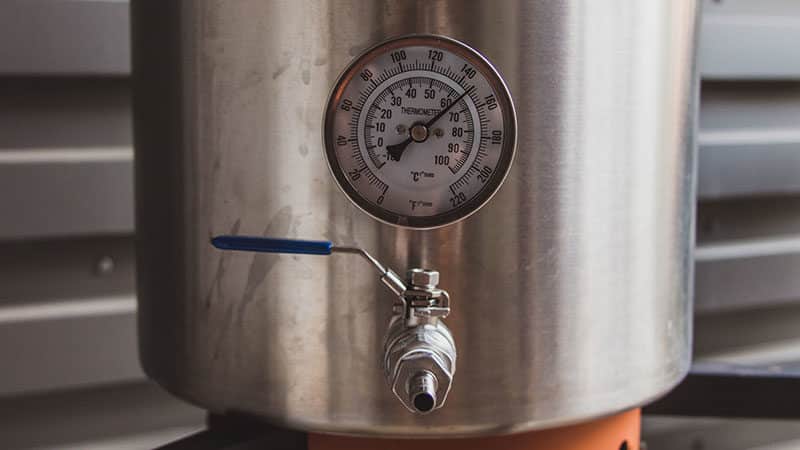
The wort chiller has no innate cooling power of its own. It can only get your wort as cold as the water you’re using. Also, because the difference in energy decreases as your wort approaches the temperature of the water, the cooling process will slow over time. So if you’re trying to get your wort down to 70°F (21°C) and are using 65°F (18°C) water, those last few degrees can really drag out.
Get your water as cold as you can, and you’ll enjoy much faster cooling. If you live in a warm climate, you may need to pre-chill your water in the fridge or freezer first to get down to pitching temperatures.
But unless you’re in the Sahara or brewing in the middle of a Kool & the Gang classic, using tepid water and a wort chiller will still save you time and help you get your wort down to 80°F (26°C) or below pretty easily.
Note: If you can’t manage to get your wort temperature below 80°F (26°C) with the coldest water you have, try pumping ice water through the wort chiller to improve performance.
Ready to improve your all-grain brewing process and dial in your system?
This video course covers techniques and processes for water chemistry, yeast health, mashing, fermentation temperature, dry-hopping, zero-oxygen packaging and more!
Click Here to Learn More
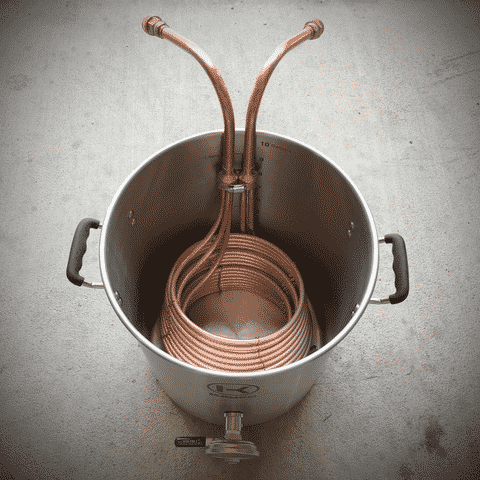
Immersion Chillers
Resembling a silly straw with a dash of Dr. Seuss, immersion chillers consist of a length of coiled tubing that attaches to a faucet. You drop the apparatus directly into the hot wort. Cold water flows through the tubing, cooling your wort.
The most basic member of the wort chiller family, immersion chillers are an affordable and easy-to-use upgrade from ice baths.
Immersion wort chillers don’t require a pump to feed them, or hoses and clamps. One simple adapter connects your immersion chiller right to your kitchen faucet, and you’re ready to go.
Cleanup is easy too. You only need to wash the outside. Plus, sanitizing your immersion chiller is as simple as adding it to your wort during the last 15 minutes of your boil.
On the downside, immersion chillers use a lot of water, and they aren’t as fast or efficient as other wort chillers. And because you place it directly into your open kettle, you’ll also need to keep your wort loosely covered during chilling. This will help prevent contaminants from finding their way into it.
It’s All About the Coil
The longer the coil on your immersion chiller, the faster it works. Choose a size that puts as much of the coil as possible into direct contact with your wort. Typically, a 25-foot (7.6 m) coil is adequate for a 5-gallon (19 L) kettle.
You can find immersion wort chillers in both stainless steel and copper. Copper has slightly better conductivity, but stainless steel is generally less expensive and easier to clean since it doesn’t develop a patina.
The most common diameters for immersion wort chiller coils are ⅜ in. (1 cm) and ½ in. (1.3 cm). A larger diameter improves efficiency but also increases the cost.
Immersion Chillers We Love
If you’re new to brewing or looking for an entry-level replacement for ice baths, immersion chillers can get the job done without breaking the bank.
MoreBeer! Immersion Wort Chiller
This innovative wort chiller from MoreBeer! moves the chilling coils to the top where the majority of the heat is, speeding up the heat exchange. You also won’t need to stir during chilling, thereby reducing the chance of contamination as it allows your trub and spent hops to settle at the bottom of the kettle.
The copper tubes are soldered together at the top of the chiller, out of the wort, helping the unit to retain its shape. No need for hose clamps with this one. The connection feeds are oriented downward to keep any drips out of the kettle and your beer.

NY Brew Supply Super Efficient Copper Wort Chiller
A plus-sized contender, this wort chiller is made of 50 feet (15.2 m) of ⅜-inch (1 cm) copper tubing. And the included high-quality brass hose adaptor and stainless steel hose clamps let you adjust your coil height and spacing to fit your kettle.
You also get 12 feet (3.7 m) of vinyl tubing, shipped as single piece. This makes it easy to customize your input and output hoses for maximum performance.

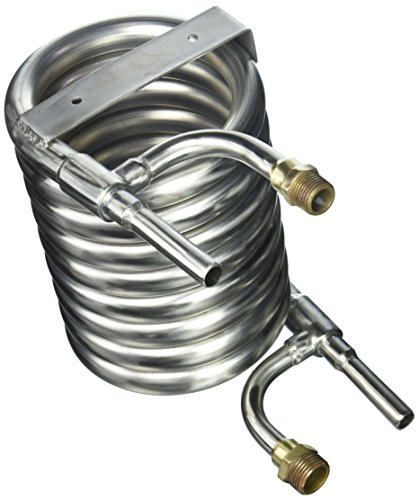
Northern Brewer Silver Serpent
Are you brewing big batches of all-grain homebrew using? Cool 10 to 15 gallons (38–57 L) batches with this hefty immersion wort chiller. Made of stainless steel tubing and uses proprietary barbed fittings for a tight grip. If you’ve got a utility sink in your garage, backyard, or basement, you can use the garden hose attachment to get chilling fast.
The stainless steel makes for easy cleaning, and the large size makes it handy to have around if a standard batch isn’t your bag.
The Hydra
You never thought you’d hear yourself utter the words “Hail Hydra!” but after you try this immersion chiller from JaDeD Brewing, you’ll be ready to join the ranks of homebrewers who have fallen under its spell. Why? Because this thing will cool your wort down in about five minutes with stirring.
In fact, stirring the wort counterclockwise to the cold water flow will improve chilling time. The only problem with this chiller is that it’s massive! You may have to buy a shorter thermometer for your brew kettle so the chiller will fit. But that’s a small price to pay for super-fast chilling.
Counterflow Chillers
Don’t worry, you don’t need to keep this particular breed of wort chiller on your kitchen counter. The counter in counterflow chiller refers to the way wort and water flow in opposite directions during use.
Counterflow chillers work in much the same way as immersion chillers, but use two sets of tubing, housed one inside the other, instead of just one.The interior tubing is usually made of copper, and circulates the hot wort. The outer housing tube circulates cold water. The wort moves in one direction, and the water in the other, improving convection cooling.
Unlike immersion chillers, counterflow chillers sit outside the kettle, making them compatible with just about any size of brew kettle or pot. You’ll just need a way to draw or pull the wort out of the kettle and into the chiller hose intake. If your brew kettle has a ball valve, for example, you’re ready to go.
Some models let you place the chiller below the kettle and feed the wort into the coils via gravity, but you can also use a pump for more convenience and potentially less mess.
Counterflow chillers cool your wort more quickly than immersion chillers. They also use less water in the process, and the enclosed design means a lower risk of contamination. You’ll also have to handle two sets of connectors: one for the wort, and one for the water.
Clogging is also a potential problem. Since the wort travels through the interior of the coil, using a hop screen can help prevent clogs, as can spinning your wort.
Cleaning is a bit trickier with counterflow chillers than immersion chillers, too. You’ll definitely want to give your counterflow chiller a good cleaning with very hot, nearly boiling water before and after each use. And pay special attention to the brewing sanitizer you use. Some formulas might corrode the metal.
Finally, counterflow chillers come with a slightly higher price tag, so if thrift is your biggest priority, you might want to stick with an immersion chiller.

Our recommended NO-RINSE brewing sanitizer (acid-based) of choice with easy measurement built in. Plus, the foaming action helps sanitize all the nooks and crannies. Don't fear the foam!
2 Super-Cool Counterflow Wort Chillers
They cost a bit more and require more TLC than immersion versions, but these wort chillers get the job done on the double.
NY Brew Supply Deluxe Counterflow Wort Chiller
A hose is a hose is a hose, as the poet once said. But maybe not. This baby uses a high-temperature, ¾-inch (1.9 cm) outer hose. Inside, it has 25 feet (7.6 m) of ½-inch (1.3 cm) or ⅜-inch (1 cm) copper tubing to provide efficient heat transfer and rapid cooling.
Heavy duty brass fittings attach to your cold water tap with a garden hose connector. They’re adjustable, so you can tweak your setup without worrying about snapping a fitting.
Kegco’s Stainless Steel Counterflow Chiller
Yo dawg—Kegco heard you liked steel, so they put some steel on your steel so you could steel while you steel! Made of gleaming stainless steel inside and out.
The interior tube is made of 12 feet (3.7 m) of ⅝-inch (1.6 cm) stainless steel, with a matching exterior tube made of ⅞-inch (2.2 cm) stainless steel. Built like a tank, this counterflow chiller is one of the most durable, heavy-duty wort chillers on the market.
You’ll also get ½-inch (1.3 cm) tubing and hose clamps to connect your wort feeds, and ¾-inch (1.9 cm) male and female hose connectors for your water feeds.
The Layered Look: Plate Chillers
Replacing coils with stacks of metal plates, the aptly named plate chiller is the fastest way to cool your wort. The plates separate water and wort. Cold water flows in one direction and hot wort in the other, and the wide, flat plates allow for efficient heat exchange.
You’ll pay more for all this convenience and power. But because plate chillers are compact, cool wort rapidly, and use the least amount of water, you’ll find your improved efficiency may eventually help your plate chiller pay for itself.
One potential downside is the possibility of hops and proteins clogging the small spaces between the plates, which can be difficult to clean. Strain your hops or use a hop spider to keep your wort clear before it hits the chiller. As with counterflow chillers, whirlpooling and a hop screen can help, too.
Also, because of the way the wort flows through the plate chillers, the cold break happens inside the wort chiller itself. This means the proteins and tannins that would otherwise settle out end up in your fermenter. So if you’re concerned about excess break, you might want to consider less powerful options.
Top-Shelf Plate Chillers
Big cooling power comes at a price, but plate chillers also offer an efficiency boost that’s hard to beat.
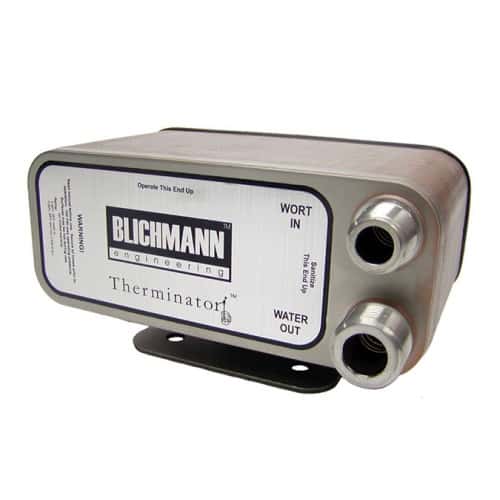
Blichmann Therminator
Do you like to brew strong lagers? Then the Therminator will have your wort deadpanning, “AH’LL BE BOCK.”
OK, not really. Actually, this top-of-the-line plate chiller, boasting 40 chill plates and all-stainless construction, is similar to the ones used by commercial brewers. The Therminator chills 10 gallons (38 L) of wort to 68°F (20°C) in just 5 minutes, using 58°F (14°C) cooling water at 5 gallons per minute (gpm).
The ½-inch (1.3 cm) MPT wort fittings will work with most common hose connectors and make the Therminator easy to sanitize. And with ¾-inch (1.9 cm) MPT garden hose thread connections for water, there’s no need to buy extra adapters. You’ll be ready to pitch before you can say, “Are you Sarah Connor?”
Duda 40-Plate Wort Chiller
Duda Energy, which is also the name of our Rush cover band, offers this 40-plate wort chiller made of food-grade stainless steel. It has garden hose fittings for the water side, and ½-inch (1.3 cm) male NPT fittings for the wort side.
This model is all business. It’s ideal for 10- to 20-gallon (38 to 76 L) batches of wort.
You’re Ready to Chill … ’til the Next Episode
Don’t let your beer languish in a lukewarm limbo. Leave ice baths behind and step up your homebrewing game with an immersion chiller, or go big out of the gate with a counterflow or plate model.
No matter which type of wort chiller you choose, adding one to your homebrewing toolkit will save you time and effort. You’ll get to pitching faster, and help protect protect your wort against funky flavors and bacterial invaders.
Happy Brewing!