The path to homebrewing success begins by starting small and dreaming big. And whether you’re new to homebrewing and looking for an easy, inexpensive way to get started, or a seasoned homebrewer who wants to test a recipe before wasting a lot of time and ingredients, small batch brewing is the solution.
The term small batch refers to any batch less than five gallons in volume. With the right supplies, a little effort, and some patience, you can brew a simple, one-gallon batch of beer that’ll produce a six-pack of 12-ounce bottles.
Extract Brewing and All-Grain Brewing
As with larger batches, small batch brewing relies on one of two potential methods: all-grain brewing or extract brewing.
All-grain brewing takes a bit longer than extract brewing, since you’ll be extracting the wort—the golden liquid that’s transformed into beer by fermentation with yeast—from your grains yourself.
But it also gives you a little more insight into the entire brewing process and might inspire you to try more advanced homebrew techniques such as crushing malts at home.
Small Batch Brewing Supplies
The art of crafting beer requires patience, time, and the right equipment. Sadly, there’s no easy way to gain more patience, but trust us—your new beer will be worth the wait!
Time is easy to account for. Plan on:
- 3 hours on brewing day
- 2 weeks for fermentation
- 2 weeks for bottle conditioning, or carbonation
- Total time: 4 weeks. Not bad for a month’s work!
The equipment for small batch brewing is fairly straightforward as well:
- Brewing sanitizer
- 15-quart (14.19 litre) or larger kettle
- Large—at least 24 inches (60.96 cm)—mesh filter bag for mashing grain
- Digital thermometer, (a meat thermometer will work)
- Brewer’s gloves
- Slotted spoon or mash stirrer
- Small digital kitchen scale
- Food-grade bucket for sanitizing
- 2-gallon (7.57-litre) primary fermentation bucket
- One-gallon (3.78-litre) glass carboy for secondary fermentation, equipped with a rubber stopper with a small hole in it
- 3-piece airlock
- Hydrometer for measuring the amount of alcohol in your beer
- Mini auto-siphon
- Food-grade vinyl tubing
- Bottle filler
- Carbonation conditioning sugar tablets (also called priming sugar tablets)
- 12-ounce (354-mililiter) beer bottles
- Unpressed beer bottle caps
- Bottle capper
Ready to improve your all-grain brewing process and dial in your system?
This video course covers techniques and processes for water chemistry, yeast health, mashing, fermentation temperature, dry-hopping, zero-oxygen packaging and more!
Click Here to Learn More
Small Batch Homebrew Pale Ale Recipe
A successful beer isn’t made with time and gear alone, of course. You also need a tasty recipe. You can start your homebrew adventure with a simple one-malt, one-hop recipe and produce a delicious pale ale.
You’ll need:
- One of the following:
- 2 pounds (.91 kg) of crushed pale malt
- 1.2 pounds (.54 kg) of light dry malt extract
- 1.5 pounds (.68 kg) of liquid pale malt extract
- 1 ounce (28.35 g) of Cascade hop pellets
- 1 packet of Safale US-05 brewer’s yeast
- Water (either tap or filtered spring water)
Note: Water makes up about 90% of beer, so it’s important to use good, filtered water. You can absolutely use tap water, but you’ll get better results with two gallons of filtered spring water from your local grocery store.
Avoid using distilled water. It might seem like a good idea since it doesn’t contain any contaminants, but it also lacks minerals essential to fermentation and can alter the taste of your beer.
Once you have your recipe, your ingredients, and your equipment, it’s time to start brewing!
Note: If you’re brewing with malt extract, you can skip ahead to Small Batch Brewing with Malt Extract.
Mashing The Grain
You can make extracting the wort from your grains easy by using the brew in a bag method.
Prepare Your Mash
In a your kettle, heat 7 quarts (6.62 litres) of water to 170°F (76.6°C). This is all the water you’ll need for the entire brew. It will boil down to one gallon (3.78 litres) over the course of the brew.
Add your mesh filter bag to the hot water. Slowly add the crushed pale malt to the bag while stirring with your slotted spoon or mash stirrer. You can avoid “dough balls” in your malt by adding the malt slowly and stirring gently.
Rest Your Mash
After you add the malt, cover the kettle and let it sit for one hour. Adding the malt will bring the water temperature down to around 150°F (65.5°C). Covering it should keep the water at that temperature for the full hour, but you can also wrap the covered kettle in a towel or a blanket for extra insulation.
As the mash rests, the hot water will help convert all the starches in the malt to sugar, and release it into the liquid. When this magical process is complete, you can call the liquid wort. Of course, you can call it whatever you like—we won’t tell—but your friends might give you some odd looks if you say your beer was made with “Wondrous Barley Squeezins’.”
Extract Your Wort
Wearing brewer’s gloves for safety, pull out the bag of grain and squeeze it to transfer as much wort as possible into your kettle. The spent grain makes excellent compost.
Small Batch Brewing with Malt Extract
Heat 7 quarts of water in your kettle. Before it reaches a boil, add the malt extract and stir thoroughly, making sure all the malt extract is dissolved.
Important: Do not add the malt if the water is boiling because your kettle could boil over, creating a very sticky, very unpleasant mess that you’ll have to clean up before you can start over with a new batch.
Boiling The Wort and Adding Hops
With the lid off the kettle, bring the wort to a boil. Keep an eye on your wort, because it can easily boil over as it heats. If it starts to rise quickly, lower the heat or remove the kettle from the heat until things calm down a bit. You’ll need to boil for exactly one hour.
For this recipe, you’ll be adding hops at three different times during the one-hour boil. To begin, divide the ounce of cascade hops into three 0.33-ounce (9.5-gram) doses.
Once your wort is boiling:
- 60 minutes left in the boil: Add the first dose of hops. These hops will stay in the wort for the entire boil and will give your beer a bitter taste to balance the sweet wort.
- 30 minutes left in the boil: Add the second dose of hops. This will develop some additional bitter and hop flavors in your finished beer.
- 15 minutes left in the boil: Add the final dose of hops to give your beer a crisp and refreshing hop aroma.
Cooling The Wort
After an hour of boiling, You can cool your wort quickly by submerging the kettle—with the lid on—in an ice water bath in your kitchen sink.
Simply plug the sink with a towel or stopper, fill it with cold water, and add a bunch of ice from the freezer. You can also use bagged iced from the store if that’s easier.
To help accelerate cooling, gently move your kettle around in the ice bath in slow circles. Take temperature readings with your digital thermometer, and continue chilling until the wort reaches 70°F (21.1°C)
You can also make things a little easier on yourself by investing in a wort chiller for this step, but because this is small batch brewing, you can certainly cool your wort successfully in your sink without the extra equipment or expense.
Sanitizing Your Workspace and Equipment
We really can’t overemphasize the importance of keeping your brewing area and gear clean and sanitized. Bateria and other contaminants love beer even more than you do, and they can’t wait to slip in wherever they can.
Plus, by keeping things clean and sanitized, you won’t run the risk of wasting all your time, effort, and ingredients with a batch of funky, skunky beer.
While the wort is cooling down, start sanitizing your equipment. Fill your food-grade bucket with water and then, following the directions on the package, add the correct amount of brewing sanitizer.
Soak everything that will touch the beer in the brewing sanitizer solution for a minimum of five minutes. This includes:
- Mini auto siphon
- Food-grade vinyl tubing
- Primary fermentation bucket and lid
- 3-piece airlock
Be sure to wash your hands thoroughly as well. If anything’s going to introduce bacteria into your brew, it’ll be those likely suspects.
Aerating Your Wort and Pitching The Yeast
Using your sanitized mini auto-siphon and food-grade vinyl tubing, transfer the cooled wort into your primary fermentation bucket.
Note: All the hops will have fallen to the bottom of the kettle during the boil. You’ll want to avoid getting this layer of boiled hops into the primary fermenter. Siphon carefully to make sure you leave the hops at the bottom of the kettle.
Once your cooled wort is transferred to the fermentation bucket, it’s time to aerate the wort. Tightly snap the lid into place, cover the hole on the top with a sanitized piece of aluminum foil, and shake well.
Why are you shaking your wort like James Bond’s bartender? Because you’re adding air, and therefore oxygen, into the wort. This will help keep your yeast happy and healthy during fermentation.
Shake your wort for five minutes or so. When you’re finished, pitch your yeast—meaning, add it to the wort—using about 1/4 of the package of the dried US-05 ale yeast. Don’t worry about science-lab precision here—you can eyeball it.
It’s ok if you add more than a 1/4 of the packet, but make sure you don’t add the whole thing. You can save the remainder for another batch—a single packet of yeast is good for about 5 gallons of wort.
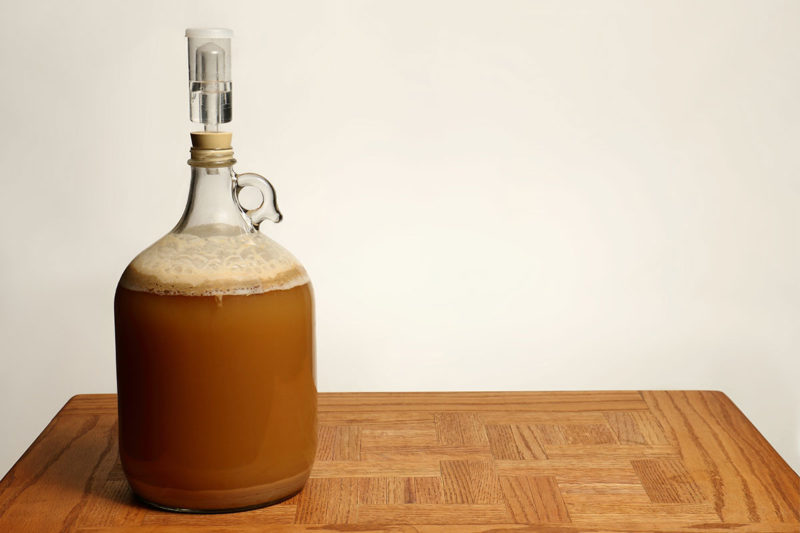
Primary Fermentation (One Week)
You’ve aerated and pitched the yeast. Now add the airlock to the primary fermentation bucket. We recommend filling the airlock to the line with some of the sanitation solution to keep things as sanitary as possible.
Once you’ve installed the airlock, store the fermenter in a dark, cool place for one full week.
In about 12 hours, you should see bubbles begin to form in the airlock, which is a very good thing. These tiny bubbles are a sign the yeast is eating the sugar in the wort and converting it to alcohol and CO2.
Transfer to Secondary Fermentation Vessel (One Week)
After a week, you can transfer your beer-in-progress from the primary fermentation bucket to your secondary glass carboy fermenter.
Before you transfer, remember to sanitize your transfer equipment. Fill your bucket with water, add the sanitizing solution as directed, and soak the equipment for at least five minutes.
You’ll find a layer of trub—yeast and other particles that have settled out of your brew—at the bottom of the bucket. Since you want a clear and delicious beer, the trub must be left behind while your brew moves into its new home in the carboy.
Moving it to a clean and sanitized fermenter also helps slow fermentation and allows your beer’s flavor, feel, and finish to develop. Add the sanitized rubber stopper and airlock, and then store your secondary fermenter in a cool, dark place.
NOTE: You won’t see any bubbles during this week. If you’re an experienced brewer and want to add some extra ingredients at this stage—for example, if you’re dry hopping your brew—now’s the time.
Tread carefully, though, as adding anything to your beer at this stage can also introduce oxygen, which is a welcome addition during aeration but can ruin the flavor of your beer when it sneaks in during fermentation.
Bottling Your Beer For Carbonation (Two Weeks)
Now that your beer has spent two weeks fermenting, you’re ready to bottle it and start the carbonation process.
During this period, you bottle the beer and add priming sugar before sealing the bottles. The remaining yeast in your beer will eat the sugar and release CO2, carbonating your brew.
You can add priming sugar to your beer by calculating the necessary amount of sugar for the whole batch, making a sugar solution, and adding it to your wort before bottling. This is the most precise method and allows you to explore a variety of sugars, from good ol’ table sugar to more exotic sweeteners such as birch syrup or honey.
It does take some math and tweaking to get it just right, however, so if you’re just starting out—or don’t want to bother with a return to algebra class—you can use priming sugar tablets. They’ll allow you to put the same amount of sugar into each bottle and makes it easier to avoid the risk of “beer bombs”, or bottles that explode during conditioning due to too much sugar.
Before you can bottle, break out your old friend sanitizer once again.
Start by sanitizing the following equipment for a minimum of five minutes:
- Mini auto-siphon
- Food-grade vinyl tubing
- Beer bottles
- Beer caps
- Bottle filler wand
When everything is sanitized, attach one end of the tubing to the auto-siphon, and the other end to the bottle filler. Place the auto-siphon in the beer and start it up. The bottle filler will keep your beer from flowing until you’re ready to fill.
Lay a deep baking sheet on the kitchen floor and place your open, sanitized bottles on it to catch any spilled beer while you’re filling. Place the correct number of conditioning tablets into each bottle, following the directions on the package. This will probably be between 3 and 5 tablets per bottle, depending on the brand you choose.
When you’re ready to bottle, place the bottle filler wand in a bottle and press it down at the bottom. Watch carefully as it fills. When it reaches the bottle neck, lift up on the wand to stop filling, and pull the wand out. Put one of your sanitized beer caps on the finished bottles while you fill the rest to prevent any airborne contaminants from sneaking into your beer.
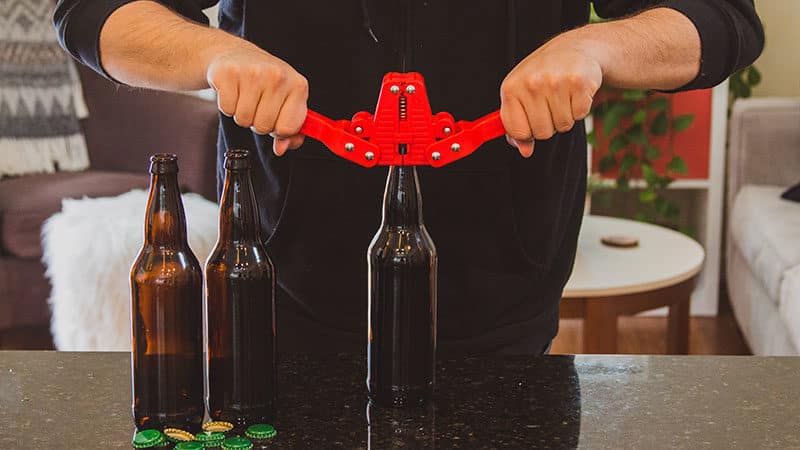
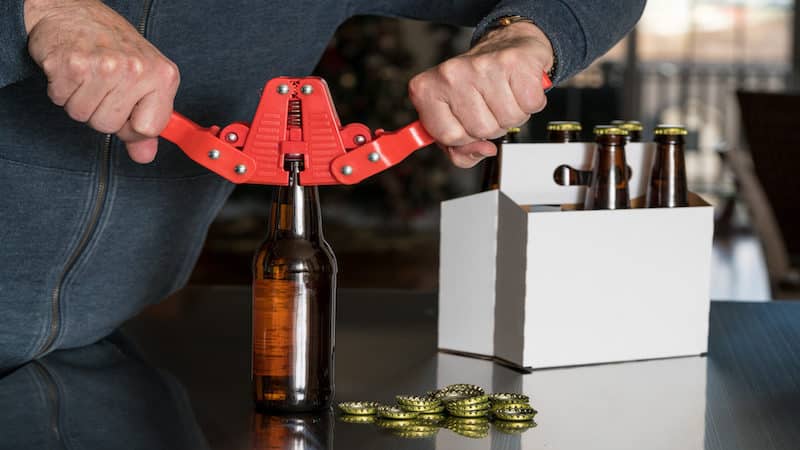
When you’ve finished filling all the bottles, use the bottle capper to lock the bottle caps in place.
Put the finished beers in a standard cardboard six-pack holder. Store them in a dark, cool place, away from anything important, just in case any happen to explode—bottle bombs happen to the best of us! Good places to store your beer during bottle conditioning include an old, unused bathtub, a crawl space, a cabinet, or a garage that’s not too cold or too hot.
Time to Tip a Few Back
After two weeks of bottle conditioning, your beers are ready to drink. Cool them in the fridge for a few hours (or days), and enjoy your homebrew.
Since this is small batch brewing, you’ll only have a six pack, and the beers will go fast. Take some time to really taste your beer. Write down a few notes about it and how it turned out—the flavor, the clarity, the mouthfeel, etc.
Make a habit of taking notes, even when drinking commercial beers, and you’ll find it’ll help you develop your palate. Soon you’ll be able to compare your beers to the pros—and maybe even brew up a little competition of your own.
Create a Weekly Brew Day
If you’re new to homebrewing, all it takes is brewing one batch to become hooked. And if you’re an experienced brewer, small batch brewing can give you the freedom to try new recipes and styles without tying up your main setup.
Create a weekly small batch brewing day for yourself, and within a month, you’ll be turning out a fresh six-pack every week. You can brew up a fresh batch, rack your most recent brew from primary to secondary, and bottle the beer in the batch before that. The only limits from there are your budget, your time, and your imagination.
Happy Brewing!