Homebrewing is an art that allows for as much, or little, DIY craftiness as you like. Everything from the recipes you choose to the grains that form your mash can be customized. And whether you’re all-grain brewing or extract brewing, you can fine-tune your perfect beer by crushing malts at home.
The prospect of taking over for your friendly neighborhood maltser might seem intimidating at first. But while crushing malts is a little more complicated than “Hulk Smash!”, it’s easier than you might think—and doesn’t require exposure to gamma radiation. With the right tools and techniques, you can safely move beyond plain old crushed malted barley, introducing specialty grains to your brew and improving beer yield.
Why Crushing Malts Matters
Both all-grain and extract brewing rely on properly milled malts.
For all-grain brewing, the crush matters because it affects how well the starches, sugars, and enzymes present in the grain will be exposed to water during mashing. The mash activates enzymes in the grain and converts starches into the sugars that become alcohol during fermentation.
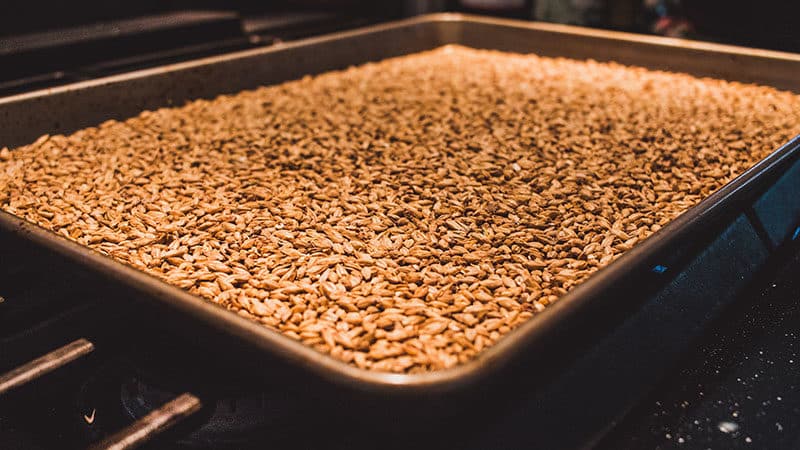
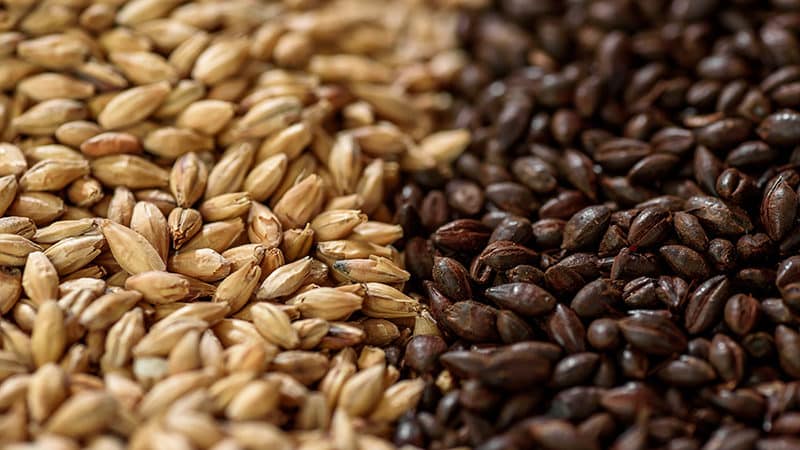
When you’re extract brewing, you’ll use dry malt extract. But you might also include specialty grains—such as roasted barley, crystal malt, and roasted malt—to add flavor and color to the wort. The process is a little more forgiving with these malts, since they are not being used as fermentables.
Crushing Malts: A Balancing Act
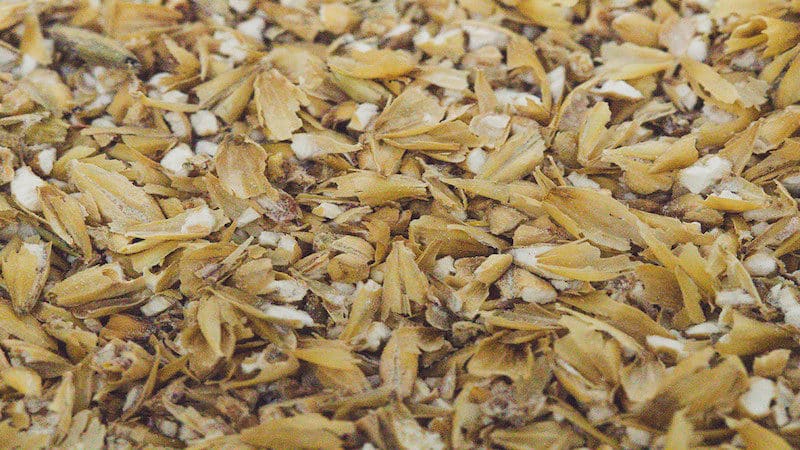
Now that you know why you want to give your malts a proper crush, the next step is mastering how you’ll be milling your grains. The goal is to break the husks, or the tough protective coating on the grains, away from the kernel, or the starch-packed core of the grain. Ideally, you’ll keep the husks as intact as possible while breaking the kernels into the smallest pieces possible.
Crushing malts properly is something of a balancing act. The more intact the malts, the easier water will flow through them. But since the particles of grist (crushed kernels) are less exposed, fewer enzymes will activate, reducing the starches that become sugars and putting a serious dent in your beer yield.
On the other hand, milling too finely will produce a grist that improves yield but reduces the flow of wort during your mash. This can create a stuck sparge, or a grain bed that soaks up your sparge water but doesn’t release it as wort.
To walk the line between rough and fine, you can aim for a “Goldilocks blend” of equal parts grist and flour. The flour can be ground rough or fine, so long as you have plenty of intact husks in your mix.
Keeping the husks mostly intact will help ensure adequate filtering in the grain bed. They don’t alter flavor but they do create small spaces in the grist, allowing water to flow through, carrying your converted starches into the wort.
If you’re using traditional mashing techniques, pulverizing all of your grain into flour is not such a hot idea. When flour mixes with water, it turns into a thick, gelatinous paste that can stop your mash cold.
Note: Don’t let your hopes be smashed if you prefer to pulverize your grains. You can still mash effectively. Just grab a mesh bag, like the kind you’d use when you brew in a bag, to hold your grains when you mash to avoid a stuck sparge.
Ready to improve your all-grain brewing process and dial in your system?
This video course covers techniques and processes for water chemistry, yeast health, mashing, fermentation temperature, dry-hopping, zero-oxygen packaging and more!
Click Here to Learn More
Malt-Crushing Methods
As with most homebrewing equipment, the gear you choose when giving your malts the old smashy-smashy is limited only by your needs, budget, and imagination.
You can go super low-tech and grab a rolling pin. You can grab the family coffee grinder or a food processor. You can even give your maltser a run for their money by setting up a grain or roller mill at home.
Rolling Pin, Hidden Malt
If you like to spice up your homebrew with some elbow grease, you just need to crush specialty grains, or you’re on a budget, a rolling pin might be your new weapon of choice.
All you really need is a resealable plastic bag, your grains, and your new best friend, the rolling pin. Maybe give it a nickname. We like to call ours Smash Graindicoot.
Put the grain in zip-close bag, and roll it until it’s suitably crushed. If this is your primary method of crushing malts, you might want to invest in a marble rolling pin. Grains can be tough little nuggets and may dent a wooden rolling pin.
This method is especially good for specialty grains, since they’re steeped in the kettle with the wort and adding flavors, color and other characteristics instead of fermentables.
Grain Mills
If you’re all-grain brewing, consider an upgrade from the rolling pin. A coffee grinder and food processor are certainly handy and relatively affordable. But they also tend to pulverize the grain and shred your husks. Unless you’re using the brew in a bag mash style, your best bet is a mill.
You can bring your malts down to size with either a grain mill, also called a flour mill, or a roller mill. Grain mills work by crushing the grain between two plates that rotate against one another while they’re turned, either by hand or electronically.
You can get grain mill, but they do have a tendency to break the husks into small particles along with the rest of the grain. And since smaller husk particles mean less flow through the grain bed, you’re on the road to a potential stuck sparge if you over-mill your grains.
One way to compensate for this is to simply spend a few dollars extra on a bit more malt. Using more grain will compensate for the reduced amount of starches released by the grain during the mash.
Roller Mills
If you’re not nuts about the idea of padding your grain budget, a roller mill is for you. With roller mills, the grain passes through two to three cylinders as they turn. The husks are crushed and torn away, remaining mostly intact. Kernels are broken into bits by the rollers. This helps you achieve that “Goldilocks blend,” balancing grist and flours of various texture and achieving an optimal yield.
The space between the rollers can adjusted based on the grain size of the particular malt you’re using. A useful rule of thumb for crushing malts is to set your rollers at or near .038 in. (.965 mm) apart. This is just a little bit bit thicker than a standard credit card.
One potential drawback of a roller mill compared to other options is cost. If you don’t want to shell out the cash for a roller mill, your local homebrew shop may have one you can use. And if you’re in a hurry, they’ll may even do it for you if you ask.
Crushing Malts with a Powered Roller Mill
Many mills, especially the most affordable ones, rely on people power via hand cranks. Unless you’re still driving a Model T and have lots of crank practice, crushing more than a couple pounds of grain can wear you out pretty quickly. Instead, you can take a page from MacGyver and motorize your mill with a power drill.
Naturally, not every drill will do the trick. You’ll want to consider two important factors: the power and torque of the drill. Your drill needs enough power to turn the mill for a reasonable length of time without overheating. It also needs enough torque to do the work of crushing the grains to your specifications.
Roller Mill Safety
The other thing to keep in mind when crushing malts with a powered roller mill is safety. Using a powerful drill with a lot of torque can be hazard, so keep an eye out for these potential dangers.
Always wear proper safety gear when crushing malts. A stone lurking in your grains could get lodged in the mill rollers and shear off the shaft. It could also go flying at dangerous speeds. Wear safety goggles and watch for anything that isn’t grain.
You’re here to crush grains, not your appendages. Watch your fingers and clothing while you mill. It only takes a second to end up in a situation straight out of a high school industrial arts safety film. If you can, enlist a buddy to feed the grain into the mill while you run the drill. Two sets of eyes and hands are better than one.
Practice good power tool discipline. Don’t leave the drill unattended while it’s running. It could overheat or malfunction, with disastrous results. Use extra care when operating electrical tools around water or moisture, although hopefully you’re not crushing malts under a waterfall or by the pool.
Only you can prevent flour dust fires. With apologies to Smokey the Bear, dust is definitely combustible. It becomes a fire hazard when it’s concentrated in an enclosed area.
You might not be milling enough grains to kick up a ton of dust, but err on the side of caution. Make sure your milling area has good ventilation, too. All it takes is a spark to send you and your grains to the big brewery in the sky.
Beware of other dusty dangers. Grain dust carries microbes that can spoil your brew. In high concentrations, they might even make you sick too. Blech. Mill your grains away from your fermenter, and if you’re processing a lot of grain at once, wear a safety mask to keep mold and microbes at bay.
Get Your Crush On
Crushing malts doesn’t have to be a trip through the wringer. It’s all about using the right grains for your recipe, choosing the right tools, and balancing your blend.
Once you’ve gotten into the swing of things, you can improve your yield, avoid stuck sparges, and make sure every beer you brew is a smashing success.
Happy Brewing!