So you’ve decided to take on the enjoyable and yes, sometimes challenging homebrewing hobby. Welcome! We think you made an excellent choice, but then again, we may be just a little biased. Or maybe you’ve been homebrewing for a while and are ready to step up your game. You came to the right place.
Brewing beer is both an art and a science, and a big part of a beer’s quality comes from the homebrewing equipment we use to create our hoppy masterpieces. A good setup may cost more up front, but you’ll save more in the long run by not having to repeatedly replace cheap equipment, or ruining entire batches of beer brewed in the wrong kinds of vessels.
The bottom line is, you can brew better-tasting, clearer beer on any budget and at any skill level when you know how to choose the right homebrewing equipment.
Beer Brewing Kits
Whether you’re just getting into homebrewing and want to jump right into your first small batch or you want everything necessary for all-grain brewing in one package, beer brewing kits are the way to go. You’ll find kits for brewing pretty much any style of beer.
Beer brewing kits are usually categorized by whether the base is liquid extract, milled grains, or a combination of the two. Some of them only contain ingredients, while other, more expensive kits may also include all the homebrewing equipment and tools you’ll need.
Kits can be an economical way to get a full setup for a single price tag. But what’s included varies significantly depending on where you buy it and what type of brewing you want to do. Before you buy, make sure to check whether you’ll need any additional items, such as a brew kettle or bottles.
Extract Brew Kits
Affordably priced and aimed primarily at beginner and intermediate homebrewers, extract kits require the least equipment. The brew process involves adding water, flavoring ingredients and extract to your kettle, then boiling and cooling your wort.
Next, you’ll put it in a fermenter with yeast. Your wort will ferment for at least a couple of weeks, depending on your kit, before it can be bottled. Basically, these kits allow you to skip mashing—an important step in all-grain brewing—completely.
All-Grain Brew Kits
If you’re ready for more complexity in your brew, but you’re worried that blending your own grains won’t yield the best taste or you don’t want to shave your beard off to mill grains safely, consider all-grain brew kits. These kits don’t use extract, and instead are sold with premixed blends in tried-and-true flavors.
If this is your first venture into all-grain brewing, be aware that you’ll need much more equipment with these kits than you do for an extract kit. Whether you choose to buy a complete all-grain brewing system, a mash tun made from a cooler, or piece together your own equipment, expect to shell out a bit of cash.
Partial Mash Brew Kits
Looking for a happy medium between basic extract and a full-blown brewhouse in your garage? Partial mash (or mini-mash) kits use malt extract and grains. All you’ll need is a kettle for boiling, a grain bag, a bucket, and a bottling bucket or drink cooler with a spigot. This type of kit lets you warm up to all-grain brewing without the huge initial investment. You can affordably buy or make the equipment you need, too.
Homebrewing Equipment Kits
If you want all the tools you need to brew beer, you can buy an equipment kit for your type of brew rather than buying each piece individually. You’ll find a variety of equipment kits available, or if you’re feeling especially ambitious, you can build your own pieces, such as a mash tun.
Our best advice is to make a list of the tools you’ll need, then find a kit that includes all, or at least most of them. If something’s not included in the kit, you can buy it separately. Just make sure you have everything before beginning. Few things are more frustrating than getting ready to brew, then finding out you’re missing one simple item that wasn’t included in your kit.
Boiling Equipment
Unless you’re using a no-boil beer brewing kit, you’re going to need to boil. During the 60- to 90-minute boiling process, you’ll add hops and any flavoring grains to your wort. Boiling your hops actually transforms them on a molecular level, creating isomerized alpha acids, which adds desired bittering to your brew. The process also removes funky-tasting sulfur compounds and stops enzymatic activity.
Boiling also kills bacteria, sterilizing your brew before fermentation. Finally, this step helps you establish your target gravity and correct volume of beer. Make no mistake, proper boiling tools are an essential part of homebrewing equipment.
Brew Pots
The kettle that holds your precious wort while boiling might seem like a pretty basic thing, but you’ll use it every time you brew, and it’s vital to the final taste of your beer. While you don’t need professional grade equipment for this step, and you could boil water in a large pot on your stove (if you’re brewing with extract), having a well-made, proper brew kettle can make all the difference in your brewing experience. What makes the perfect brew kettle, then?
Unless you’re on a shoestring budget, you’ll want a stainless steel brew pot. It’s the most durable material you can choose, and you can get one with a tri-clad bottom for the most even heating. Stainless steel is easy to clean and won’t discolor from heat exposure. However, if you need to keep your costs down, aluminum brew kettles will still get the job done.
When you boil your wort, you need enough room in your kettle to allow for frothing without boiling over. Choose a pot just a bit larger than the amount of beer you’re brewing and what you’re adding to it. Generally, an 8-gallon kettle works best for 5-gallon batches of extract brew. You’ll want a 10-gallon kettle for 5-gallons of all-grain brew, and a 15-gallon kettle for 5-gallons of brew in a bag (BIAB).
If you want to invest a brew kettle that will not only last you a long time but make your brewing experience easier, look for models with convenient features such as volume markings etched inside. A ball valve will let you drain off wort without messing around with a siphon. And a kettle strainer will help keep your valve from clogging during that process, while silicone handles make moving a hot brew pot easier and safer.
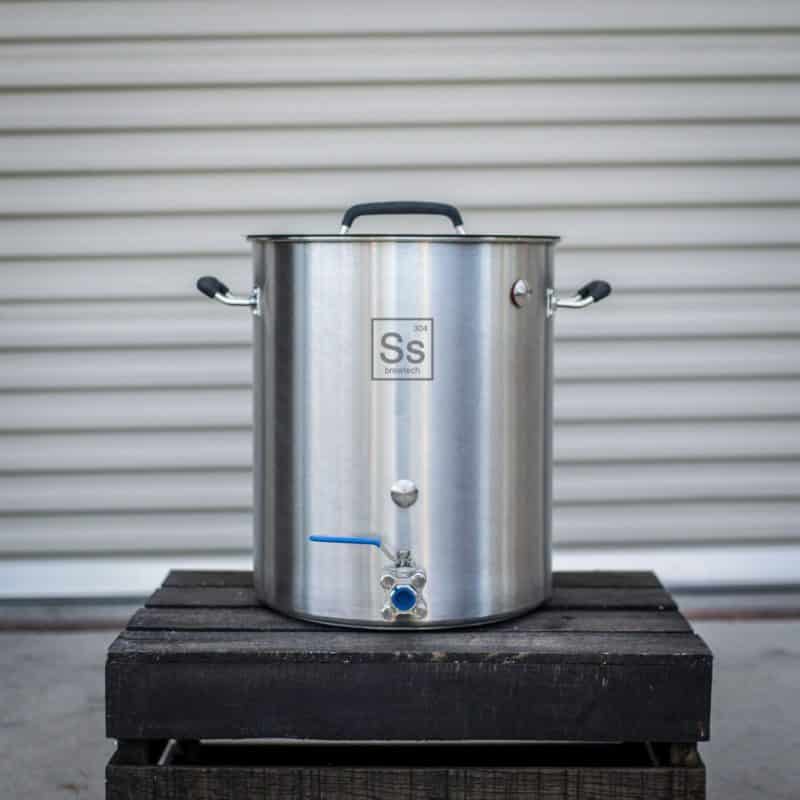
These are a premium lineup of feature-rich all Stainless Steel Brew Kettles, designed to keep you brewing for a lifetime.
Wort Chillers
Cooling your brew quickly after boiling prevents it from growing bacteria, developing a funky tase due to dimethyl sulfide (DMS), or becoming cloudy. However, cooling it quickly enough with an ice bath is awfully tough. Using one of the three types of wort chillers to cool your brew simplifies and expedites the chilling process.
- Immersion Chiller: The least expensive option, you submerge this stainless steel or copper coil inside your brew kettle. You then connect it to a tap using a simple adapter, and flush cold water through the coil, cooling your wort. Be sure to choose the correct size for your kettle.
- Counterflow Chiller: Two tubes—one inside the other—sit outside your brew pot. The outer tube is flushed with cold water, similar to the immersion chiller. At the same time, the inner tube sucks your hot wort from the kettle in the opposite direction of the water. Though the water and wort never make direct contact, the cold water chills the wort quickly. Bonus: you won’t need to use as much water as with an immersion chiller.
- Plate Chiller: The fastest way to chill your wort is this device consisting of many plates stacked together through which water and wort flow side by side. While it may have the highest price tag, it uses the least water and chills quickly. Clogging is a common issue with plate chillers, so this may be an instance where choosing a less expensive solution is your best choice.
Propane Burners
Size is the most important consideration when buying a propane burner for your homebrewing setup. We don’t mean physical size, but British thermal units (BTUs), which measure the amount of heat needed to raise one pound of water at maximum density through 1°F.
Your propane burner’s BTU rating basically tells you how quickly the burner will boil your wort. Higher doesn’t always mean better, but for comparison, your kitchen range probably puts out about 7,000 BTUs while a homebrewing propane burner will clock hundreds of thousands of BTUs.
If, instead, you choose a camping burner not specifically designed as homebrewing equipment, pick one with short, wide-set legs so it’s less likely to tip over with a large pot of wort sitting on it.

Hop Filter Screens and Infusers
You could let your hops, spices, and fruit float freely in your wort, but then you’d have them gunking up your chiller or your carboy. Using filter screens or infusers lets you get flavor into your brew without all the mess.
While a simple hand strainer could get the job done, a more convenient method is to use a mesh hop bag. You’ll toss hops into the bag, tie it up, and put it in your kettle.
Alternatively, you could use a cylindrical filter called a hop spider. They have a handy hook to attach to the side of your kettle allowing a bit more hop utilization than a tightly tied, mesh bag.
Brewing Paddles and Spoons
Utensils made for stirring mash are usually one to three feet long. Paddles have small openings in them to help break up mash, while spoons provide a sturdy, solid surface for stirring. Both can be made from stainless steel, wood, heat-resistant plastic, and bamboo.
The material is mostly a matter of personal preference. While you don’t need a tool marketed specifically as a piece of homebrewing equipment, you will need something long and sturdy for stirring. You might as well make it a stainless steel mash paddle.
Brewing Thermometers
Temperature is everything when you’re brewing beer. Cool your wort too slowly, and you’ll grow a smorgasbord of bacteria. Miss the moment your wort is about to boil, and you could have a mess on your hands. And how do you know when to add your yeast? When the temperature is just right.
Homebrewers have been known to use candy thermometers, or even the odd meat thermometer in a pinch. But having a dedicated thermometer for brewing helps ensure a more accurate temperature reading.
You’ll find floating thermometers are affordable tools that get the job done, but stainless steel probes tend to be a bit more accurate. While mounted stainless thermometers, welded or not, are a classy-looking upgrade for your stainless kettle, they may not be an absolute necessity for a great brew.
Brew in a Bag Equipment
When you want to transition from extract brewing to all-grain brewing, you might be facing a bit of sticker shock over all the homebrewing equipment you’ll need to buy. Instead of leaping straight in, you can take step toward all-grain with the BIAB method.
The only pieces of equipment you’ll need are a nylon mesh strainer bag and a kettle. You can buy them separately, or as a pair in a BIAB equipment kit. You can even buy strainer bags for your keggle.
If you buy the bag and kettle separately, be sure to double check which size bag is recommended for your kettle size.
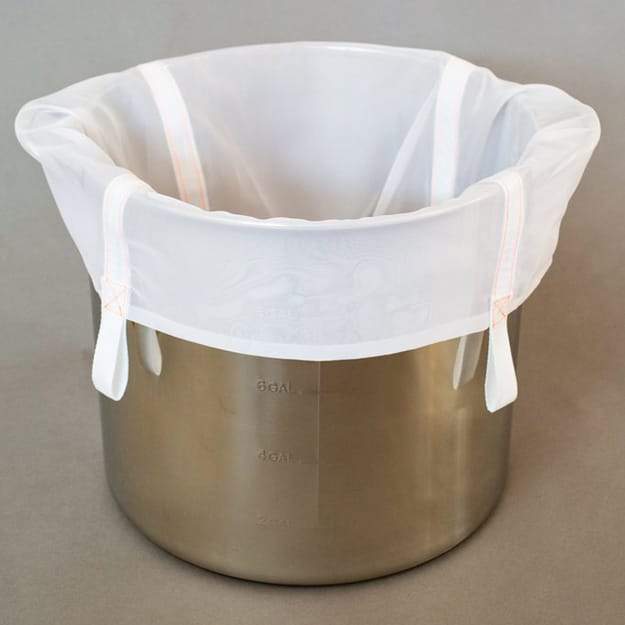
A well-designed fabric filter bag to use in all mash tuns and brew kettles.
Ready to improve your all-grain brewing process and dial in your system?
This video course covers techniques and processes for water chemistry, yeast health, mashing, fermentation temperature, dry-hopping, zero-oxygen packaging and more!
Click Here to Learn More
Fermenting Equipment
To get alcohol content and carbonation in your beer, it must go through fermentation. This process is the most time-consuming step in brewing, even though you don’t have to do much of the work involved.
Yeast does all the heavy lifting during fermentation, turning sugars into alcohol and carbon dioxide. Having the right homebrewing equipment for fermenting is a must, and not a place to cut corners.
Fermentation Containers
You’ll need a container appropriate for holding your wort while the yeast turns it into beer. You’ve got a several options to choose from.
- Glass Carboy: A large jug with a skinny neck, usually closed off with a rubber stopper, a carboy is where you keep your wort during fermentation. Glass carboys will last a long time and keep looking nice if you take care of them. You can get a variety of accessories for them, such as handles.
- Plastic Carboy: A less expensive alternative to its glass counterpart, a plastic carboy is made from non-porous plastic that will neither absorb flavors from past brews, nor leach contaminants into your beer. You’ll also find plastic options in other shapes, which may be more convenient for cleaning and moving than the classic carboy style.
- Fermenter Bucket: Possibly the least expensive option is a regular ol’ bucket. You can find buckets that hold as much as 20 gallons of wort. Fermenter buckets made specifically as homebrewing equipment may have a special hole drilled in the lid with a rubber grommet installed for use with an airlock to release gas pressure.
- Conical Fermenter: A few companies have designed containers for fermenting similar to what you’d find in a commercial brewery. These fermenters feature a conical bottom with a valve at the tip. Their shape allows solids to settle in the cone and easily be drained out the valve for disposal or reuse. Conical fermenters are typically the most expensive option.
- Oak Barrel: This can be used for primary fermentation in creating a barrel-fermented beer, or secondary fermentation. Clean beer can also be added to an oak barrel for aging to add gentle flavor. Oak barrels are not must-have homebrewing equipment, but if you’re looking to play around with new tools and new ways to add flavor, barrel fermentation or aging is an interesting option.
Temperature Control
From pointing a fan at your fermenter to investing in a heater that wraps around your carboy, you’ll find all sorts of ways to adjust your fermenter temperature and keep it consistent.
- Thermostat: You can plug heating and cooling devices into a thermostat (or temperature controller), measure the temperature of your fermenter, and turn the devices on or off accordingly to keep your brew at the perfect temperature.
- Wraps and Pads: Electric heating pads, heat wraps, and jackets made from material similar to soft-sided coolers can all help keep your fermentation vessel nice and cozy. Some methods are more effective than others. Choose the right wrap or pad made for the type of fermenter you’re using.
Stir Plates and Flasks
These completely optional devices enable you to make a yeast starter for your wort by aerating it. And it’s the perfect gift for a homebrewer.
Don’t feel like you must have them, but they make a handy addition. You’ll be able to grow and test your yeast, use fresh liquid rather than dry packets, and even make a starter from your favorite beer.

With five distinct speeds, this programmable stir plate can accommodate yeast starters up to 5 gallons. It comes with a scheduling function for up to 48 hours and powerful magnets will never throw a stir bar.
Tubing
Necessary? Yes. Exciting? Not really. Tubing gets liquids from Point A to Point B. Keep it clean and expect to replace it regularly. Most importantly, get the right size and type for the job.
- Siphon Hose Tubing: Used for moving your finished beer out the fermentation container, this tubing must be sanitized to avoid contamination. Food-grade vinyl is the standard for siphoning because it has thinner walls and is more flexible than some other types of tubing, such as braided beverage hose.
- Silicone Tubing: For moving hot wort, you’ll want tubing that can handle heat. Whether you clamp it or use it with quick disconnects, get silicone tubing for this. If you’ll be using it with a pump, check the pounds per square inch (psi) rating of the tubing to be sure it will hold up to the pressure the pump creates.
- Vinyl Beverage Tubing: For beer lines and carbon dioxide (CO2), you’ll want to use beverage tubing. It’s made from vinyl and the walls of the tubing are quite thick. Because you’ll always get buildup in beer lines, some beverage tubing is antimicrobial. You can also get lines in different colors to help specify them for various uses.
Rubber Stopper Bungs
Used to close off growlers, carboys, fermenters, and mash tuns, among other things, rubber bungs are simple but necessary homebrewing equipment components. When you shop for a rubber stopper bung, you’ll notice they’re sized by whole numbers from 000 through 12. The numbers correlate to a top and bottom diameter, with the bottom being the smaller diameter, of course.
Though the numbers are somewhat universal, there may be a difference of a couple millimeters between different sources, so double check their sizing before you buy. If you’re going to use the bung with an airlock, you’ll save yourself a headache by choosing one with a pre-drilled hole.
Fermentation Airlocks
These clever devices allow you to release CO2 during fermentation without letting air back in. You’ll put water or sanitizer inside the airlock, which creates a sort of seal. Once enough pressure builds up inside, excess CO2 will push through the liquid and out the airlock. The liquid keeps any air from getting inside and causing oxidation.
While you can use DIY methods in a pinch, such as a balloon, fermentation airlocks only cost a few dollars and are well worth buying to protect your beer from oxidation.
Racking Canes and Auto-Siphons
When you’re ready to transfer beer, you’ll need something to help you get it flowing through your carefully chosen tubing. Racking canes are L-shaped glass, stainless steel, or plastic tubes. You’ll attach the short end to tubing and insert it into your beer.
Rather than introducing bacteria by using your mouth, we recommend starting your siphon by filling the tube with clean water, closing off the end of the hose, and inserting the tube into your wort or beer.
The other way is to use an auto-siphon. This device is actually a tube with a racking cane inside it. You pump it like a plunger to start your transfer. Super easy!

Beer Funnels and Brushes
Inexpensive, but not insignificant, funnels and brushes come in handy too many times to count. Funnels are available in many sizes, plastic or stainless steel, and with or without internal filters.
You’ll also find a variety of brushes designed to clean inside bottles, carboy, tubing, kegs, and even little faucet caps with built-in brushes.
Measuring and Testing Tools
To not only get the best brew possible, but also be able to replicate it time and again, you’ll need to accurately measure ingredients, and test water quality and your wort.
Hydrometers and Test Jars
Used for determining the specific gravity of wort during fermentation to track its transformation to beer, hydrometers and test jars are vital homebrewing equipment.
They only cost a few dollars, but perform the important function of letting you know how fermentation is going. They can also help you easily and effectively replicate the process with successive brews.
Digital Scales
When you’re just getting into homebrewing, you probably won’t need a scale, especially if you’re using beer kits. But when you become more advanced, you’ll want to measure ingredients, such as grains before blending, so you can perfect your recipes and repeat them again and again.
If you intend to use your scale for spices and delicate additions, make sure it’s capable of measuring in grams.
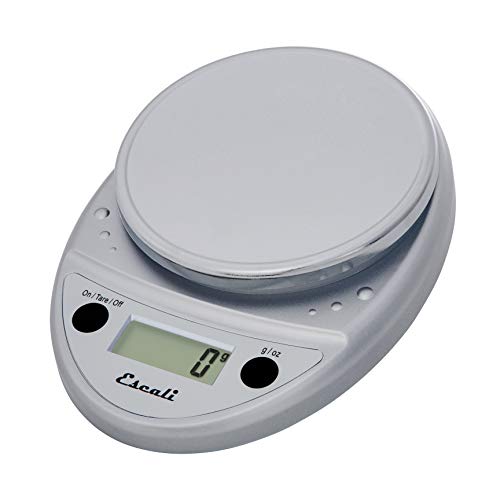
This scale can precisely weigh between one gram and 11 pounds. It's an easy-to-operate brewing scale for hops and adjuncts. It runs on AA batteries and offers a lifetime warranty against defects under normal use.
Testing Tools
From test strips for pH and chlorine to full digital analysis kits, testing equipment is another crucial component of homebrewing equipment for serious brewers. If you want to replicate brews and ensure consistency, digital analysis can help you by displaying information such as alcohol content and fermentable sugars.
Testing the water you use for brewing will also help you keep funky taste, such as chlorine, out of your beer. You can even purchase testing kits (similar to household water test kits), where you put a sample of beer into a sterile bottle and mail it to a lab for analysis.
While using clean water is smart no matter your skill level, you likely won’t need complex analysis for small batch brewing. Most testing and chemicals available for homebrewing will be used for replicating recipes for larger batches and ensuring quality.

Great for doing at-home water tests specifically for brewing beer. We've tested this product and it works perfectly!
Beer Bottling Accessories
Once your wort has finally finished fermenting, you have beer, but you can’t very well drink it from your carboy. Well, you could, but it’d probably be difficult, not to mention messy. Your best bet is to bottle that brew!
Bottles
Available in 12, 16, or 22 ounces, 750 milliliters, and liter sizes, beer bottles typically come in amber color or clear glass.
Swing-top bottles include caps on a hinge similar to a Hermes jar, others come with basic crown tops, while still others don’t include caps at all.
Growlers
If you like to send your brew home with friends, growlers are the optimal choice. They’re made from glass, stainless steel, ceramic, or stoneware. Specialty growlers are a beautiful way to gift your homebrew.
Growlers are available in several sizes from 32 ounces up to two liters. If you want to take a serving of beer without exposing it to air, growlers are the way to go.
Caps
You can choose from plain, silver-crown tops to close of your beer bottles, a rainbow of other colors, or something personalized with a logo. It all depends on your personal style.
You can even get caps with an oxygen-absorbing agent to prevent oxidation in your bottles. Fancy!
Cappers
If you really enjoy the feel of making beer with your own two hands, you may want to choose a handheld capper. It’s simply a metal press that squeezes a crown top tightly onto your bottles. More expensive, but sturdier and more convenient, tabletop cappers hold your bottle in place for you and make capping faster.
If you’re selling your homebrew and capping a lot of bottles, you may want to invest in an electric capper for increased speed and efficiency.
Fillers
The easiest, least expensive way to start and stop the flow of beer into your bottles is a bottling wand or bottle filler. Whether it has a gravity-fed or spring-loaded valve, its simple mechanics make it an easy, invaluable way to fill your bottles.
Spigots and beer guns are also convenient options for filling. Note that beer guns will cost you just a bit more.
Washers and Brushes
Cleaning equipment created for the challenging shapes of carboys and bottles includes long brushes and jet-style hose attachments. These tools aren’t absolutely necessary, but they do make the job of cleaning tricky containers a whole lot easier.
Drying and Storage Racks
You don’t want any stray water left over from washing to dilute your beer when you bottle it. You must let your bottles dry completely before bottling your beer.
Available in round, tree-style (picture a coat rack) or flat racks, these devices let you turn your bottles upside-down over a peg to dry. Some racks are even stackable with clean bottles in them for space-saving storage.
Labels
Whether you purchase blank labels and print them at home or order pre-made, personalized ones, you can your own label to your bottled beer. They’re not an absolute must-have, but you sure can have a lot of fun branding and labeling your homebrew.
Beer Sanitizers and Line Cleaners
Keeping all the components in your brewing and bottling process clean and sanitary is imperative, not just to ensure clean-tasting beer, but to prevent bacteria growth and potential illness.
Line Cleaner
Available as powder, tablets, or liquid, line cleaner differs from other cleansers because it’s formulated to address the biofilm and bacteria that grow in beer lines. Be aware that some solutions are caustic and must be thoroughly flushed before using the lines for beer.
You’ll want to completely rinse your lines regardless of what type of cleaner you use, though. Who wants that to end up in their beer?

Beer Sanitizer
Available in powder and liquid, you’ll typically need to dilute a small amount of sanitizer in a bucket of several gallons water. When mixed to the proper dilution before being flushed through your homebrewing equipment, most brewing sanitizer doesn’t need to be rinsed after use.
Sanitizer is definitely a must-have for brewing clean, safe beer.

Our recommended NO-RINSE brewing sanitizer (acid-based) of choice with easy measurement built in. Plus, the foaming action helps sanitize all the nooks and crannies. Don't fear the foam!
You can acquire your homebrewing equipment over time as your experience outgrows your setup. Remember that some equipment, such as a brew kettle, is absolutely necessary, but some pieces are just not useful for non-commercial use, or put aesthetic over function. Don’t be dazzled by the shiny (and probably expensive) pieces you don’t really need. Unless, you know, you just want a fancy setup. Nothing wrong with that, either!
Also keep in mind that if you plan to homebrew for any length of time, building a reliable setup is a long-term investment. Choose your equipment with your specific needs in mind, and you’ll never go wrong.
Happy Brewing!