It doesn’t matter if you brew once a week or once a month, your collection of homebrewing equipment seems to grow on its own every time you turn your back on it. If you’re tired of a closet stuffed with buckets, empty bottles, and loose odds and ends, we’re right there with you. It’s time to get serious about your homebrew storage.
And when we say serious, we mean serious. Developing an organization system that works for you can be hard work at first. But once you get comfortable with your new system, you’ll wonder how you ever survived without it.
Creating Your Homebrew Storage Plan
Getting organized might seem like an easy prospect, but the really easy part of organization is getting lost in wild organization hacks. Yeah, that Pinterest board of organization tips for homebrewers might look amazing, but if you’re not actually going to use those ideas, what’s the point?
Not only that, but if you get spun up on all the latest storage ideas and tactics, you’ll be tempted to run out and start buying without knowing what you actually need. Shopping without a plan could mean you end up with way more clutter than you started with. You need a more practical starting point.
Take Stock
Before you look at nifty storage bins or shelving units, you absolutely must take inventory of the homebrewing equipment you have. This will help you determine the kinds of organization items you need, as well as the amount of space you’ll need to dedicate to a good storage area.
Making an equipment inventory is also a good time to purge any old, broken, or unused items.
Find a Good Spot
Once you complete your inventory, do a walkthrough of your home to find the best place to store your equipment. Remember to consider how close the storage location is to where you brew. The closer your homebrew storage is to your brewing area, the easier it will be to stick to your organization plan.
When you pick your storage spot, take height, width, and depth measurements of the location. These will come in handy when you’re ready to go shopping.
Building Your Storage System
Before you start thinking about your own organization system, be sure to keep two things in mind:
- There’s no magic bullet for organization. What works for your brew buddies might not work for you, and vice versa.
- You may not get it right on the first try, and that’s OK.
Developing a good storage system takes dedication and constant adjustment, especially if you plan on adding more equipment as you continue on your homebrewing journey.
Maybe you’re the kind of person who lives for pegboards and hanging storage solutions. Or you might be more of a shelving person. Or perhaps you’re a bin organizer, where everything needs to be labeled and hidden away.
Chances are, you’re probably a mix of all these organizers. Get comfortable with trying new ways to keep your equipment organized and cutting out concepts that aren’t working for you. Mix and match as you please, and remember, homebrewing organization is as personal as your beer tastes.
1. Create a Caddy for Small Supplies
You’re in the middle of brewing, and you’re just about to measure your batch’s gravity, and … wait, where the heck did your hydrometer go?! Those little items can be easily lost under and behind larger things, and will disappear right when you need them most.
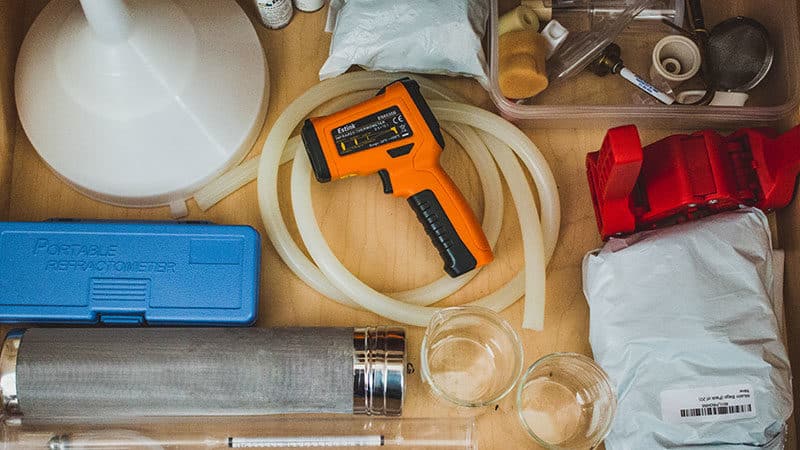
Avoid the panicked, last-minute search—and minimize the number of trips to your homebrew storage area—by creating a caddy for those pieces of small but essential equipment. Here’s what we keep in ours:

NOTE: The following items are affiliate links. We earn a commission if you click and buy any of the products with no additional cost to you.
- Star San brewing sanitizer
- Spray bottle of Star San brewing sanitizer
- Spray bottle of distilled water
- Thermapen MK4 digital thermometer
- Refractometer
- Graduated cylinder and hydrometer
- Scrub brush with a handle
- Pipe cleaners
- Wine thief
- Hanna pH meter
- pH meter calibration chemicals
- pH meter storage solution
- Lactic acid for pH adjustments
- Whirlfloc tablets
- Fermcap
- Bottle opener
- Sample plastic beakers
- Butane lighter for burner
- PBW cleaner
- Multitool (like a Swiss Army knife or a Leatherman)
- Scissors for opening yeast bags
- Muslin bags for hop additions or steeping grains
- Microfiber cloths
- RV water filter
- Adjustable measuring spoon
- Keg lube or O ring lube
- Teflon tape
- Disposable food-safe gloves
- Lotion (Your hands will get dry working with all the water and chemicals!)
2. Go Plastic or Metal When You Can
If you take good care of your equipment, you wash it after every use, before you put it all away. Invest in plastic or metal storage solutions so you don’t have to worry about damp equipment ruining cardboard boxes. Moisture can weaken cardboard, and moist cardboard can grow mold. Blech.
3. Use Bungee Cords to Hang Extension Cords
Wrapping your cords and laying them flat in a bin is just begging for entropy to come and ruin your brewing day. But you can hang cords without a bulky hook.
Once you wind your cord up for storage, just thread a bungee cord with hooks on both ends through the middle, and hang the ends on a small bike hook.
4. Hang Without Hooks
If your stirring spoons, racking canes, or bottle brushes have metal in the handle but no way to hang them, consider getting a magnetic strip you can mount on the wall. This solution not only gets your tools out of cluttered drawers, but it makes them easy to access.
5. Hang Your Lids
This is an especially useful tip if you’re using a closet for your homebrewing storage space. Use adhesive hooks to hang your pot lids on the inside of your door. Without the lids to worry about, you can stack kettles and pots with no problem at all.
6. Use That Ceiling Space
Walls aren’t the only places you can hang things. If you have the time, the tools, and the skills, you can easily make sliding ceiling storage out of reinforced totes and homemade carriages.
7. Outline and Label Your Peg Board
If you want to use a pegboard to hang and organize your brewing supplies, make sure you stick to it by outlining the areas where things are supposed to go. That way you don’t, for example, mix up the spots for your canes and your filters.
Once you’ve optimized your pegboard storage space, just trace the outline of your equipment with a permanent marker.
8. Use a Peg-Rail Organizer
If pegboards are a little too freewheeling for you, a peg-rail organizer might be just the thing you’re looking for. Like a pegboard wall, a rail offers a neat, out-of-the-way spot for hanging your tools. And, as DIY projects go, all you need is an afternoon for an entirely new storage solution.
9. Stack When You Can
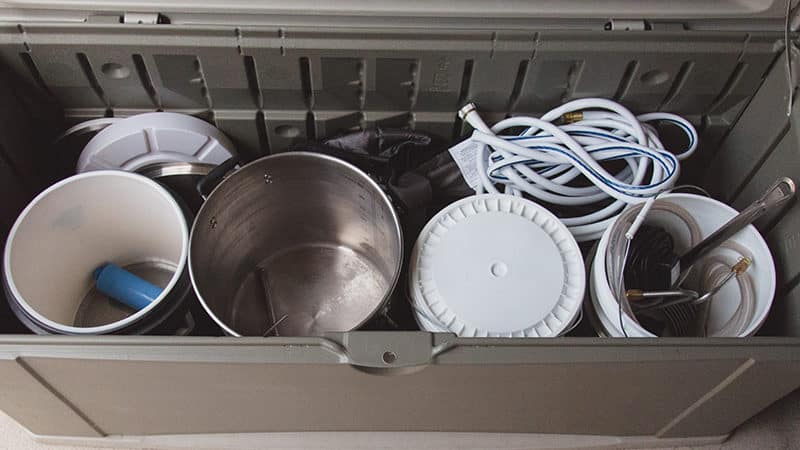
Do your stainless steel kettles or weighing bowls fit inside each other? Stack ’em and forget ’em. Better yet, store your hop filters and weighing bowls in your kettles, so all you have to do is pull out one thing to start getting ready for brew day.
10. Group by Use
Building off the idea of stacking, try to organize your equipment by purpose in a single container. You can dedicate a bin to all the tools you need for weighing, including your scale, brewing salts, refractometer, and thermometer. Then do the same with bins for your fermentation and bottling tools, and every other category and piece of equipment you have, so all you have to do is pull out a single bin when you’re on that step.
11. Compartmentalize
Bins and drawers with loose tools don’t have to be chaotic. Smaller plastic bins that fit into your big bins are great ways to keep your tools more organized. If you balk at the idea of turning your homebrew storage into a Russian nesting doll of bins, you can always turn to expandable drawer dividers.
Yeah, they say they’re for drawers, but you can definitely modify them for storage bins.
12. Be Okay With Broad Categories
Before you get too deep into categorizing your brewing equipment, take a deep breath. There is such a thing as getting too organized, especially if it makes it harder for you to stick to your system.
Accept that you’ll have broad categories and that everything won’t be exactly perfect. A little imperfection in your system is just fine.
13. Organize by Frequency
Shelves are a great foundation for an organization system, but the way you order equipment on those shelves is just as important. Try to store your most frequently used tools between waist and eye level.
Not only does this keep your regular tools handy, but it also saves you from busting out a step stool or getting down on your knees to pull things out.
14. Make a Bottle Filing Cabinet
Filing cabinets can be surprisingly versatile once you stop thinking about paper. They usually have deep drawers, making them the perfect height for most bottles. Instead of risking your bottles to the elements or a clumsy bump of a shelf, keep them safe and snug in a filing drawer.
15. Use Grease Pencils to Mark Your Brews
You might not have time for fancy labels or organizing your bottles by brew. That’s perfectly fine, because there’s an easier, non-permanent way to mark your bottles. Grease pencils are relatively inexpensive; can write on porcelain, glass, metal, and plastic; and moisture-resistant while still being easy to scrub off.
That means you don’t have to mess around with sticky tape residue or permanent marker accidents. Just write the name of the brew and the date on your fermenter, keg, or bottles to make sure you don’t mix anything up.
Worried about dark plastic or glass? Don’t be. A light-colored grease marker will still show up.
16. Keep Notes
What good are brewing mistakes if you don’t know what you did? Brewing is as much of a science as it is an art, so take a page out of high school chemistry and keep a research notebook on your brews.
By writing down what you used and when you used it, you can learn from your mistakes and more easily replicate successful batches.
17. Go Digital
If Pinterest works for you, use it. The same goes for any other mobile apps like Google Keep, Evernote, and BeerSmith™ Mobile Home Brewing. Spreadsheets might be more of your style than a notebook.
As long as they don’t needlessly complicate your brew day (and you actually use them), digital solutions might help you get organized enough to burn through your to-brew list.
18. Build a Rolling Cabinet
If you have the space and the right kind of flooring, you could make brew day super easy with a rolling homebrew storage space for all your equipment. It’s a big DIY project, but a compact and moveable shelving unit could make getting set up for brew day a snap.
Just tuck the shelves away in a corner or in the garage when you don’t need your gear and trundle it out when you do.
Ready to improve your all-grain brewing process and dial in your system?
This video course covers techniques and processes for water chemistry, yeast health, mashing, fermentation temperature, dry-hopping, zero-oxygen packaging and more!
Click Here to Learn More
The Ultimate Test: Getting Prepped for Brew Day
The point of organization is to make your brew day go smoothly so you can spend less time wondering where your stirring spoon went and more time brewing good beer. Once you have your storage system all worked out, give it a test run by brewing up a storm. You know your system works if you can easily find and reach everything you need.
Remember: a good organization system takes maintenance. Be ready to make adjustments as you add new equipment and discover better ways of storing your gear.
Happy Brewing!