I bought the Ss Brewtech SVBS, their all-electric single-vessel brewing system (eBIAB). It’s been two years in the making. I thought it would never come out.
Now, why would I buy this?
If you know me at all from my videos or emails, I freaking love Ss Brewtech gear. They don’t sponsor me or give me money for reviews. I’ve been a fan ever since I bought the Ss Brew Bucket.
Now, I never used an eBIAB (electric brew-in-a-bag) system before. There are plenty of other ones on the market. And have been on the market long before Ss Brewtech’s version.
I’m going to review the SVBS from my personal experience. I have nothing to compare it to besides brewing basic BIAB batches using a nylon mesh bag (which was a pain to lift out of the kettle). And I’m also comparing it to brewing on a 3-vessel RIMS system.
I’ve been brewing beer since 2005. And I’ve brewed beer in every modern way except an all-in-one electric system.
So with that context, here’s my honest review.
The First Unit I Received Malfunctioned
I bought the Ss Brewtech SVBS as a pre-order. When it was finally delivered, I waited to open it until I was ready to brew.
I set everything up. There were not a lot of parts, which was nice. But I had trouble connecting the digital touchscreen controller. That was the only problem.
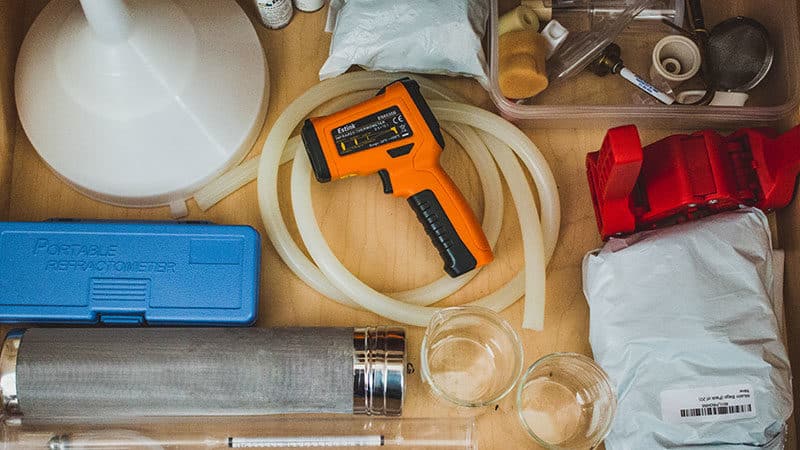
Per the directions, I cleaned the unit with TSP and passivated it with citric acid.
I decided to brew a SMaSH beer (single malt and single hop). Just 10 pounds (2.5 kg) of 2-row pale malt and 6 oz. (170 g) of mosaic hops at flameout.
When I got everything heated up (quickly), I noticed something weird. The temperature kept rising to 185º F (85º C) as it was heating. I assumed this was because the temperature probe was near the heater, which was normal.
I later learned this was NOT normal.
But I carried on until the unit wouldn’t heat. I had to transfer the wort to my original 3-vessel system to finish the brew.
I contacted Ss Brewtech with videos of my temperature problems. And they immediately sent me a new unit and a shipping label to return my old unit.
The customer service was fast! So must give credit where credit is due.
A week later, I got the new unit, cleaned it, passivated it, and decided to brew a Dry Irish Stout for St. Patty’s day ☘️.
Setting Up The SVBS
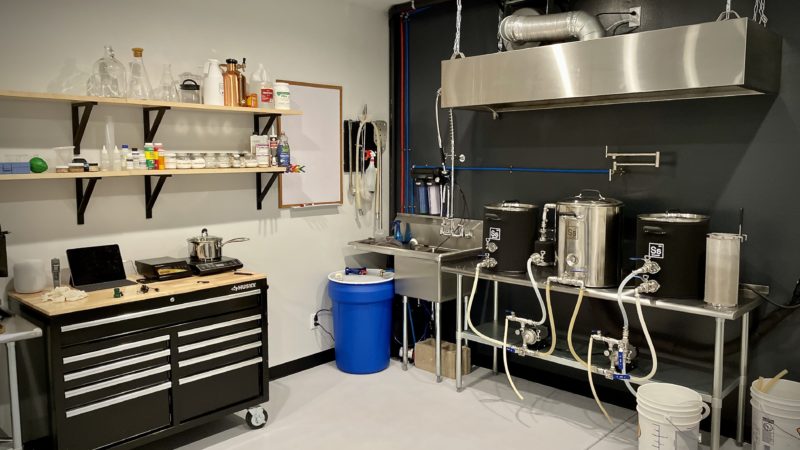
The vessel is well-built. It’s heavy. It looks freaking awesome. And the control panel is slick.
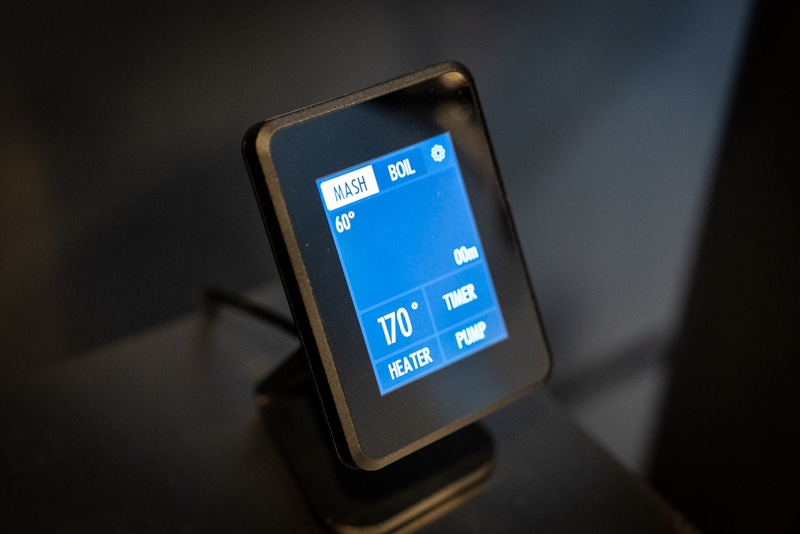
I’ve watched a lot of videos of other single-vessel systems. And many of them have a touchscreen or control panel built into the unit. I wouldn’t say I liked the way Ss connected separately at first.
I had a hard time knowing where to put the control panel. But once I got a good setup, I realized it was better. I can replace it if needed. And it stays out of the way of hot wort in case of spills. It’s a good thing.
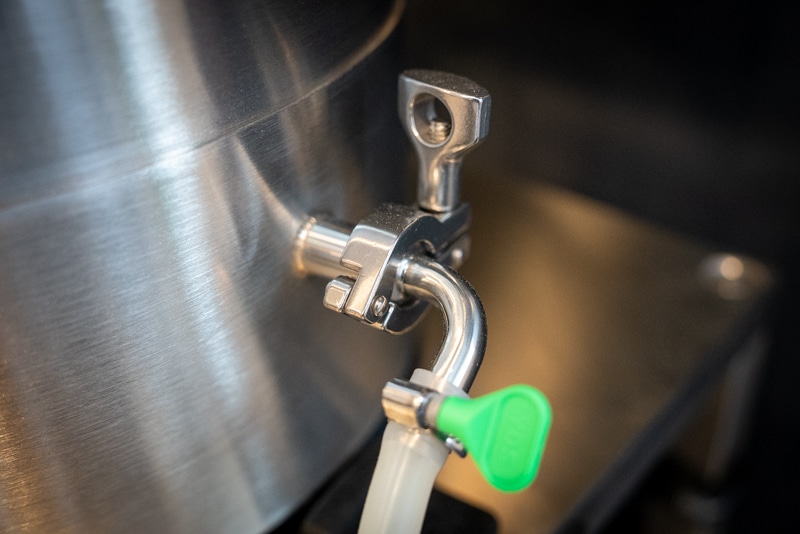
Now, this unit has a built-in pump and three dials to control different flows. One for whirlpooling, recirculating the mash, and transferring the wort to the fermenter when the boiling is complete (knockout).
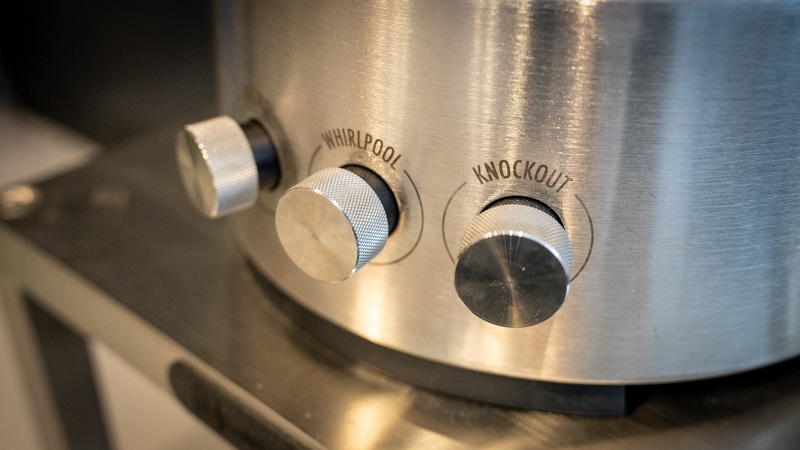
Gaining access to the pump is not easy, according to what I read online. The SVBS is an all-in-one system that wouldn’t be easy to replace parts. Thankfully, I’m not the kind of guy who likes tinkering and fixing things.
I’m also good with this because the ONE pump does THREE things using silicone hoses (which never seem to go back). The three valves (or knobs) on the front of the unit turn and pinch these hoses making it completely sanitary. And they’re not controlled by ball valves which can get messy.
In other words, there’s nowhere for beer stone and gunk to build up inside the unit.
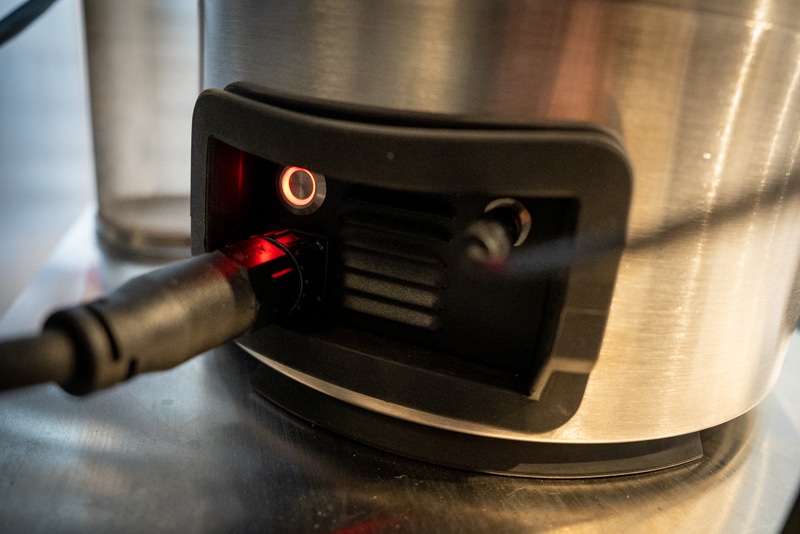
A 3-prong twist lock cord powers the unit into a 240v outlet. I already have this setup in my brewery because I’ve been brewing on the Ss Brewtech 3V system for the last 4 years.
Most people don’t have this setup. But I come from the pool industry. I was always used to dealing with the 3-prong twist lock. It’s much safer for me when you’re dealing with water and electricity.
But I understand the complaint from others about this choice. It worked for me, but other vessels I looked into wouldn’t work for my setup. Either way, you get an adapter.
I own an extension cord for this setup but didn’t need it. The cord is also a bit short. I do wish the cord was longer, though.
Ok, now about the brewing process…
Ready to improve your all-grain brewing process and dial in your system?
This video course covers techniques and processes for water chemistry, yeast health, mashing, fermentation temperature, dry-hopping, zero-oxygen packaging and more!
Click Here to Learn More
My First Brewing Experience With The Ss Brewtech SVBS
I filled the kettle with 8 gallons (30 liters) of water and turned on the heater. The touch screen is easy to use. It’s not even worth diving into. It doesn’t require a manual. It’s very intuitive and simple. I love this!
Heating The Strike Water
Spinning the water might help heat the water faster and more evenly. I set the temp to 155º F (68º C), and it heated 8 gallons (30 liters) of water in about 30 mins. I also turned on the pump and opened the whirlpool valve. I don’t know if this is true, but it felt true.
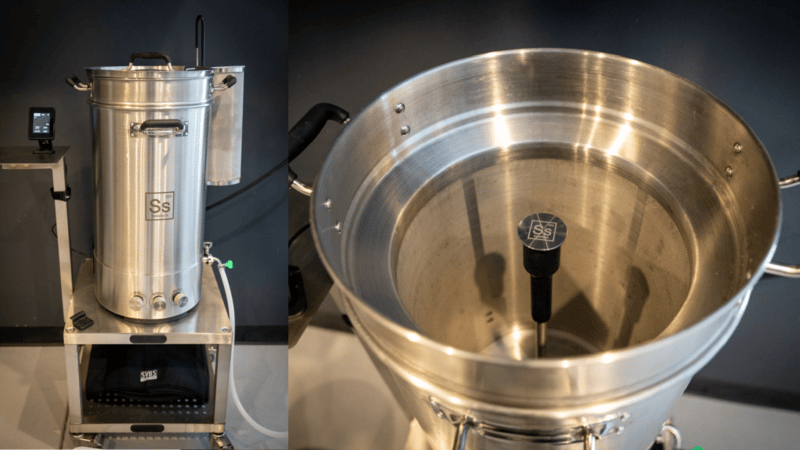
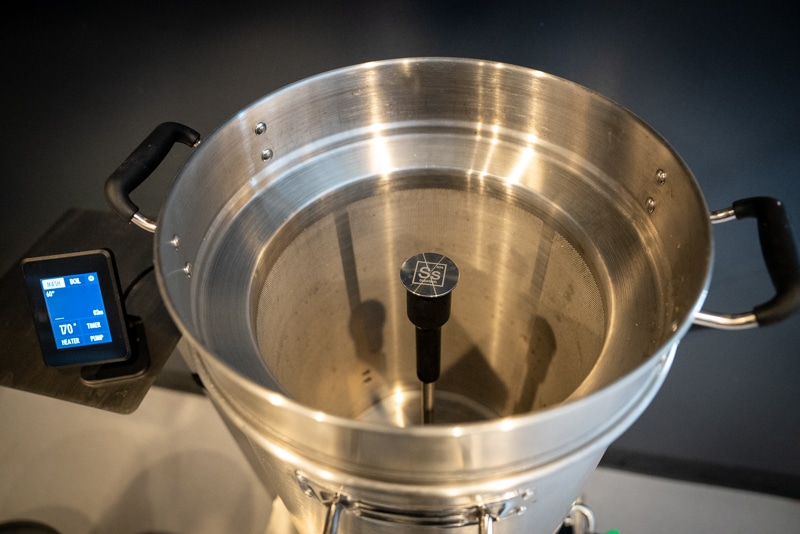
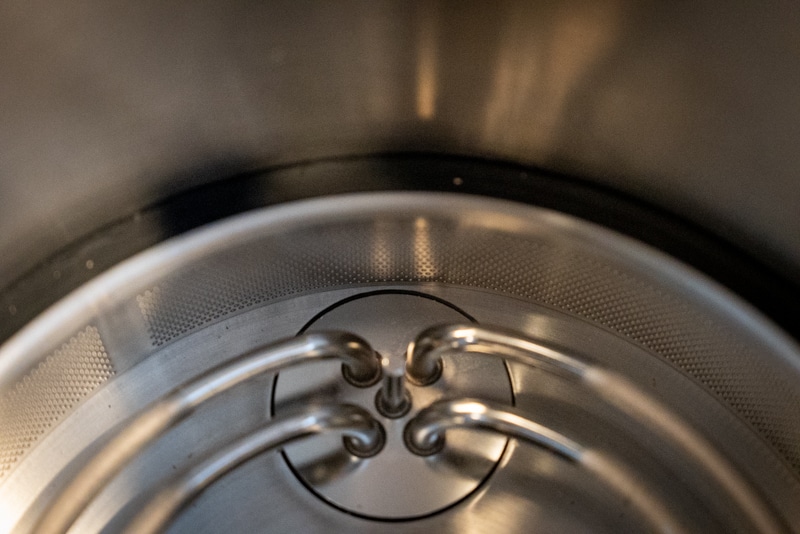
Now, the SVBS comes with a hefty gain basket. It’s a beast. And inside the grain basket is a standpipe that connects to the bottom of the kettle when you place it inside. This connects the pump to the standpipe and allows for recirculating the mash.
I had trouble getting the water to flow up through the standpipe. It connects using a rubber thingy (not sure what to call it). It works, but the pressure pushing up through the standpipe could be stronger.
Mashing in The Ss Brewtech SVBS
I placed the grain basket in and added my malt. I added a small amount at a time and used a plastic mash paddle.
I set the temp to 150º F (65.5º C) and a timer on the touchscreen to 60 minutes. FYI, the timer had no sound. So it’s not useful, honestly.
I let the mash sit for 10 minutes before turning on the pump and opening the recirculation valve. I also opened the whirlpool valve for good measure. I like the fact I can open up these two valves at the same time.
The temp stayed steady. The recirculation wasn’t as constant, but it worked.
In 60 minutes, I cranked up the temp to 170º F (76.6º C) for mash out. That happened in less than 5 minutes, and I let it go for another 5 minutes.
When I checked the gravity, I had a mash efficiency of 72%. I was shocked! I had always heard that eBIAB devices usually get under 70%. So I was delighted.
Now it was time to lift the grain basket and let it drain. This was the part I was worried about. Well, my back was worried.
I lifted it slowly. It was easier than I thought. The SVBS has built-in brackets to hold the mash basket out of the left-behind wort. I let it drain for 5 minutes while I switched the controller over to the boil tab and cranked the heating power to 100%.
Here’s my one gripe about eBIAB systems in general. What the hell do I do with the mash basket?
How Do I Clean The Mash Basket?
Normally, I empty the spent grain from my mash tun into a compost bag. But with the basket, I had to take it outside and dump it. And I could have tossed it into a compost bag too.
But cleaning the mash basket was a pain. It was zero degrees outside during the winter in Colorado, and my hose was frozen. I wanted to rinse it in the sink, but the water wasn’t powerful enough to remove all the grain.
Plus, I can’t put a drain in my sink because I don’t have a garbage disposal.
My only path was to let it dry and try to clean it gently in my sink. But I said this thing is a beast. So I found it cumbersome to clean. That’s my biggest gripe with this type of system and the SVBS.
Boiling The Wort
Now the boil happened in like 15 minutes, which was great!
For the hops, I added a stainless steel hop spider. The Ss Brewtech SVBS has a trub and hop screen, but I don’t trust it. Never will. The hop spider also composts the spent hops easily and keeps the pump and plate chiller from clogging.
Everything went smoothly. I was excited the whole time I was brewing. My brew day, compared to my 3-vessel system, went SO fast. I was already in love with this device (except for cleaning that damn mash basket).
When the boil was over, I opened the knockout valve, turned on the pump, and pushed it through a plate chiller and into my fermenter.
I tried whirlpooling to cone the trub, but that didn’t work. I was not patient enough, to be honest. Not a huge concern for me anyway with the hop spider.
Finally, cleaning this thing was easy.
Cleaning the Ss Brewtech SVBS
I filled it with water to remove the excess trub. Then I filled it again with water, heated it to 150f, and added PBW. I simultaneously opened the whirlpool and recirculation valves and cleaned everything in 30 minutes.
I ran the PBW through the knockout valve and plate chiller.
Finally, I gave it a good rinse in place. I finished the beer in less than 4 hours. It would have been faster, having it not been my first time.
My Final Thoughts On The Ss Brewtech SVBS
So my overall review of this product is great. I have very few gripes, and they’re all about cleaning.
The price is currently $1,299 (as of writing this in 2023). I have not compared it to others, but I assume it’s more expensive. But the build quality is awesome, and its simplicity is even better. There’s no disconnecting and moving things besides the mash basket in this whole process.
I can see why it took them two years of engineering to make this. They thought everything through. I’m glad they were not the first to market because they learned how to address most issues with the current systems.
So obviously, I can’t change how to clean the mash basket. There’s nothing Ss Brewtech can do better there. But they could make it easier to replace parts and a longer power cord in the future.
If you’re a tinkerer, then this might not be for you. But if you want an easy brew day and you’re only making 5-gallon batches, then it’s perfect! Pick up one for yourself here (not an affiliate link).
Also, it’s a 12-gallon system. I originally thought it could make 10-gallon batches, but it can’t. However, it does allow you to make BIG beers with a lot of grain. So making the system bigger for that specific purpose is a nice touch.
If you have any questions about this unit that the Ss Brewtech website didn’t answer, I’d be happy to do so. Send me an email: [email protected].
And if you want to read more homebrewing product reviews from me in the future, please let me know.
I love testing out new gear!