To make a truly great homebrewed beer, you need healthy yeast. And making a yeast starter is the perfect way to do that. You’re after yeast that will operate at peak efficiency as they chow down on the sugars in your wort to create alcohol and carbonation.
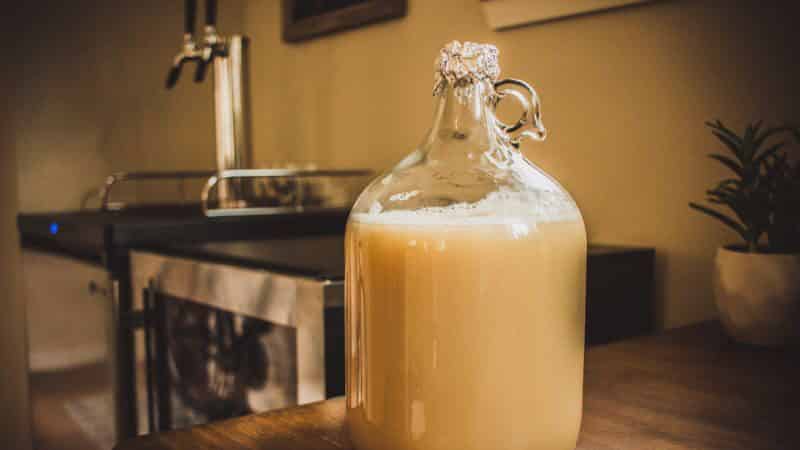
A yeast starter is just a small batch of beer you use to grow, or propagate your yeast, letting them feed on the nutrients within until you’ve got enough to ferment your latest batch of homebrew. You can make a quality yeast starter from packaged liquid yeast or even your own bottle-conditioned homebrew.
Do You Need to Make a Yeast Starter?
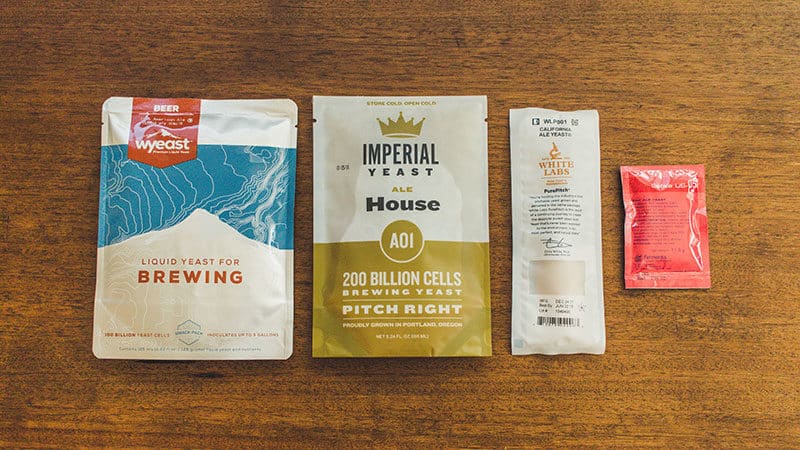
The main reason for making a starter is to pitch the proper amount of yeast cells into the type of beer you’re making. Most dry yeast packets and liquid yeast pouches contain roughly 100 billion cells. And that depends on how old the yeast is. The older, the less viable.
So it’s important to build more yeast cells to pitch into your wort for proper fermentation. Not to mention that higher gravity (sweeter) wort needs more yeast cells to eat all that sugar.
NOTE: Imperial Organic Liquid Yeast pouches contain 200 billion cells, which is twice the number of cells from most suppliers. We’re not sponsored, just wanted to point out that not all yeast suppliers are the same.
Can you make a yeast starter with dry yeast?
Yes! And you should. But the reason some resources will tell you not to is because dry yeast is cheap enough to pitch a few packets. And with the time involved to make a starter, it might just be easier to buy another packet.

The Benefits of Making a Yeast Starter
- A high-quality starter means a fast start and a quick finish in the fermenter. Quick fermentation will give you cleaner-tasting beer with fewer esters, phenols, and other chemical byproducts of yeast metabolism that can ruin flavor once your wort’s in the fermentation chamber.
- Healthy, strong yeast give you a crisper, drier beer, with on-target attenuation and less chance of stuck fermentation.
- Too much osmotic pressure can put your yeast under stress, altering its metabolism. To avoid potential problems, keep a close eye on the specific gravity of your starter. Use a hydrometer for optimal accuracy, and keep the specific gravity in the range of 1.030–1.040.
- Oxygen is also critical to yeast growth. For most strains, 8–12 parts per million (ppm) of oxygen is ideal. And because boiling liquids causes oxygen loss through evaporation, make sure you aerate your wort before adding the yeast. For a small starter, vigorous shaking should do the trick. For regular yeast starters, use an aerator to boost oxygen levels.
- Temperature can also affect how quickly your yeast replicate. Keep your starter at 70°F–75°F (21°C–24°C) for best results.
Why are you playing things cool? It’s all about protecting your adaptable but sensitive yeast. Anytime you toss yeast into an environment that’s too different from its current state, you’re going to have some stressed, underperforming, or even dead microbes.
If you pitch a warm starter into cool wort, you can actually shock the yeast and put them to sleep, slowing fermentation. You’ll have much better success with cold pitching, or pouring the starter straight from the refrigerator into wort that’s already been cooled to a few degrees below the optimum fermentation temperature for the yeast strain you’re using.
Here’s the Wind-Up … And the Pitch
After nabbing some happy and efficient yeast, you’ll need to calculate your pitching rate, or the approximate number of yeast cells required to ferment your batch of wort.
Pitching rates will vary based your wort’s specific gravity, which is based at least in part on the the beer style you’re brewing.
Note: This does require a bit of calculation, so if you’re not mad for math, you can use an online calculator and skip to the next section.
Pitching rates are usually given in terms of number of cells per milliliter or liters per degree Plato (mL/°P or L/°P). Each degree Plato is equivalent to 4 gravity points of specific gravity.
Let’s say a particular beer style calls for a pitching rate of 1,000,000 (1 million) cells/mL/°P. We can simplify that to 1,000,000,000 (1 billion) cells/L/°P. The wort has a specific gravity of 1.040, or 10°P (.40 = 4 points × 10).
Your average batch of homebrew is 5 gallons, or 19 L.
So, applying our rate of 1 billion cells/L/°P, and our specific gravity of 1.040 (10°P) we get:
19 × 1 billion cells/L/°P = 19 billion cells
19 billion cells × 10°P = 190 billion cells
We need around 190 billion yeast cells to ferment 5 gal. (20 L) of wort at a specific gravity of 1.040.
In calculating your pitching range, remember they’re usually given as a range rather than an absolute value. Different styles have different sweet spots, so it’s important to do your homework and experiment until you find the right range for the beer you’re brewing.
If you want a lighter beer, you’ll pitch toward the lower end, which can result in a higher initial growth rate and more by-products of yeast metabolism, such as esters and phenols. If you’re brewing a wheat-based beer like a Hefeweizen, that can be a good thing.
If your goal is a heavier beer, you’ll probably pitch toward the upper end of the range, which will give you a clean-tasting brew with a less-fermented character, ideal for lagers.
Ready to improve your all-grain brewing process and dial in your system?
This video course covers techniques and processes for water chemistry, yeast health, mashing, fermentation temperature, dry-hopping, zero-oxygen packaging and more!
Click Here to Learn More
Starter Size: How Big is Big Enough?
Yeast is a living organism, and it needs enough food to grow and reproduce. If your starter is too small, your yeast have less room for growth because they use up the available nutrients too quickly.
Don’t break out the ten-gallon bucket just yet, though. A yeast starter that’s too big can overwhelm and stress your yeast, reducing performance.
Your yeast starter size is determined by how many cells you want to begin with, and how many you ultimately need for the particular beer you’re making.
You might’ve heard that .26 gal. (1 L) is the ideal size for a starter made with a packet of liquid yeast. But this one-size-fits-all approach isn’t exactly optimal. Depending on your goals, you might need .53 gal. (2 L)—or more—of starter for a 5 gal. (19 L) batch, assuming you start with a package of liquid yeast containing around 100 billion cells.
Brewing a high-gravity beer or a big batch? You’ll definitely need more yeast.
Also, growth rate is a function of starter size.
Let’s say you have a package of liquid yeast that contains 60–120 billion cells. Putting that into a .26 gal. (1 L) starter can double your yeast count in a day or so. But if you make a .53 gal. (2 L) starter, you’ll end up with around 2.5 times the number of cells you started with. Adding the packet to a .79 gal. (3 L) starter will triple the number of yeast, and so on.
As with pitching rates, your fastest and most convenient option is to use an online calculator to give you maximum precision when establishing your yeast starter size.
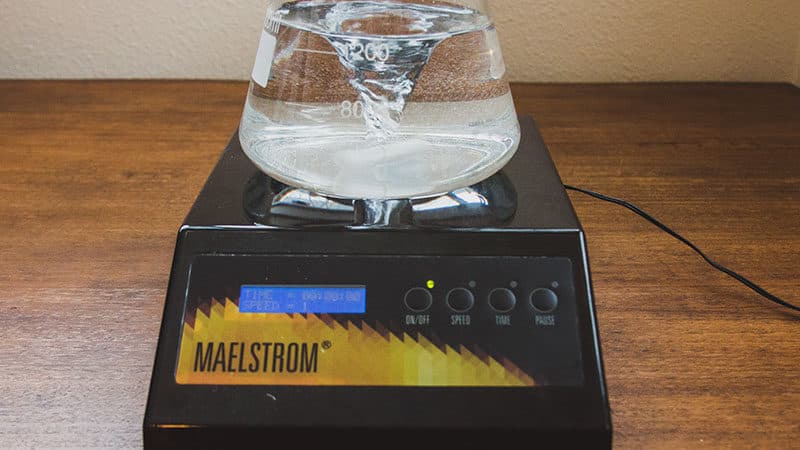
Shaken, or Stirred? Rousing vs. Stir Plates
If you’re not keen on investing in extra equipment, or don’t feel like building a stir plate yourself, you can rouse (shake) your yeast regularly to encourage aeration. Both methods can help improve the quality of your yeast, and therefore your beer.
But a yeast starter stir plate can effectively double the number of yeast produced compared to rousing.
Why? Because a stir plate effectively suspends the yeast in a constantly swirling environment where oxygen is freely available, and the waste products they produce (including CO2) are carried away. With maximum available oxygen and plenty of room, the yeast have a much better environment for multiplying.
Occasional shaking will still improve your yeast yield over no starter at all, but a stir plate is the way to go.
Jane, Stop This Crazy Thing
Can you over-spin your yeast? Well, unless you’re firing up a CERN-style centrifuge, a gentle spin is all you really need. Your stir plate probably isn’t packing enough power to create the kind of forces that stress yeast in an industrial brewing environment, but a little caution can’t hurt.
Your goal is to increase the available space for the exchange of gases—specifically, the release of CO2 and the increased suspension of oxygen. More oxygen means better health for your yeast, and a greater number in your starter. You can accomplish this at relatively low speeds.
A huge whirling vortex that touches or envelops your stir bar might look cool, but it increases the chances your stir plate will “throw” the bar, leaving you with a starter that’s going nowhere.
Low and Slow is the Tempo
How long should you stir your starter? The rule of thumb is 12–24 hours. Suspended as they are in the swirling solution, your yeast will gobble up the oxygen on offer and use it to reproduce. The swirling motion also discourages the yeast from flocculating, or clumping up and settling to the bottom of the flask.
Your results may vary, and of course the number of yeast required will affect how long you let your starter whirl and swirl. But overall, a slow, steady stir for a day or less will produce a top-notch starter.
How to Make a Yeast Starter from a Liquid Yeast Packet
You know the theory. You’ve found your yeast. Gentlebrewers, start your, er, yeastin’.
Note: To give your yeast time to reach their peak potential, make your starter one or two days before brew day.
To make your yeast starter, you’ll need:
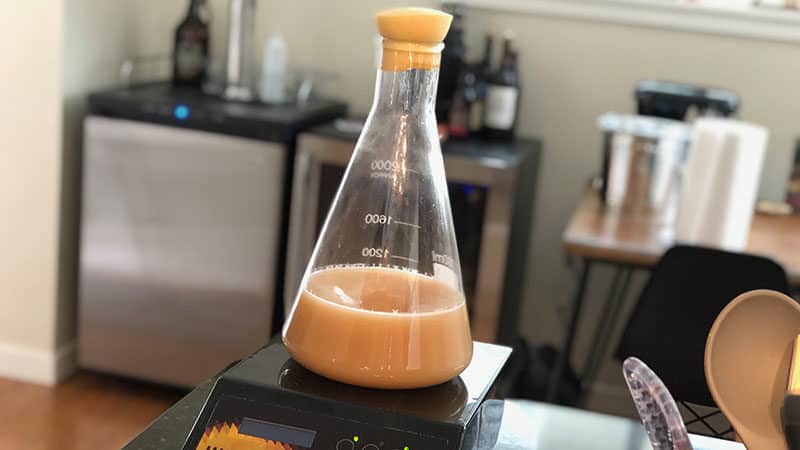
- Flash, large enough for your starter plus ample headspace. For example, a 1.1 gal. (4 L) flask is ideal for a .53 gal. ( 2 L) starter.
- 4-quart saucepan
- Funnel
- Foil or a foam stopper. Don’t use a bung and airlock.
- Flash weight (optional)
- Stir plate with stir bar (optional)
- Dry Malt Extract (Light DME)
- Fermaid
- 1 package of yeast
Note: If you’re using yeast with an inner nutrient packet, take it out of the fridge about four days before brew day, and burst it by squeezing the inner packet. Shake it up and let it rest overnight in a warm place until the packet has fully swollen.
Making Packaged Yeast Starter
To make the starter, add 2 cups (7 oz., or 200 g) of Light DME to .53 gal. (2 L) of water in a saucepan with enough room.
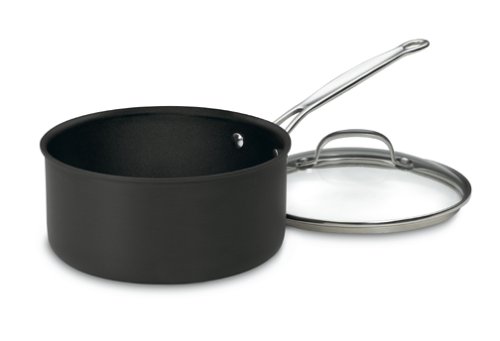
This is the perfect 1-gallon saucepan (that we tested) big enough to heat up priming sugar and boiling dry malt extract for yeast starters. It includes a spout on both sides so you can pour easily with the lid still on!
Note: If you’re using a gas stove or burner, you can also boil your starter directly in the flask, although a separate saucepan with enough head space helps you avoid boilovers. For safety reasons, never boil your flask on an electric stove or burner.
Boil for ten minutes, stirring regularly.
If you’re using a separate container to boil your wort, clean and sanitize your flask while you’re boiling your wort. For added insurance, you can put the flask in the oven at 250°F (121°C) for an hour with a piece of foil over the mouth of the flask. Since you only boil your wort for ten minutes, you’ll need to complete this step and allow your flask to cool before you begin your boil.
Put the lid on the pot during the last few minutes of the boil in order to sanitize the lid. Be careful of boilovers.
After the boil is finished, add ⅛ tsp. (.17 oz., or 4.8 g) of yeast nutrients to the mixture.
Move your flask to the sink. Using a funnel, pour the hot wort into the flask. If you’re using a stir bar, add it now to sanitize it.
Submerge the flask in the ice water bath, and cover the mouth with sanitized foil. Add a weight, if you’re using one, to keep the flask bottom submerged in the bath.
Using an oven mitt, swirl the flask, swishing the wort so it cools to 65°F–75°F (18°C–24°C).
Once the wort is cool, sanitize the outside of the yeast package and pour the yeast into the flask. Swirl to combine.
If you’re using a stir plate, put the flask on the plate and turn it on. Put the whole thing on a safe, sturdy surface, out of direct sunlight. Keep it at a steady temperature of 70°F–75°F (20°C–24°C).
If you’re not using a stir plate, make sure the flask is tightly covered and shake it vigorously for about a minute. For the next day or two, give the starter a periodic swirl. Use a gentle touch, because the starter can foam up and out of the flask if you swirl it too vigorously after fermentation has begun.
Note: For larger batches or high-gravity worts, you can repeat this process until you’ve collected enough yeast to pitch.
How to Make a Yeast Starter from Bottle Conditioned Craft Beer
If you’ve already brewed up some of your favorite beer, there’s no need to go shopping for yeast. You’ve got some tiny, trusted friends on hand who’re champing at the bit to make even more delicious beer for you.
Note:Your starter size will be smaller than with packaged yeast. Also, the specific gravity of your wort should be relatively low (around 1.020) because higher-gravity wort will overtax the yeast cells.
You’ll need the same equipment as with a packaged yeast starter. But instead of a fresh package of liquid yeast, you’ll need 2–3 bottles of bottle-conditioned or unfiltered, canned craft beer.
Making Bottled Beer Yeast Starter
Prepare an ice bath to cool your wort, ideally in a sink or steel tub.
To make the starter, add 1 tsp. (.7 oz., or 20 g) DME to 2 cups (16 oz. or 473 ml) water in a pot and swirl to combine. Your starting gravity should be around 1.020.
Boil for ten minutes. Stir frequently.
If you’re using a separate pot, clean and sanitize your flask while your wort is boiling. You can put the flask in the oven at 250°F (121°C) for an hour with a piece of foil over the mouth of the flask to help ensure it’s fully sterilized. Complete this step and allow your flask to cool before you begin your boil.
Sanitize the pot lid by adding it during the last few minutes of the boil. Watch out for boilovers.
After the boil is finished, add ⅛ tsp. (.17 oz., or 4.8 g) of fermaid to the mixture.
Move your flask to the sink and, using a funnel, pour the hot wort into the flask. If you’re using a stir bar, add it now to sanitize it.
Submerge the flask in the ice water bath. Cover the mouth of the flask with sanitized foil. If you’re using a weight, add it now to keep the flask submerged.
Using an oven mitt, swirl the flask, swishing the wort so it cools to 65°F–75°F (18°C–24°C).
While the wort is cooling, sanitize the bottle tops and cover them with sanitized foil.
When wort has cooled to 65°F–75°F (18°C–24°C), remove the foil from bottles.
Swirl the bottles to create a slurry, and then carefully decant the yeast from the bottles directly into the wort.
If you’re using a stir plate, add your flask and turn it on. Keep your starter out of direct sunlight, and keep it in the range of 70°F-75°F (20°C–24°C).
After 12–18 hours have elapsed, turn off the stir plate. This will give the yeast time to propagate before you pitch it.
After 24–48 hours, you should see the yeast settle out, and propagation will be complete.
If you’re not using a stir plate, shake the flask vigorously for about a minute. Over the next 12–18 hours, swirl it frequently. Don’t get too enthusiastic, since over-swirling can cause the starter to foam over.
Once 12–18 hours have passed, let the starter rest so it can propagate.
In order to reach the number of yeast needed to ferment your brew, you’ll probably want to make at least one more batch of starter wort.
For the second batch, use 2 cups (7 oz., or 200 g) DME to .53 gal. (2 L) of water. Aim for a specific gravity of 1.030–1.040.
Boil the wort, then add a pinch of complete yeast nutrients and cool as with the previous batch.
Add the second batch to your first batch of yeast starter and either return it to your stir plate or give it a good swirl. Let the starter stir on the plate for 12–18 hours, or swirl periodically during the same if you’re not using a stir plate. Let your starter rest as with the first batch.

When to Pitch Your Yeast Starter
When it’s at peak fermentation—also known as high Kraüsen—your yeast starter is ready to pitch. Depending on the temperature, size, and pitch rate, this usually happens 24–48 hours after you create the starter.
If you decide to let the yeast settle, your starter will still good for pitching for up to two days after the yeast settles. But if you wait longer, you may need to replenish the starter, since your yeast may have used up their nutrition reserves.
Replenishing your starter is easy. Simply make another batch of wort, then add it to your starter and allow it to ferment again before pitching.
Cool your wort in the fridge, and either pitch the full starter directly into your wort or decant it—i.e., transfer the wort it to another container, leaving the yeast behind—and then pitch.
Decanting vs. Adding The Whole Starter
When your yeast are ready to pitch, you can simply pour the whole shebang into your wort with minimal impact to the final beer.
But you might want to take a different route if you’re brewing a very light-bodied beer, or you’re using a large starter. This is especially true if you’re concerned about the starter wort altering the flavor or original gravity of your beer. To avoid potential issues, you can decant the starter into another container before pitching.
Decanting is easy to do. When your yeast starter is finished fermenting, pop it in the fridge overnight and let the yeast settle to the bottom. When you’re ready to pitch your yeast, pour off most of the wort into another container. Make sure to leave the layer of yeast at the bottom.
The tiny bit of remaining wort isn’t going to hurt your beer, and ensures all of your yeast make it into the batch so they can do their job.
Let’s Get This Party Started!
Making the perfect yeast starter for your beer doesn’t require a degree in biochemistry. And whether you use prepackaged yeast or gather your own, you can get better fermentation and hit your gravity targets more easily with a high-quality starter.
All it takes is a basic understanding of yeast health and behavior, the right gear, and a little math. You’re ready to create a yeast starter that’s the beginning of some truly beautiful beer.
Happy Brewing!