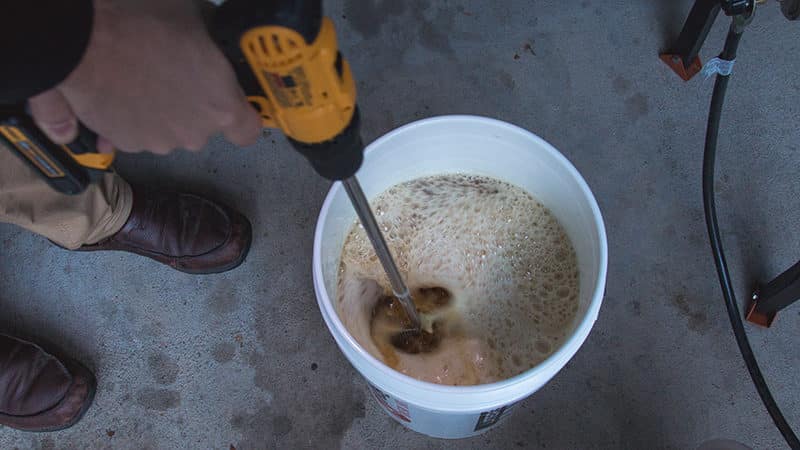
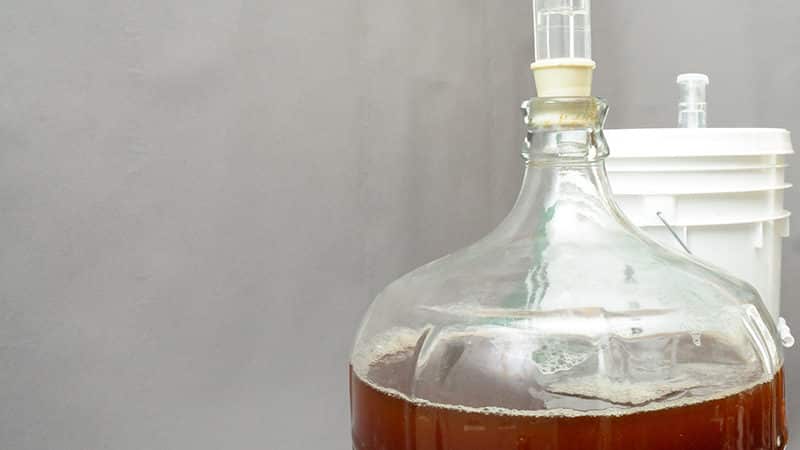
You’ve done the hard work of mashing, and boiling your beer, and now it’s ready to visit the fermentation chamber. Whether you use a carboy, a bucket, or a conical fermenter, regulating the heat and light that reach your homebrew while it ferments is critical. Fermentation temperature can have a powerful effect on the flavor, gravity, and clarity of your finished beer.
As with many other parts of the homebrewing hobby, crafting the right fermentation chamber for you is limited only by your budget, resources, and imagination. That said, the best fermentation chambers, from basic to advanced, include temperature and light management for your homebrew as the yeast inside transform your wort into delicious beer, so you have several options to choose from.
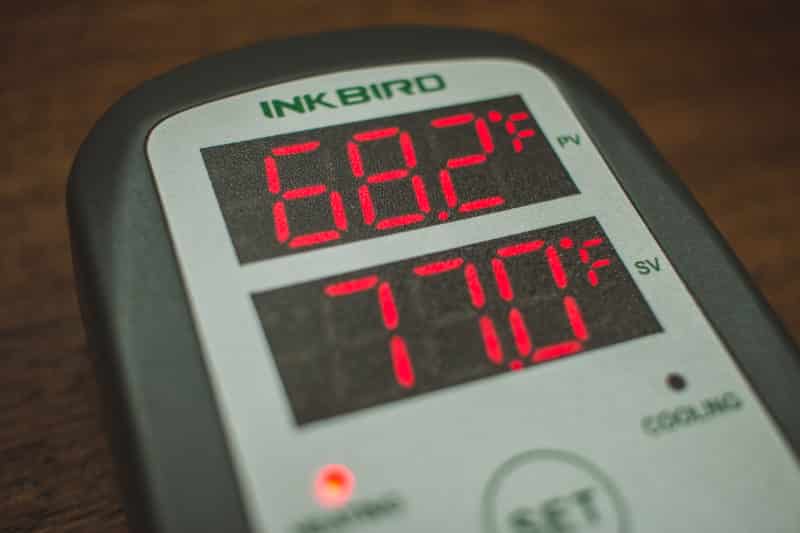
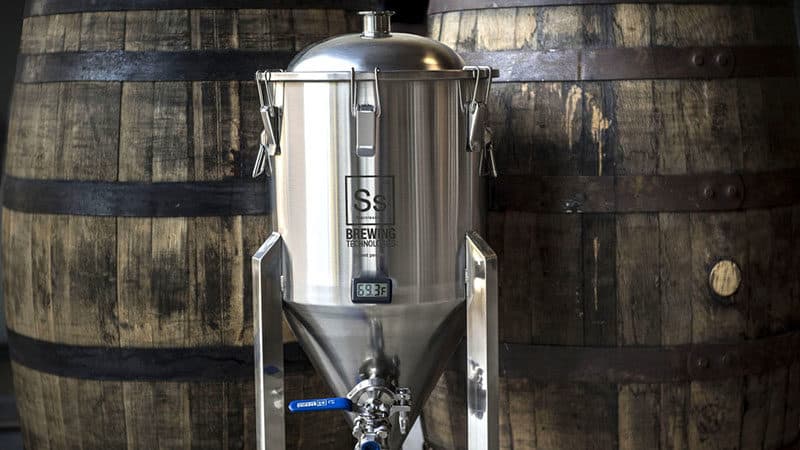
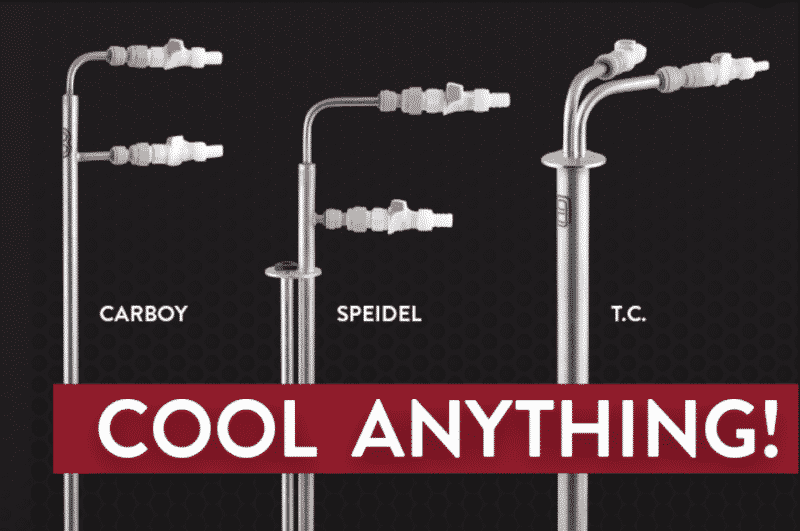
NOTE: Pictured above is the Inkbird digital temperature controller that we recommend using to read and control the internal temperature of a modified fridge or chest freezer.
Why Fermentation Temperature and Light Control Matter
Yeast are very sensitive to temperature, and different strains have different ideal working temperatures for fermenting their associated beer varieties. They need conditions to be just right in order to produce the expected results.
For example, when fermenting ale, the ideal fermentation temperatures fall in the 68°F–72°F (20°C–22°C) range. Meanwhile, lager has a much cooler ideal zone of 45°F–55°F (7°C–13°C).
It’s important to keep in mind that the task of transforming the sugars in your wort into alcohol and other beer components is an exothermic, or heat-generating, process. A 5-gallon (19-liter) batch of beer can be warmed by as much as 10°F–15°F (6°C–8°C) by fermentation alone. And while some heat is necessary for fermentation to occur, you also want to avoid a few pitfalls.
1. Fusel Alcohols
High temperatures encourage the yeast to produce compounds known as fusel alcohols, a term that comes from the German for bad liquor. These particular alcohols are heavier than ethanol, the alcohol you actually want in your beer. They can produce harsh or even solvent-like flavors. Not exactly what you’re going for in your homebrew.
2. Esters
Higher temperatures also push yeast to produce fruity alcohols known as esters. This isn’t necessarily a good thing, since too many esters can leave you with a brew that tastes more like a banana than a beer. Ales benefit from esters to varying degrees, but if you’re after a clean, crisp lager, you want to keep them to a minimum.
3. Diacetyl
Known for giving beer a buttery blast of flavor, diacetyl can also be produced in excess if your fermenting homebrew gets too warm. A good diacetyl rest can help the yeast clean up some of these compounds.
But if the temperature is too high during primary fermentation, the yeast might produce more diacetyl than they can clean up during the rest, leaving you with a dairy-fied disaster.
4. Yeast-Killing Cold Temperatures
On the other end of the spectrum, a fermentation that’s too cold can result in sluggish yeast that aren’t up to the task they’ve been given. They could drop out of suspension and fail to complete the fermentation altogether.
Temperature fluctuations are the enemy of good beer. Inside a properly regulated fermentation chamber, your homebrew stays at a consistent temperature, and you reduce the risk of under- or over-fermentation. This is especially important during the first 72 hours of fermentation when yeast are doing the lion’s share of the work needed to turn your wort into beer.
5. UV Exposure
Keeping your homebrew out of the light, particularly sunlight, is crucial to hitting your target flavor, finish, and gravity. Not only does sunlight add heat, but the UV light it contains causes hopped beers to develop a skunky flavor only Pepé Le Pew could love.
Natural Temperatures and Brewing With the Seasons
Humans have been enjoying beer for more than 5,000 years. Since nobody but stranded time travelers had refrigerators in the early days of beer, brewers learned to craft their creations with the seasons. They also learned to ferment their beer in the cold, shadowy recesses of caves.
You probably don’t live in a cave, but you can assist the fermentation process by taking advantage of the seasons and natural shadows.
Does the area where you live have very distinct seasons, with long periods of hot and cold? Consider brewing lagers in the cold season and ales when it warms up. Depending on how hot your summers get, you may want to skip brewing during the dog days altogether.
Ready to improve your all-grain brewing process and dial in your system?
This video course covers techniques and processes for water chemistry, yeast health, mashing, fermentation temperature, dry-hopping, zero-oxygen packaging and more!
Click Here to Learn More
What Makes the Best Fermentation Chambers
The best fermentation chambers all share four common features:
- A method of adjusting and maintaining temperatures, either manually or automatically
- Insulation against external temperature fluctuations and light exposure
- An easy way to monitor the temperature of the fermenting brew
- Adequate room for the fermenter and temperature adjustment equipment
The best fermentation chambers provide a wide variety of options, making it easy for you to find a solution that fits your budget, available space, and brewing goals.
Easy Ways To Make A Fermentation Chamber
1. A Naturally Cool, Dark Room
All you really need to create a successful basic fermentation chamber is a cool, dark place that provides easy access to your homebrew and is easy to clean up in the event of spills. While this is the least consistent option for regulating temperature, it’s arguably the easiest.
Turning a small part of your home into an impromptu fermentation chamber is ideal if you’re pressed for space, don’t have a large homebrewing budget, or only brew with the seasons.
Supplies you’ll need:
- A stick-on thermometer that will let you keep an eye on your beer’s temperature as it ferments.
- An electric blanket, insulated pads, or a warming wrap if you need to warm your fermenter.
- Wet towels and reusable freezer packs if you’re looking to cool your fermenter. Place a few reusable freezer packs or bags of ice between the wet towels to provide additional cooling as the water evaporates.

Find a spot in your home, apartment, or garage that’s cool or warm enough for your yeast to stay in their target range and stash your homebrew out of the light. Leave your homebrew in place as long as possible, since moving the fermenter can disturb the sediment at the bottom.
2. Swamp Cooler
Despite its name, this handy little fermentation chamber is not a frozen monster from a B movie. It’s just a little more advanced than simply stashing your homebrew in a cool, dark place.
The basic idea is to control the temperature of your fermenting beer by submerging it in a larger vessel full of ice water.
Supplies you’ll need:
- A large stainless steel tub, cooler, bucket or bin for submerging your brew. You can also add a wet piece of fabric, such as an old T-shirt or a towel, on top of the vessel to provide extra cooling through evaporation.
- An electric fan. If you really need to cool down your brew, you can further boost cooling by pointing an electric fan at the swamp cooler to promote even faster evaporation.
- A stick-on thermometer to check your brew’s temperature as it ferments.
- Lots of ice or ice packs.

Simply place your fermenter in the swamp cooler, fill it with water to the beer line, and surround it with ice packs. Take a temperature reading after an hour, then every few hours after. Add or swap ice packs as necessary to keep your homebrew in the right temperature range for your yeast.
One caveat for this particular fermentation chamber design is that it needs constant attention. This is particularly important if you’re brewing a lager, or the ambient temperature is high.
3. Son of Fermentation Chiller
Another fermentation chamber with a whimsical name, the Son of Fermentation Chiller has achieved almost mythical status in the homebrewing community. First designed by homebrewer Ken Schwartz in 1995, Son of Fermentation Chiller is a DIY fermentation chamber that uses everyday materials to provide easy and powerful temperature control.
The system is similar to the swamp cooler, but by adding insulation, a thermostat, and a fan, Son of Fermentation Chiller lets you regulate the temperature much more effectively than you can with a swamp cooler or ambient storage. You’ll still need to swap out ice, but much less frequently.
You can find plans for Ken’s updated version of his original design online. This fermentation chamber is a great balance between budget and convenience. However, some basic woodworking-type construction skills are required and Ken recommends that you do not use household current (120 VAC) as this could be a potential fire hazard.
You’ll likely find everything you need to assemble your own for less than $80. Better still, it can be adapted to suit just about any brew space, budget, and beer style.
4. Modified Fridge or Freezer Fermentation Chamber
Turning a fridge or freezer into a fermentation chamber is an easy DIY project and makes for an effective fermentation chamber. The materials and build are simple.
Supplies you’ll need:
- A chest freezer or fridge that’s at least 5 cubic feet.
- A digital temperature controller for reading and controlling the internal temperature of the freezer. It will automatically turn the freezer on and off to help you maintain the right temperature.
- A friend to help you move the darn thing.
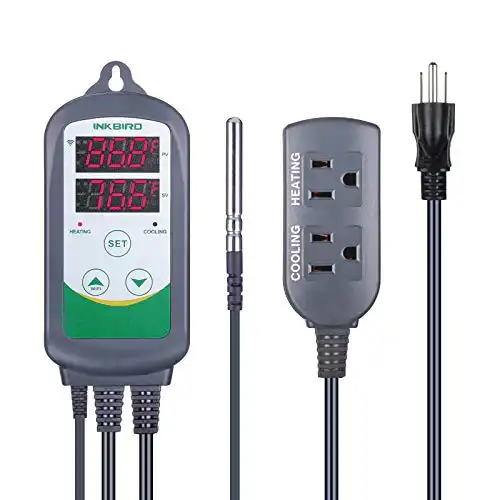
Simple, low-profile, easy-to-use temperature controller for keezers and kegerators. The built-in Wifi lets you adjust the temp from your smartphone or tablet wherever you are.
It’s easy to find plans for a basic freezer fermentation chamber online. The basic design is the same regardless of how much capacity you need. Plus, if you’re wise in the ways of how to keg homebrew, you can convert it to do double duty as a kegerator. Now that’s cool.
5. Conical Fermenters with Temperature Control
If you’re not the DIY sort, this all-in-one option makes up for its hefty price tag with utter simplicity. Made of stainless steel, temperature-controlled conical fermenters incorporate advanced temperature controls to keep your beer a steady temperature, hot or cold.
These units are great if you’re brewing a lot of beer at one time. They don’t require a special fermentation chamber for storage because they handle temperature control on their own. Some even let you adjust the temperature of your fermenting beer to the nearest degree.
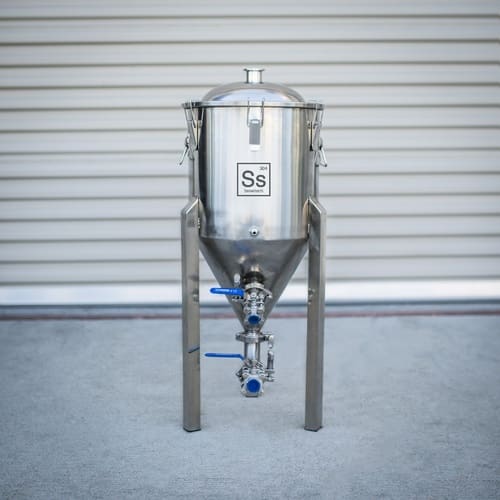
We recommend the Ss BrewTech Chronical Fermenter. Their weldless thermowell allows for easy temperature monitoring and control.
You need to make sure your fermentation vessel has a stainless steel coil that will allow you to pump ice water or glycol through. The pump is connected to a controller with a thermostat which will tell the pump when to turn on and off.
We highly recommend investing in a glycol chiller instead of using an ice water bath in a cooler. The main reason is you’ll have to either constantly add ice or bottles of ice to the cooler in order to keep the fermenter temperature in check. Otherwise, if you don’t, you risk your beer increasing in temperature and producing off flavors.
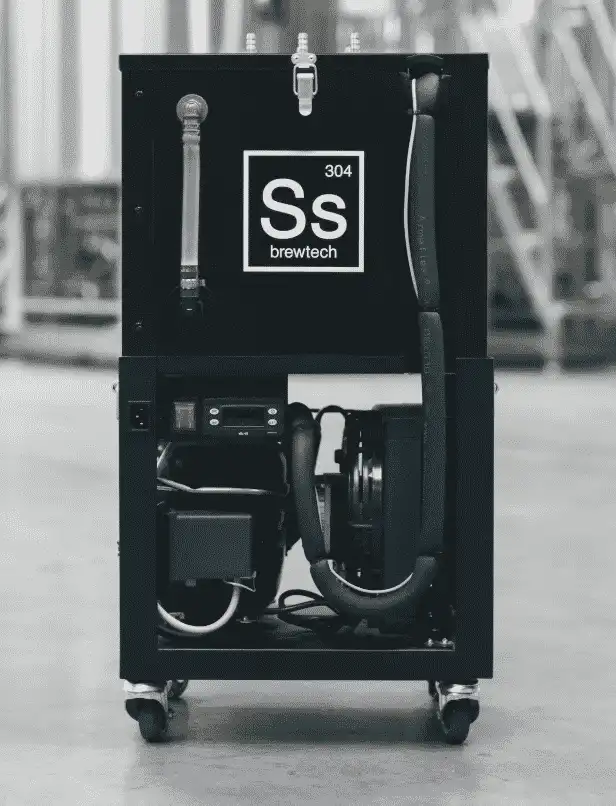
The Ss Glycol Chiller 1/5 HP maintains lager temps and enables crash cooling for up to 3 vessels even in relatively high ambient temperatures. Each FTSs kit includes its own dedicated temperature controller, pump, and tubing.
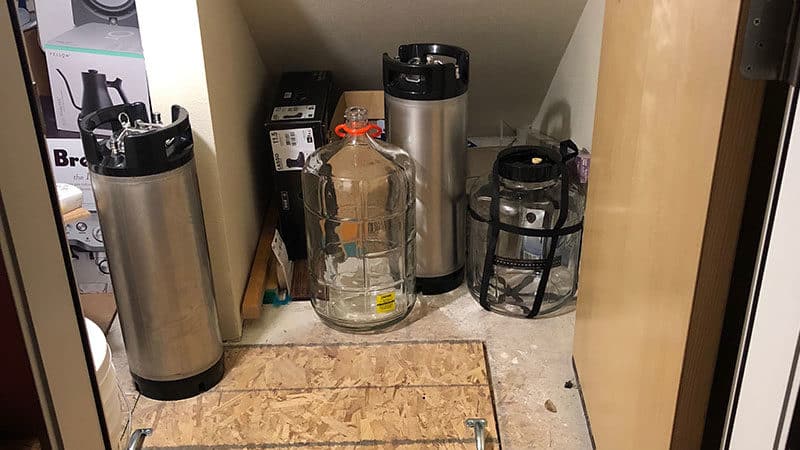
Still not ready to invest in a conical fermenter for your fermentation chamber needs? You can turn ANY fermentor into a self-contained temperature-controlled vessel with the invention of CoolStix by BrewBuilt. That means you can use your good ol’ carboys!
6. A Walk-In Cooler or Cold Room Fermentation Chamber
If you’re running out of room to ferment and store your various homebrewing creations, it might be time to go into This Old House mode and build a fermentation chamber that’s actually a chamber.
Yes, you could hire someone to install a room for you. But you can save on labor and gain some serious bragging rights by building a cold room yourself. All you really need is space, insulation, a good air conditioner, and some temperature control hardware and software.
As with the Son of Fermentation Chiller and modified freezer builds, you can find plans online that will walk you through every step of building a cold room.
To nobody’s surprise, this option is the most expensive way to create a fermentation chamber. However, you’ll have absolute control over your fermentation and storage temps. You’ll also be able to run taplines right from the chamber to the taps in your home bar, den, or garage-based pocket brewpub for extra convenience. The jealous awe of your friends is just a side benefit.
Get to Fermenting!
No matter which fermentation chamber you choose, adding this crucial component to your homebrewing setup will help you produce the best homebrew possible, and on a consistent basis.
By taking control of this key step in the fermentation process, you’ll keep funky flavors at bay, give your yeast a chance to do their best work, and produce beer that looks, smells, and, most importantly, tastes great.
Happy Brewing!