At its heart, the science of homebrewing is about using yeast to turn sugar into alcohol. And if you’re going to do it right, you’ll need to know how much sugar you have, how much alcohol it’s going to create, and how efficient your yeast are at the task. A hydrometer helps you measure and calculate important data so your finished beer will hit the targets you’ve set.
Using this basic brewing tool to get accurate readings is easy. All it takes is a little preparation, the right techniques, and an understanding of what a hydrometer is and how it works its specific magic.
What the Heck is a Hydrometer, Anyway?
Named for the Greek words for water (hydro) and measure (metron), a hydrometer is a simple piece of homebrewing equipment made for measuring specific gravity. The difference in density between pure water and another liquid, specific gravity is an important value when you’re brewing.
Your average brewing hydrometer looks a bit like a thermometer. It’s made of clear glass, with a narrow stem and a weighted bulb at the base, and is designed to float. The stem contains a scale indicating the specific gravity of the liquid it’s floating in.
If you get down to the nerdy nitty-gritty, hydrometers used for brewing are technically saccharometers. That’s because they measure comparative density based on sugar content, or saccharinity.
Hydrometers are calibrated for a specific pressure level and temperature. That generally means sea-level pressure of around 30 in. mercury (Hg) (760 mm Hg) and room temperature, or 59°F–68°F (15°C–20°C).
If it’s being used outside its calibrated range, a hydrometer’s accuracy will be affected. You might need to recalibrate or get another if you’re brewing up a batch of homebrew on top of Everest or in the middle of Death Valley, anywhere sea-level pressure is higher or lower than average.
While the specific gravity scale is widely used, your hydrometer might also have markers for other systems. For example, it could have an indicator for the Plato scale, which measures the concentration of extract in wort as a percentage by weight, in degrees Plato (°P). It might also have an indicator for the very similar Balling and Brix scales, which are used to calculate potential alcohol by volume (ABV) for your finished beer.
If your model only measures specific gravity, you can still calculate Plato, Brix, and ABV volumes by using an online calculator. Or, if you prefer to do the math yourself, you can use a few simple formulas. These formulas involve the specific gravity, or density difference compared to water, of your wort. The two readings you’ll worry about most often as a homebrewer are the original gravity (OG), or the specific gravity of your wort before fermentation, and the final gravity (FG), or the specific gravity of your wort after fermentation.
To find ABV:
(FG − OG) × 131.25 = ABV
To convert specific gravity into Plato (or Brix, or Balling):
((FG − OG) × 1000) − 1000 = °P
Specific Gravity in Homebrewing
Picture two glasses. One is full of fresh water. The other is full of wort from your latest batch of homebrew. Because the wort contains suspended sugars extracted from your grains during their time in the mash tun, it will have a different density than the water.
This difference is the wort’s specific gravity. The OG and FG gravity readings are especially important when you’re homebrewing. When everything works properly, the FG will be lower than the OG, because alcohol is less dense than both the sugar it replaces and the water in the wort.
For example, a stout might have an OG of 1.038, and an FG of 1.007. That means the wort was 3.8% denser than water to start out, but only .7% denser after fermentation.
Comparing these two values not only confirms that the yeast have done their job of converting sugars into alcohol, but how well they’ve done it. If your FG is still too high when you reach the end of your fermentation period, your ferment may have stalled.
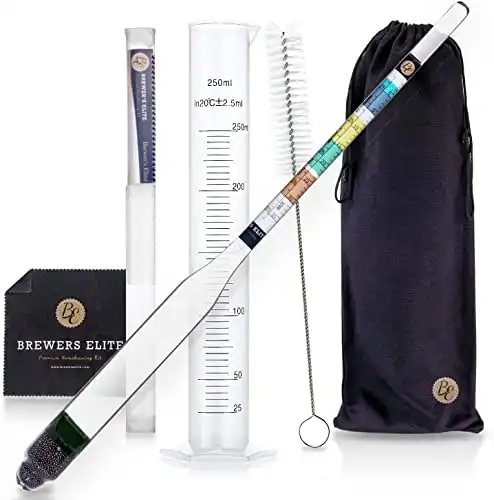
This Brewer's Elite Triple Scale Hydrometer & 250ml Test Jar - Combo Set is the perfect tool for any homebrewer. Our durable all-glass design makes it easy to read, and our graduated color bands help you know when your brew is ready. Plus, our Crystal clear fonts are so easy to read.
Ready to improve your all-grain brewing process and dial in your system?
This video course covers techniques and processes for water chemistry, yeast health, mashing, fermentation temperature, dry-hopping, zero-oxygen packaging and more!
Click Here to Learn More
How to Get a Hydrometer Reading
While you’re making a batch of homebrew, you’ll need to get two hydrometer readings. The first is the wort’s OG, which you’ll take just before pitching your yeast. The second is the wort’s FG, which you’ll take once all visible signs of fermentation have stopped.
One method is to insert the hydrometer into your wort right before pitching the yeast. Just be sure to sanitize the hydrometer and your hands. If you decide to wear gloves, sanitize those too.
Two things to keep in mind: If the wort is actively fermenting, all that activity will cause the hydrometer will move around too much to get an accurate reading. And if fermentation is complete, you risk oxidizing your beer by removing the lid to insert the hydrometer into the whole batch. For these reasons, we don’t recommend using this method.
Instead, we recommend taking samples via one of two methods.
Use a Wine Thief
Insert a sanitized wine thief into the wort to collect a sample. If you don’t have a wine thief, a sanitized turkey baster will also do the trick. Draw enough liquid for the hydrometer to float freely.
Transfer the sample to a container big enough to let the hydrometer float without touching the bottom or sides. We recommend a graduated cylinder to get both the depth and diameter you need.
Note: This method also introduces the risk of oxidation.
Use the Fermenter’s Spigot
This is our favorite method. Why? Because there’s no need to lift the lid, so there’s no risk of oxidation. Simply use the spigot to pull a sample into the graduated cylinder, and insert the hydrometer.
Important: Remember to sanitize the spigot after you pull samples.
Never return a sample to the fermenter. Instead, taste it, and give your palate a preview of the hoppy goodness to come.

Our recommended NO-RINSE brewing sanitizer (acid-based) of choice with easy measurement built in. Plus, the foaming action helps sanitize all the nooks and crannies. Don't fear the foam!
How to Read a Hydrometer Accurately
Place the unit into the sample and give it a whirl. Literally. A gentle spin will help the hydrometer center itself. If you’re using a narrow container, the device might cling to the side. If that’s the case, give it another spin and wait until it’s floating freely before you try to take a reading.
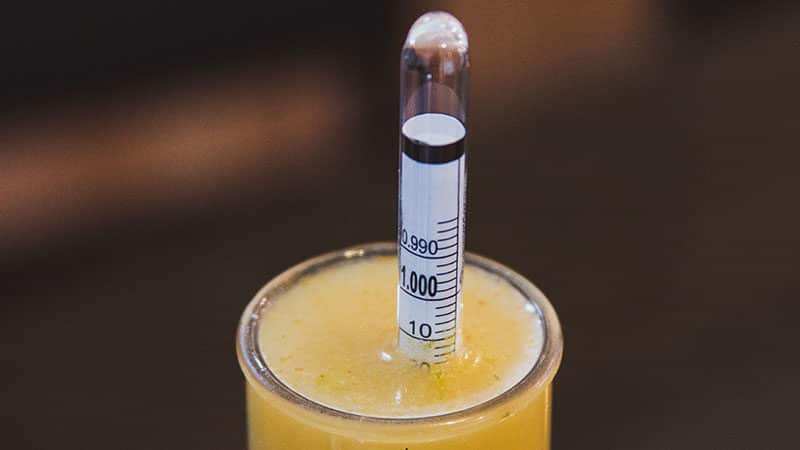
While it might seem that reading the hydrometer is as simple as eyeballing the point where it hits the surface of the wort, a little more care is necessary. Reading from that point might give you results that are higher than the actual specific gravity.
This Brewer's Elite Triple Scale Hydrometer & 250ml Test Jar - Combo Set is the perfect tool for any homebrewer. Our durable all-glass design makes it easy to read, and our graduated color bands help you know when your brew is ready. Plus, our Crystal clear fonts are so easy to read.
That’s because a hydrometer is read at what is known as the meniscus, or the curvature in the surface of the wort surrounding the stem. They form in every container, but they’re especially prominent in tall, narrow vessels like test tubes.
Take a careful look at the bottom point of the meniscus. That’s your true reading. It’s probably a few lines lower than the point where the liquid actually touches the hydrometer. Reading the meniscus at eye level ensures your reading is accurate.
Fine-Tuning Your Hydrometer
Chances are, detailed instructions for calibration were included with your particular model. But if you’re getting weird readings or working outside the recommended ranges for temperature and pressure, you can still get an accurate reading with a little tweaking and … gulp … math.
Calibration
If you suspect something’s out of whack, you can test the calibration with a glass of distilled water. Make sure the water is in the temperature range for your device, then drop in your hydrometer and give it a spin. Ideally, it will settle at a specific gravity of 1.000.
If it’s too high, you can gently file from the bottom of your hydrometer until it sits properly. If it’s too low, add a little clear nail polish to the top until it measures 1.000.
Alternatively, you can take note of the difference in your reading and add or subtract when you do a reading. For example, if your hydrometer is measuring specific gravity of 1.003 in distilled water, remember to subtract .003 from your wort readings to get the correct value.
Compensating for Temperature
Sometimes, you might find yourself brewing in temperatures outside the scope of your hydrometer’s calibration. Save yourself some time and aggravation and consult an online tool to compensate. Sure beats laying out the dough for another hydrometer, right?
Now Your Homebrew’s Sure to Measure Up
Forget the eye of the tiger. You’ve got the eye of the brewer, and no meniscus can defeat you. Armed with a well-calibrated hydrometer and the proper reading method, you’ll be able to test and tweak your homebrew with consistently delicious results that hit your targets for flavor, ABV, and finish.
Happy Brewing!