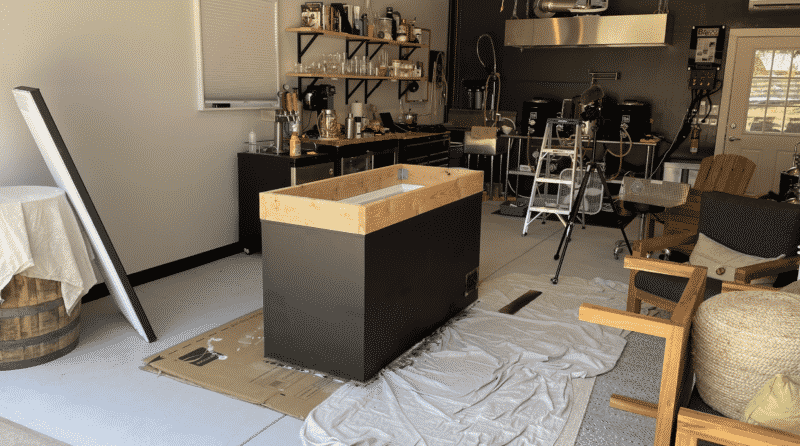
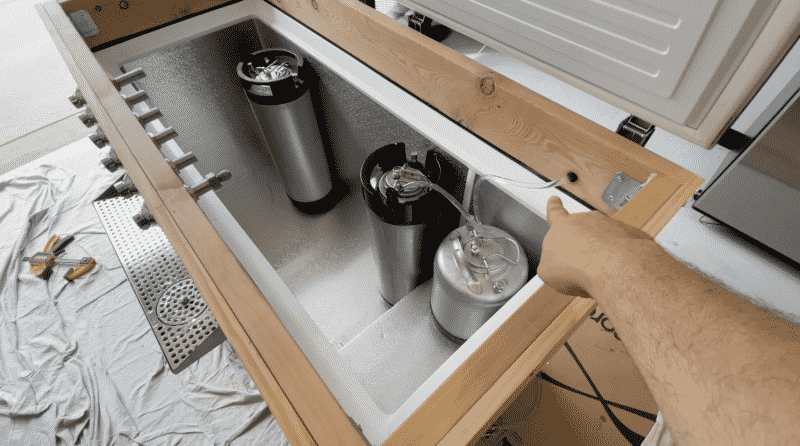
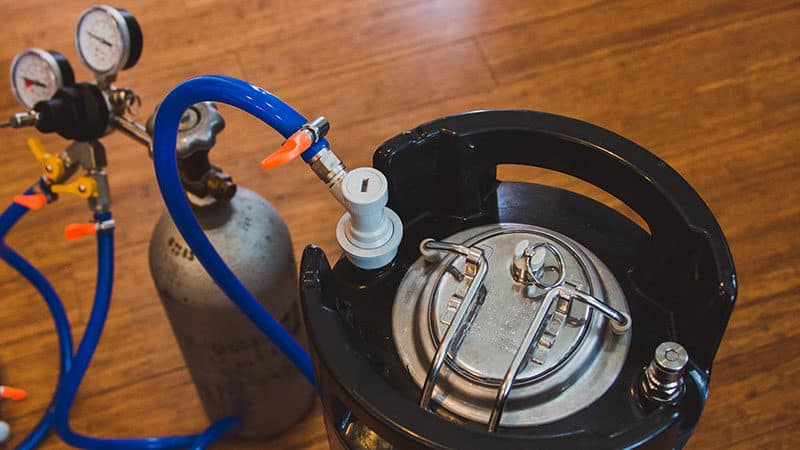
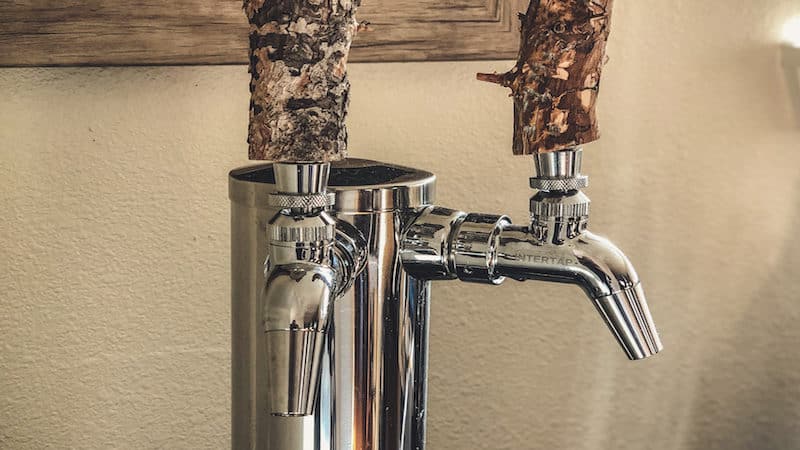
I wanted to expand the number of taps in my home brewery. I also wanted enough space for cold-conditioning kegs. And my friend convinced me to build a keezer.
Chest Freezer converted to a Kegerator = Keezer.
But truthfully, I never took woodshop classes and never had enough space to build something. That said, after putting together this keezer myself, I’m 100% confident that literally, ANYONE can do this.
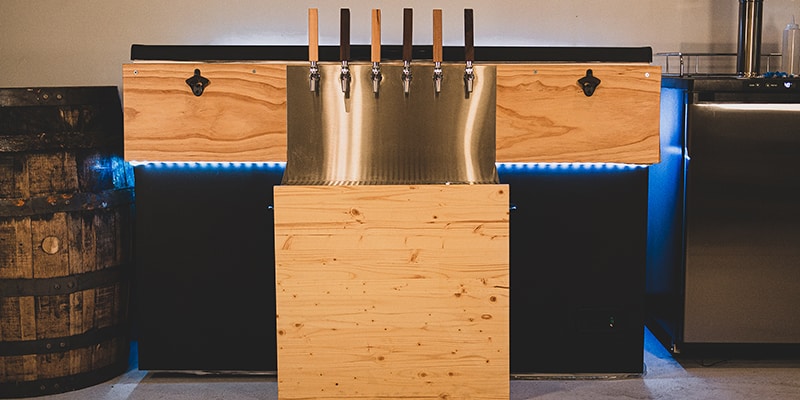
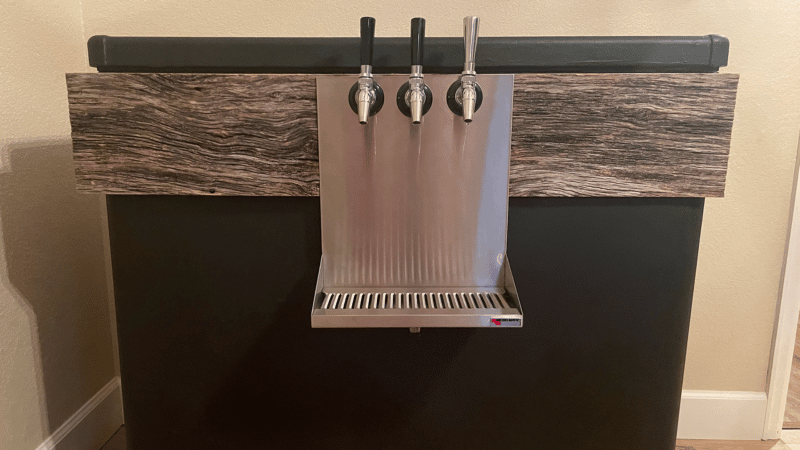
Here’s a picture of my Keezer as proof 👇.
The following article is a DIY guide to planning, sourcing, and building your own keezer. The build includes a 15 cubic foot matte black keezer with 6 beer taps, a glass rinser, and LED lighting.
But first, I invite you to watch this video I made on the entire keezer build process with a twist. If you’re already seen it, feel free to continue.
Step 1: Planning Your Keezer Build
I consumed every article and video I could find about building a keezer. And I made a list of key features I wanted:
- Large enough to serve six beers and cold condition at least one keg.
- Perlick Beer Faucets/Taps that are easy to clean.
- A real drain port. Not JUST a try I have to keep emptying.
- Glass rinser. This is something I’ve always wanted.
- The ability to pressurize kegs at different levels. Including a dedicated gas line for burst carbonation.
- House a large CO2 tank I don’t have to refill as often. And big enough to supply 10 kegs.
- Lights!
Another added benefit is I can use the keezer as a fermentation chamber. Mainly for cold-conditioning lagers or cold-crashing a finished beer.
The Reusable Keezer Collar
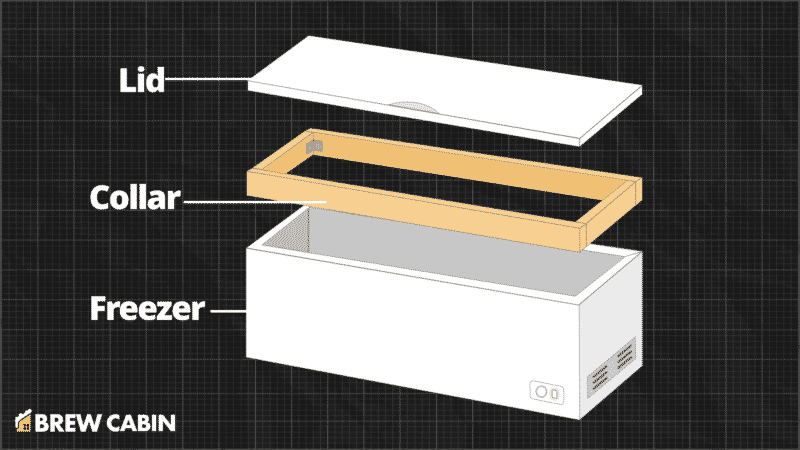
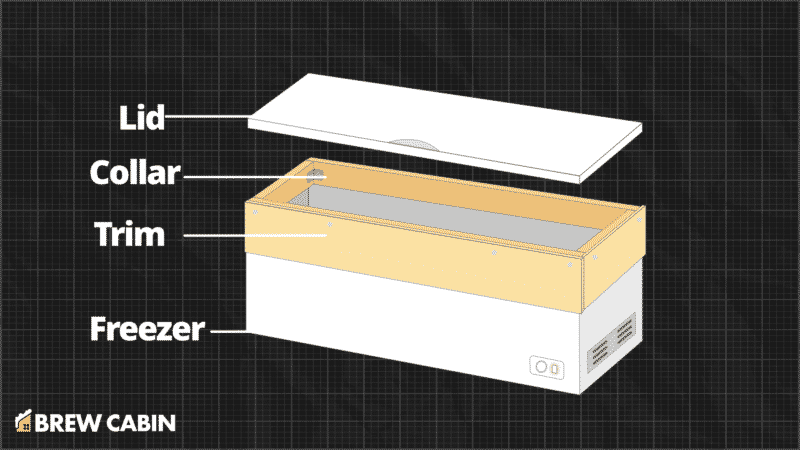
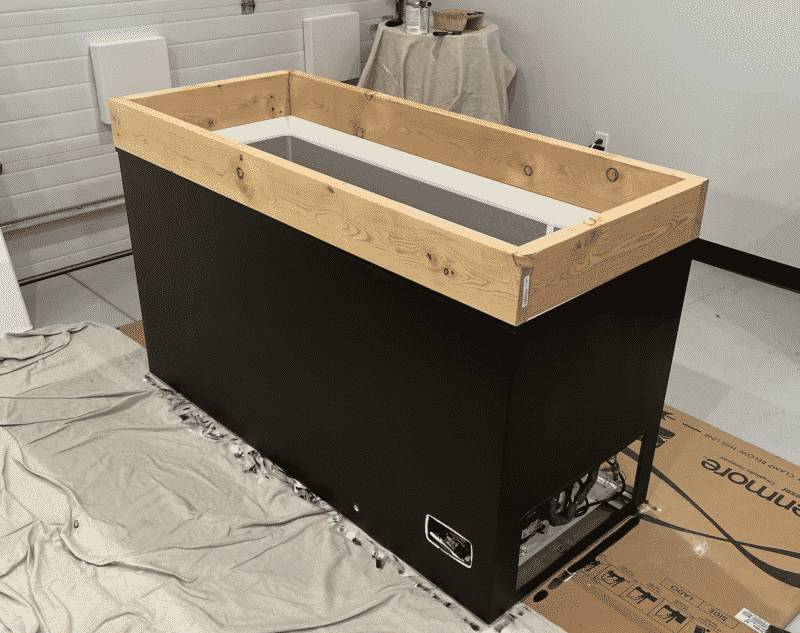
One step in building a keezer is adding a wood collar. The idea is to remove the chest freezer lid and build a rectangle wood collar on top of the freezer. Then, reattach the lid on top of the collar. See the diagram below.
Why build a wooden collar? Because you can’t drill holes in a chest freezer for your beer faucets. Refrigerant lines are running throughout the sides of the freezer. And if you puncture one, you’ve destroyed it.
The wood collar allows you to drill holes for your faucet shanks without hitting refrigerant lines. It also adds a nice height to your kegerator.
However, I also noticed a lot of homebrewers gluing the wood collar to the freezer. I don’t like this idea. What happens when the freezer craps out? I gotta build a new collar? No thanks.
This build doesn’t require any glue (like Liquid Nails). Instead, I took ideas from brewers who crafted the collar heavy enough to stay in place without gluing it down.
On top of that, you can build a wood keezer collar without a saw or expensive woodworking tools.
Tools You Need to Build The Keezer
Here are the ONLY tools I needed for this project.
NOTE: The following are affiliate links. We earn a commission at no additional cost if you click a link and purchase. It helps us keep the lights on 💡.
- Power Drill – One powerful enough for a hole saw for the beer faucet shanks. And to screw into wood. Which I think is most power drills.
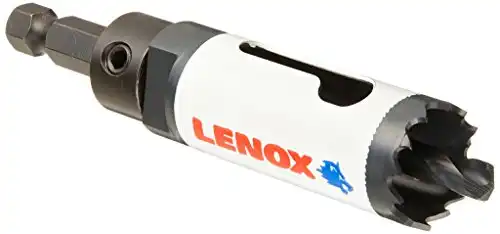
- Hole Saw – For drilling the holes for the faucet shanks through the wood collar.
- Orbital Sander – In this project I used just a regular hand sander. Boy did I wish I had this power tool though.
- Shop-Vac – for removing sawdust and other dust from sanding.
- Work Gloves – These are the ones I use for homebrewing too.
- Trigger Clamps – This came in handy when I installed the facial trim board and drip tray.
I also needed basic tools like screwdrivers, pliers, and a tape measure. On top of that, since I painted my chest freezer, I got basic paint supplies like a foam roller, paint tray, drop cloth, and other safety gear.
Sourcing Keezer Parts
All the keezer build parts were found at a big hardware store (Home Depot or Lowe’s) or Amazon. The only exception is the CO2 tank I found at a welding supply store.
The Chest Freezer
First, I needed a chest freezer that was big enough to hold at least seven corny kegs. So I found this helpful post on Homebrew Talk to get started showing the size of different chest freezers and how many homebrew kegs they’d hold.
But instead, I just measured the width of one of my corny kegs and did the math based on the dimensions of different freezers I found online. I also wanted my Keezer to be black. But after searching far and wide for a factory black chest freezer, there just wasn’t one big enough and under $1,000.
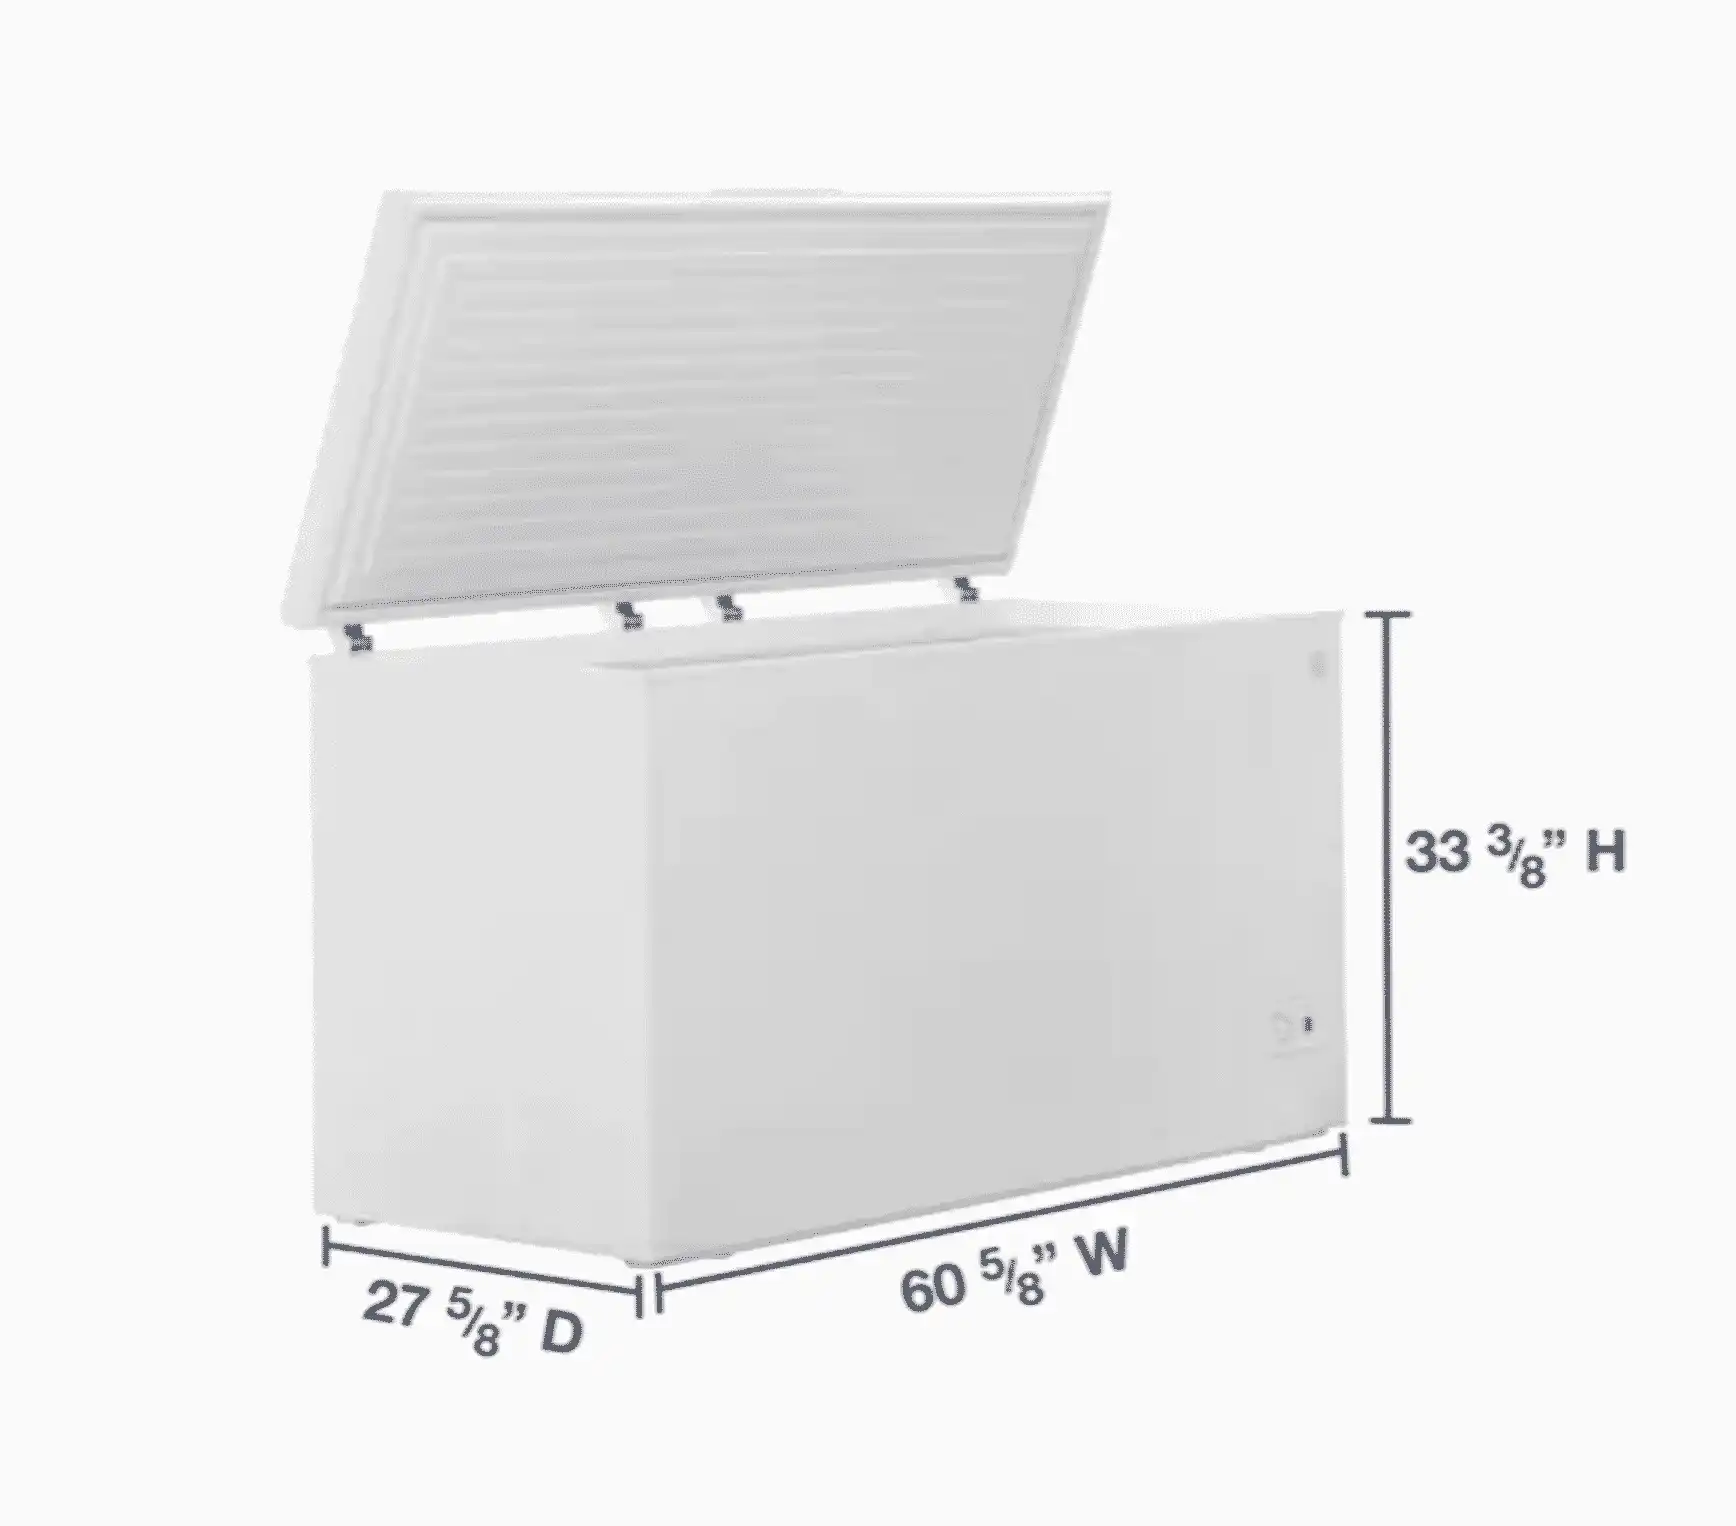
The one that worked for me was a 14.8 cubic foot freezer big enough to hold eight corny kegs and two mini-kegs on the compressor ledge.
This freezer will fit 8 corny kegs and two mini-kegs with room to spare for a small CO2 tank. You'll also have room to store bottles and cans of beer. Plus, yeast packets!
Temperature Controller
Since I’m converting a FREEZER into a kegerator, I need to regulate the temperature so I don’t freeze the beer. The best way to do this is to buy a third-party temperature controller.
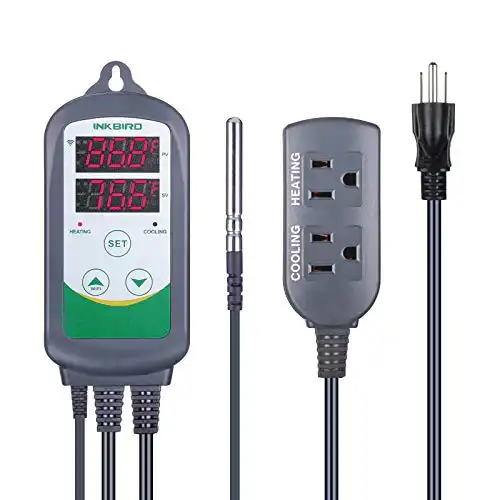
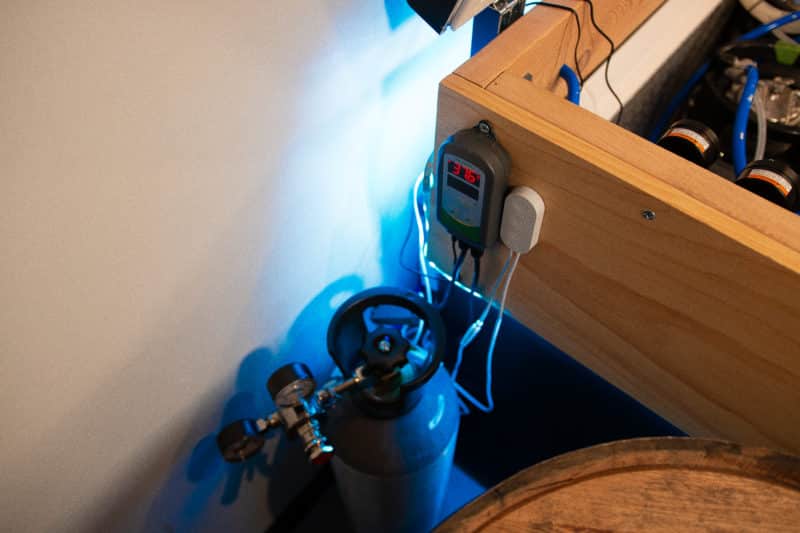
I purchased an Inkbird controller with WiFi to control the temp from anywhere. All you do is plug the freezer into the controller and the controller into your electrical outlet. Then, place the temperature probe inside the freezer.
I set mine to 38ºF (3.3º C) to keep the foam under control. The probe measures the temperature inside the freezer. When it gets above the set temperature, it kicks on the freezer and shuts it off when it reaches the desired temperature.
Simple, low-profile, easy-to-use temperature controller for keezers and kegerators. The built-in Wifi lets you adjust the temp from your smartphone or tablet wherever you are.
The Wood Collar
The wood I chose for my collar was 2×6 fir lumber. And I had the big hardware store cut the pieces for me. To fit the exact chest freezer dimensions, I needed two 60-inch boards for the front/back and two 22 5/8″ boards for the sides.
I didn’t know this at the time, but my dad told me that 2×6 does not actually mean the board is two inches by 6 inches. It’s really only 1 1/2 x 5 1/2 inches (38 x 140 mm). So glad I figured that out before getting the wood cut. Thanks, Dad!
To screw the boards together to create the collar (butt joints), I researched a few options.
NOTE: Just using wood glue will not create a strong bond. Also, if I just use screws in the end grain of the wood it can cause it to split. DO NOT use either of these options. There are better and more secure ways to create a strong butt joint without being a master carpenter.
- Option 1: Use metal brackets. This is what I decided on since I didn’t want to invest in option 2 (I don’t plan to do a lot of woodworking in the future, so I don’t need useless tools lying around).
- Option 2: Drill pocket holes. Here’s a great video I found that I was planning to follow.
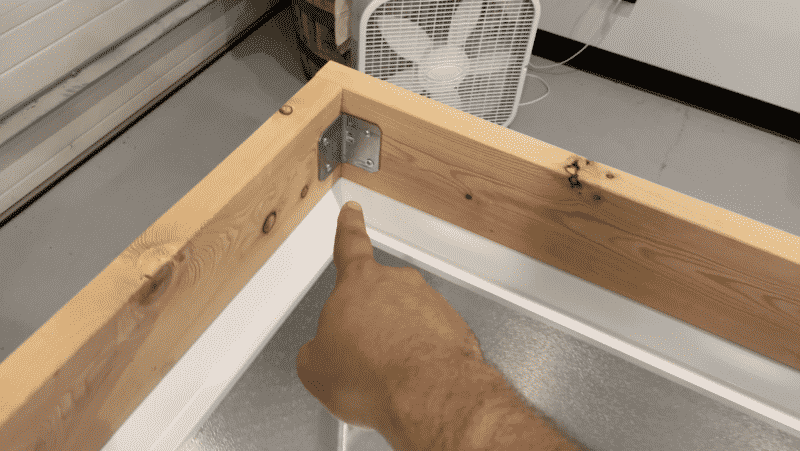
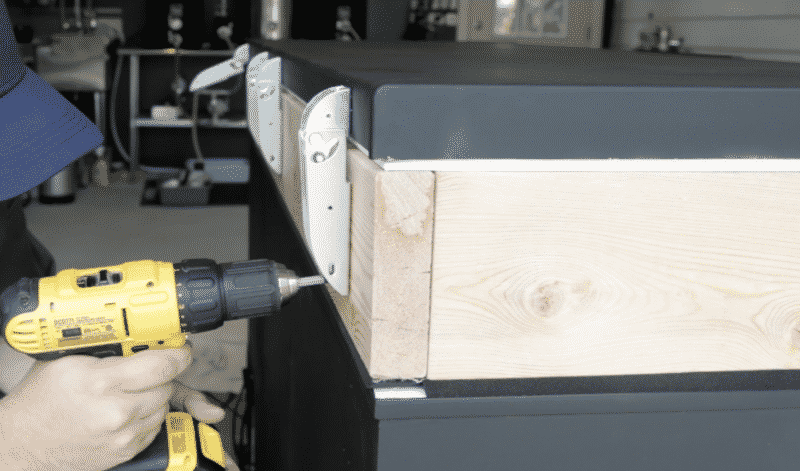
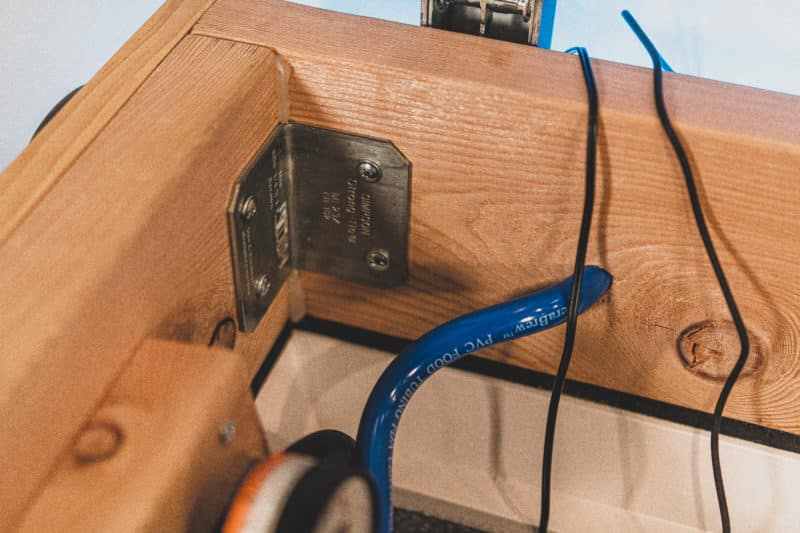
I used four strong angle brackets and 32 flat wafer head deck screws (1 1/2″ long). This method allowed me to create a strong wood collar without investing in any special tools. And also allowed me room for error.
NOTE: The only problem I ran into here was gaps in the collar that would allow cold air to escape. I had to seal up a few of these minor gaps with some silicone.
The Trim or Facial Board
In order to add weight to the collar and create a nice-looking exterior, I added 1×12 premium pine boards around the front and sides of the collar. This also gave more stability to the drip tray I added. And allowed me to hide an LED light strip.
This was a little extra money and work to install, but I think it was a crucial move in the keezer build. Here’s a diagram including the trim.
I decided to add a coat of Danish Oil to the boards for some added protection from moisture and to make the wood grain stand out a bit more. While Danish Oil did a fine job, in hindsight, I would have used a darker oil.
During my research, I found three ways I could have finished the wood:
- Polyurethane: This is a time-consuming process and requires a bit of skill. Which I don’t have. Plus, the wood looks a little “plastic-y.”
- Lacquer: It’s fast-drying and you don’t need to sand in between coats. And it somewhat keeps the natural wood look.
- Oil: The two main types of wood oil is Tung and Linseed. Danish Oil is a blend of Polyurethane and oil which I took to mean “the best of both worlds” as it adds a layer of protection with some staining. In hindsight, I could have just used Tung or Linseed and that would’ve been fine.
The CO2 Tank
Since I had to supply up to 10 kegs with gas, my little 10-pound CO2 tank wouldn’t cut it. But not without trying first. Technically, the standard CO2 tank will actually fit inside the chest freezer with all 10 kegs. But it was a pain in the ass to read the gauges.
I upgraded to a 20-pound CO2 tank (which cost almost the same amount to fill as the smaller one). And I placed it outside the freezer and ran a single gas hose through the collar. This made it easy to manage from a more readable gauge and control without opening the lid.
CO2 Regulator and Manifold
Like I mentioned in the beginning, I wanted the ability to pressurize kegs at different levels. So I invested in two CO2 regulators.
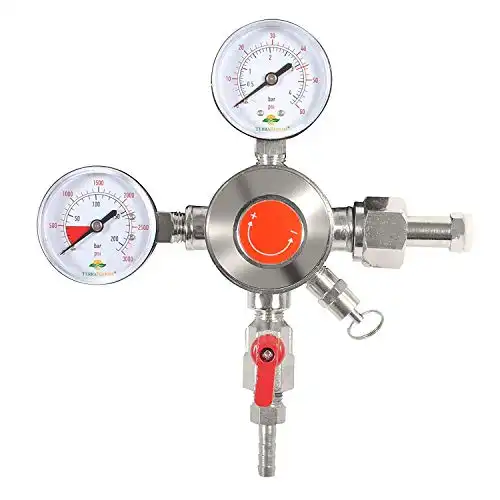
One was a standard gas regular for my main 20-pound CO2 tank located outside the keezer.
A heavy-duty unit made with two gauges to measure working pressure and tank pressure. Fits all standard CO2 tanks with CGA-320 inlets. Includes a shut-off valve pressure relieve valves to prevent beer from backing up into the gas lines.
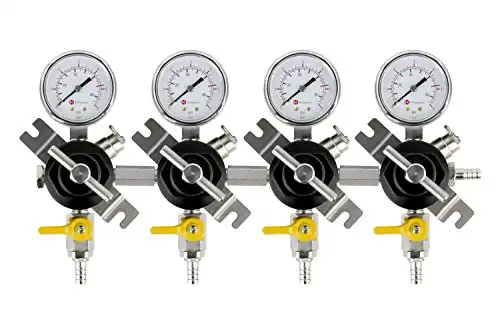
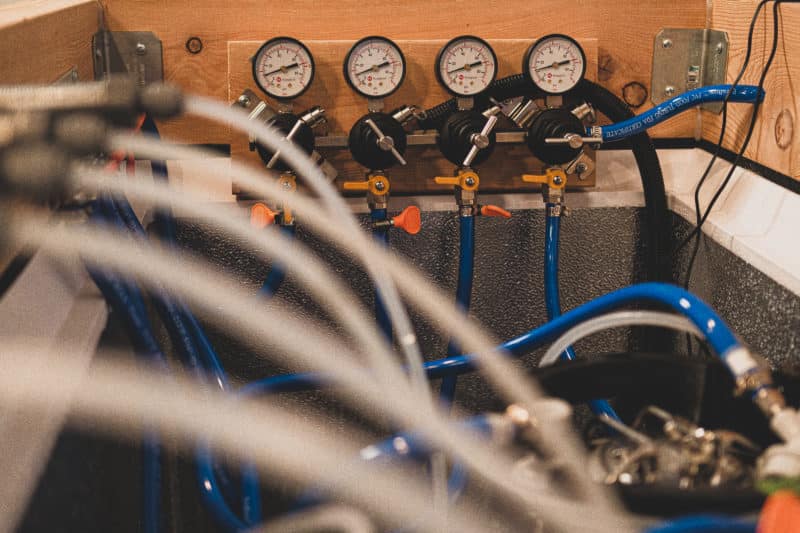
The other was a 4-way regulator located inside the freezer. This alone would only allow me to pressurize 4 kegs.
Dispense two or more kegs off of the same CO2 tank at different pressures. It includes shut-off valves pressure release valves and four gauges that indicate how much CO2 pressure is inside of the kegs.
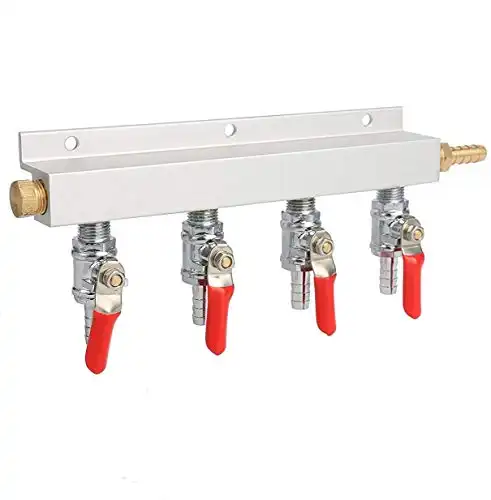
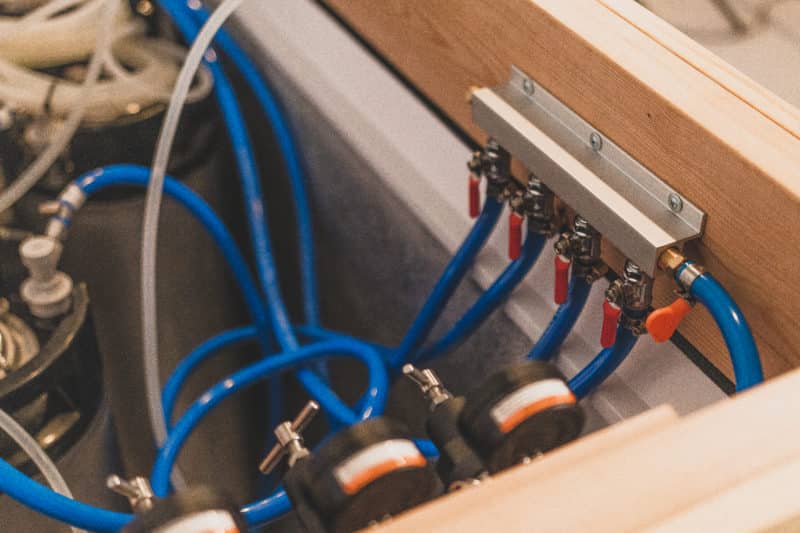
To extend it, I added a simple 4-way CO2 manifold.
The Drip Tray with Built-In Glass Rinser
Here’s an area where I made some serious upgrades. My goal was to build an impressive keezer. And it started with the drip tray.
At first, I ended up buying the wrong one. I just bought a tray that screwed to the wood. There was no drain port. And it wasn’t wide enough to handle six beer faucets. So I had to do more digging.
I found this amazing video of a 16 tap keezer and it inspired me to find a wall-mounted drip tray that included holes for the taps and a glass rinser.
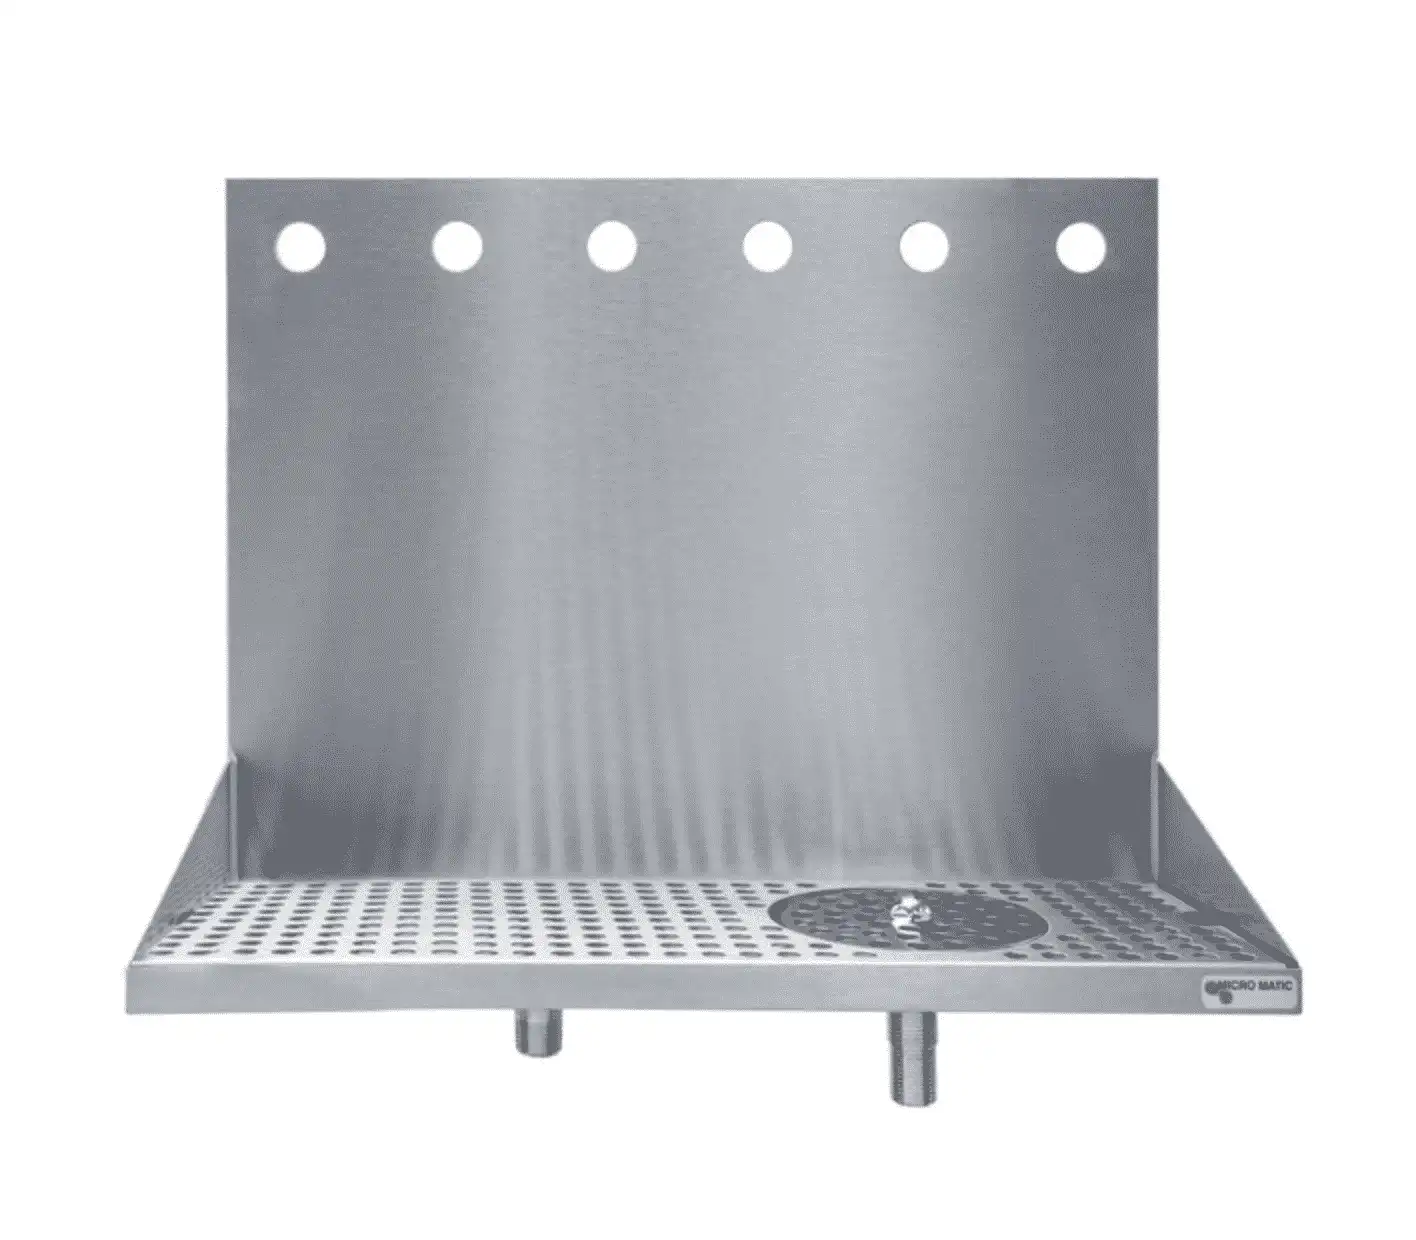
So I found this one on WebRestuarantStore.com by MicroMatic. And this was the best move I made on this whole keezer build. The built-in glass rinser is next-level!
This drip tray is everything you need to complete the best part of any keezer or kegerator. The built-in glass rinser is a crowd-pleaser and the drip tray actually has a drain spout.
Shanks and Faucets
The drip tray makes it easy to mark the holes on the collar where you need to drill. And it offers a specific size shank.
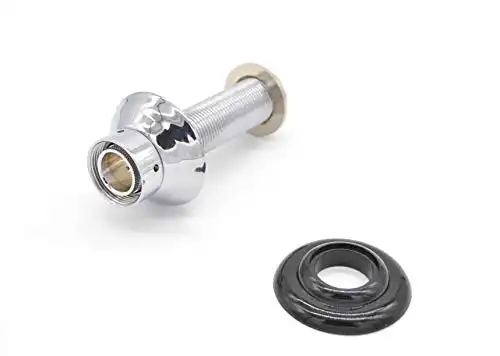
Since there are about 3 inches of wood you need to drill the shank through, I went with a 5-inch long shank. In hindsight, a 4-inch shank would have been plenty too. And with the wall-mounted drip tray, I need a 3/16″ I.D. Bore.
This shank comes without the tailpiece. I like this because you can add your own tailpiece including 90º elbows and Duotight fittings. Makes it more customizable.
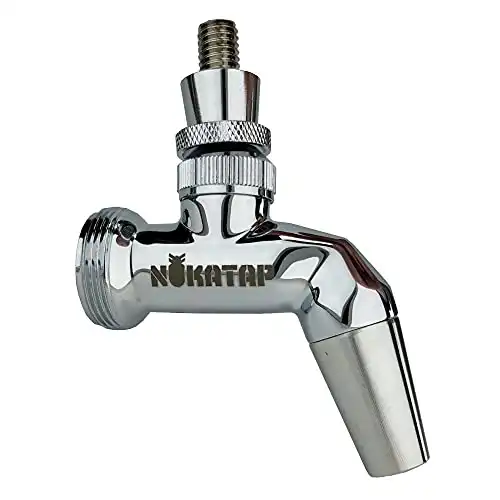
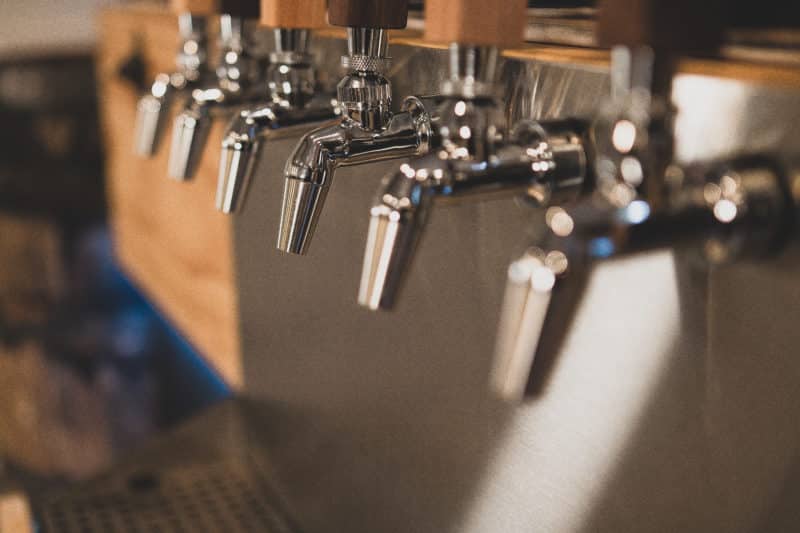
For the faucets, I always go for Perlick-style taps. They don’t get sticky like regular beer faucets. But as an upgrade, I went for the NukaTap Perlick faucets.
These faucets are the best ones I’ve tested. They reduce the amount of foam you get from unbalanced keg lines and they seal much better for less dripping (wasted homebrew). On top of that, you can change out the spouts to add a bottle filler, a growler filler, a stout faucet, and ball-lock CO2 line and more!
And I would get the springs to keep your drunk friends from accidentally leaving the taps open at a party. Lesson learned!
Reduced first pour foam due to low thermal mass. Forward-sealing design prevents beer residue from gumming up the faucet. And changeable spouts!
Beer Lines and Ball Lock Kegs
Thanks to a wonderful episode of the Brulosphy Podcast, I found out about EvaBarrier Tubing and DuoTight fittings. These were a game changer!
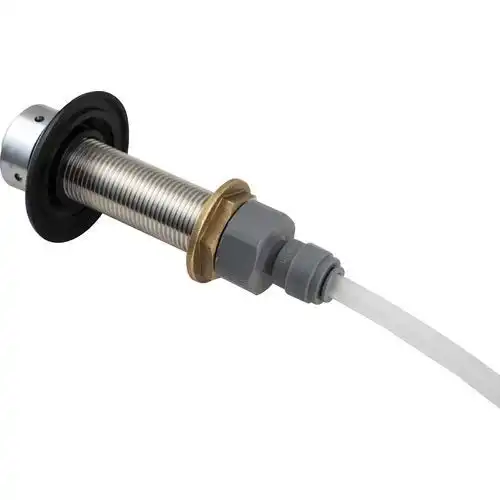
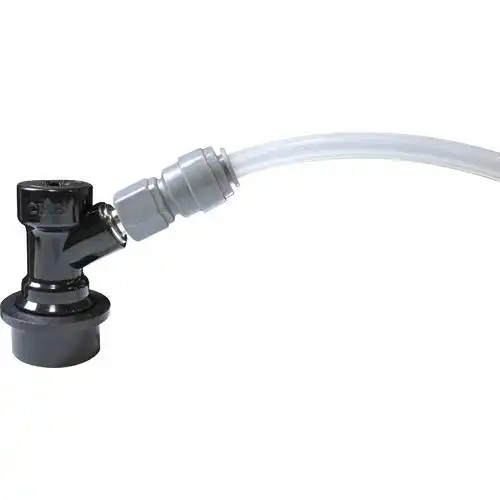
I’m using DuoTight fittings for each shank and liquid quick disconnect. And 15 feet of 4mm EvaBarrier tubing to push into them. It makes it much easier to switch and clean lines without having to use a bunch of hose clamps.
Screw these on the back of your beer faucet shanks for a quick disconnect of your Evabarrier beer line tubing.
Instead of dealing with hose clamps, use these push-in fittings with Evabarrier tubing on your ball lock liquid quick disconnects!
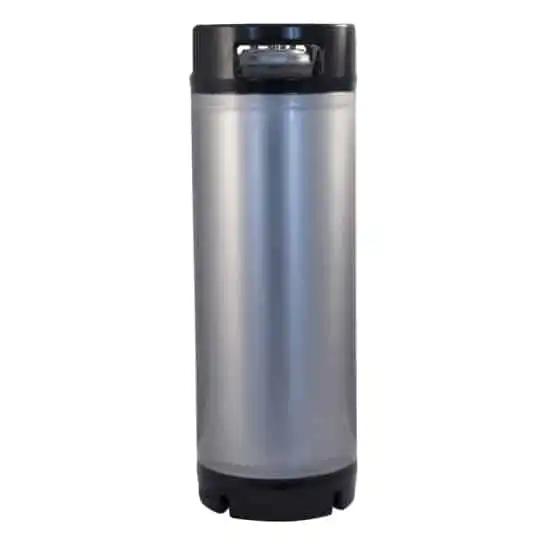
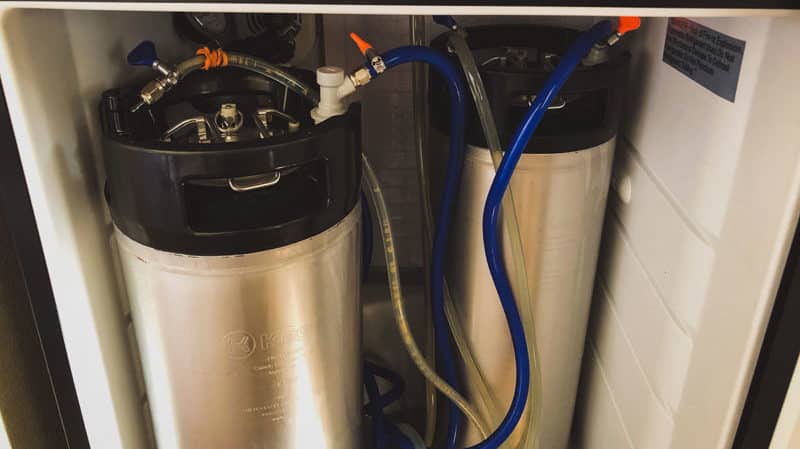
For the corny kegs, I really like the ones from KegLand. Nothing special. Just basic kegs.
Our recommended corny ball lock kegs for kegging your homebrew. Simple, lightweight, and easy to clean.
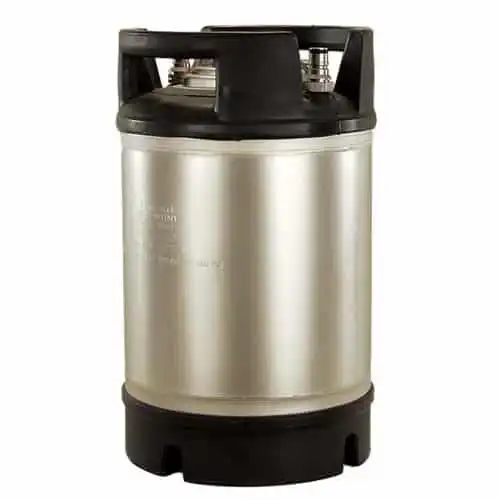
This mini keg is great for making small batches of beer. Or if you're feeling adventurous, fill it with wine, cider, or a cocktail!
Before I started, I wiped everything down with some kitchen cleaner and a microfiber cloth. I laid down drop cloth under the freezer and make sure all my supplies were in the same room.
Ready to improve your all-grain brewing process and dial in your system?
This video course covers techniques and processes for water chemistry, yeast health, mashing, fermentation temperature, dry-hopping, zero-oxygen packaging and more!
Click Here to Learn MoreHow to Paint a Chest Freezer (Optional)
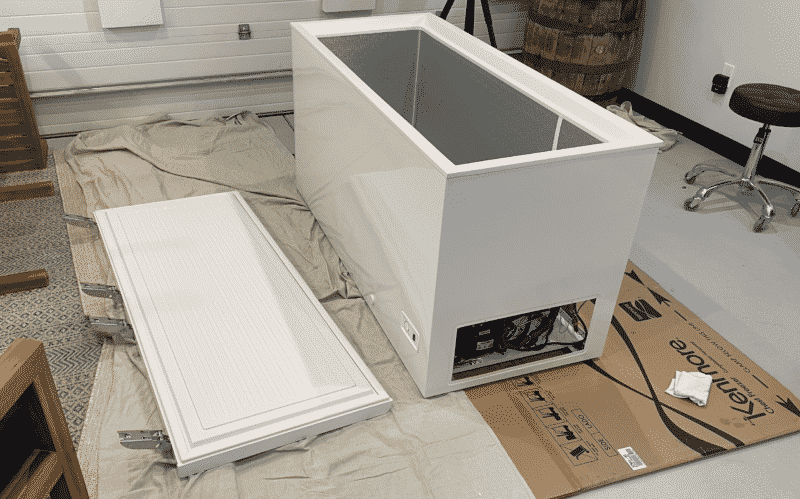
The first step was prepping the freezer for painting. For the final chalkboard paint to adhere to the surface, I needed to sand the crap out of the freezer. And then, add a good layer of primer. These steps are key, or else I would’ve had paint rubbing off every time I touched it.
I followed this guide from Little House on The Corner when painting the freezer. It was really helpful.
But why paint the freezer? You can skip this step, but I wanted a black keezer to match my brewery. Black chest freezers were hard to find at the time of building it. Plus, they were priced higher than the white ones.
1. Remove All The Plastic, Metal, and Stickers
I remove all the plastic and metal pieces. Anything with screws. Also, I remove stickers with a hard metal scraper. And used Goof Off to remove any leftover sticker residue.
2. Sand The Freezer Surface with 120 Grit Sandpaper
You need to sand the surface of the freezer to remove the glossy layer. This will help the paint adhere to the surface better and last longer without chipping.
I sanded the entire surface with 120-grit sandpaper by hand. I wished I used an orbit sander for this part. It would have made my life a lot easier. But I didn’t want to buy any new tools at the time.
I remove the dust with a mini shop vac and a microfiber cloth with a kitchen cleaner.
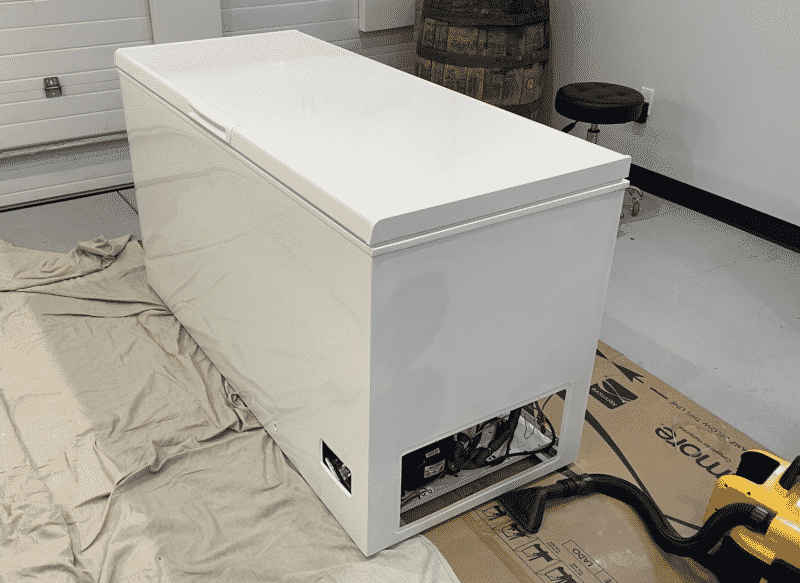
Sanded Chest Freezer
I also sanded it again with liquid sandpaper. But honestly, this is optional. Afterward, I wiped everything down with a clean cloth and prepared it for priming.
3. Apply Primer Paint with Foam Roller
I applied two coats of primer with a small foam roller to give it enough time to dry. The foam roller applies a smoother coat.
In hindsight, I should have used a darker primer color since I was painting it matte black.
4. Apply Chalkboard Paint with Foam Roller
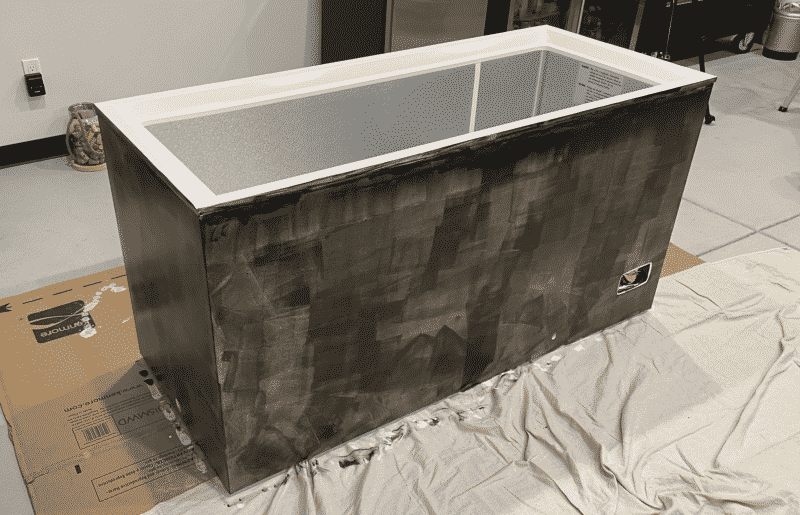
I applied three coats of chalkboard paint with a small foam roller. If I had used a darker primer, I wouldn’t have needed as many coats of chalkboard paint. Lesson learned!
I allowed enough time to dry in between coats. The freezer took two weeks to dry fully.
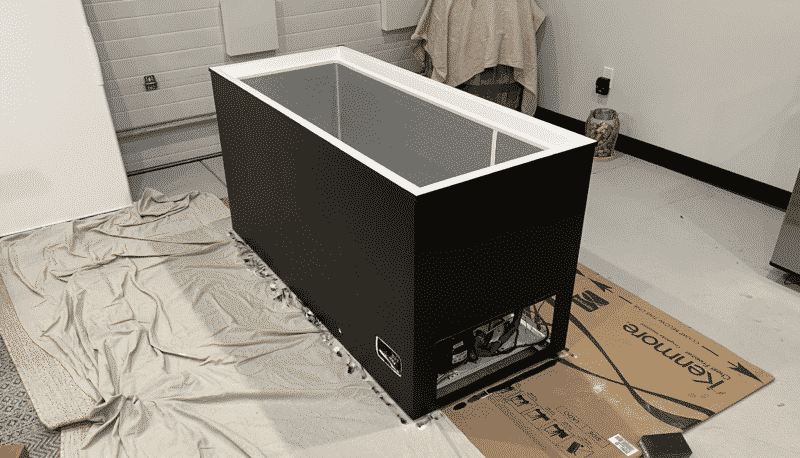
Chest Freezer with Three Coats of Chalkboard Paint
5. Spraypaint Small Plastic and Metal Pieces
For the smaller pieces, I used chalkboard spray paint. I didn’t sand them or add primer because these pieces would never be touched or even seen for the most part.
How to Build a Keezer Collar
I had my lumber and parts ready to go. This was much easier than I thought it would be to accomplish.
1. Make Sure The Wood Collar Fits
Before I twisted a single screw, I ensured the 2×6 fir boards I had cut at the hardware store fit on top of the chest freezer. I just lined them up and took a picture. Nailed it!
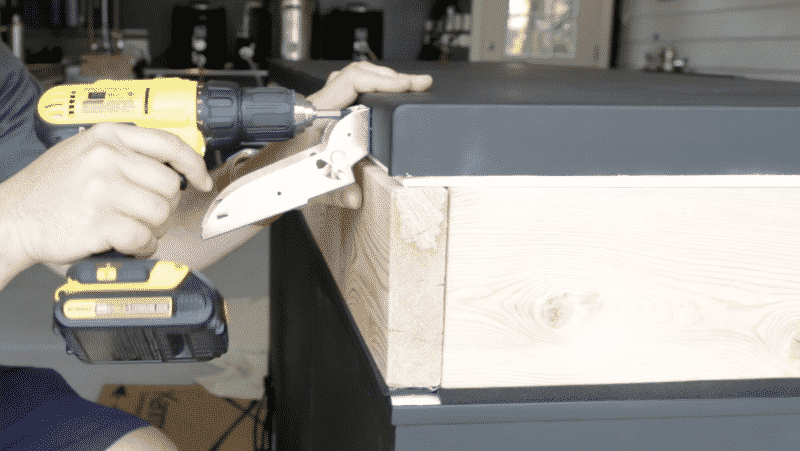
2. Connect the Collar Board with Metal Angle Brackets
I used #8 1-1/4″ Wafer-Head Screws to attach the fir board using metal angle brackets inside the collar. Each bracket required only four screws.
3. Apply Silicone Sealant to Collar Corners
Unfortunately, I didn’t do a perfect job of attaching the brackets. So there were a few gaps in the butt joints I had to seal with silicone. Otherwise, cold air would leak out of those gaps.
4. Add Thick Weather Stripping To the Bottom of The Collar
To attach the wood collar to the top of the freezer without using glue, I needed to create a tight seal that would prevent air from leaking out between the freezer and the collar. And it also needed to help keep the collar in place.
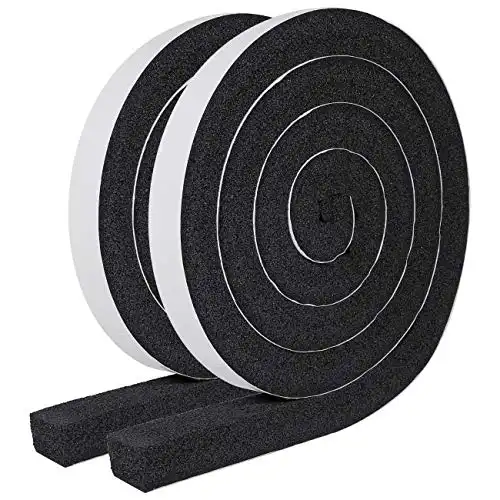
So I used 1-1/2″ expandable foam weatherseal to create a weatherproof seal when it compresses. The weatherseal is a self-adhesive strip that sticks to the bottom of the wood collar.
To keep my wood keezer collar in place instead of using glue, I used this self-adhesive expandable foam weatherseal.
Again, the reason for using this method over just gluing the wood collar to the freezer is I can replace the chest freezer if it ever craps out. And if anything goes wrong with the collar, I can easily replace it without damaging the freezer.
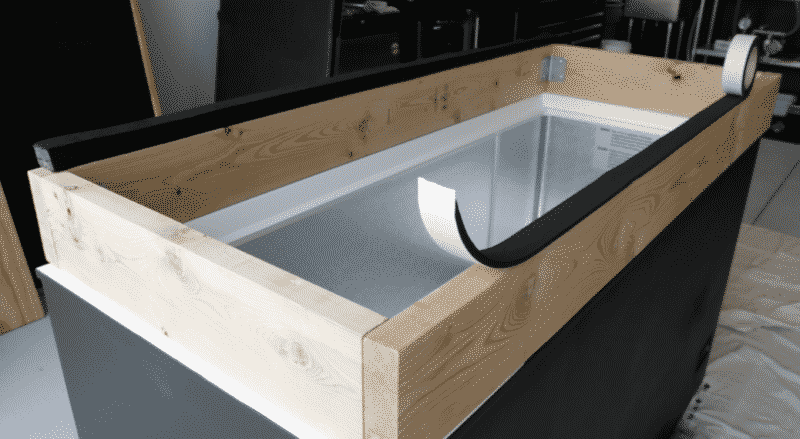
What you’re looking at is the bottom of the wood collar where I added the weatherseal. I will flip the collar over to place it on the freezer.
I got the idea for the weatherseal technique from Homebrew Academy. His keezer build includes the facial board and weather stripping. I knew I was in good hands after watching his video where he stated that once he added the lid, the collar did move at all, even without glue.
5. Reattach Freezer Lid to The Wood Collar
First, I laid the lid on top of the collar to make sure it had a good fit and sealed properly. Then, I added back the lid hinges by screwing them into the lid first. Then, screw the base of the hinge directly into the wood collar.
The weight of the lid compresses the weather seal even more. At this point, the collar was firmly in place. And I could have stopped here and just added the taps directly into the collar. But I wanted to add a layer of beauty and weight to the front of the keezer.
How to Add Facial Board to a Keezer Collar
This was an optional step for me. But I’m glad I did it. The 1×12 premium pine boards added weight to keep the collar in place (since I’m not gluing the collar to the freezer). On top of that, it provided extra support for the drip tray, a nicer overall look, and gave me a spot to hide an LED light strip.
1. Make Sure The Facial Board Fits
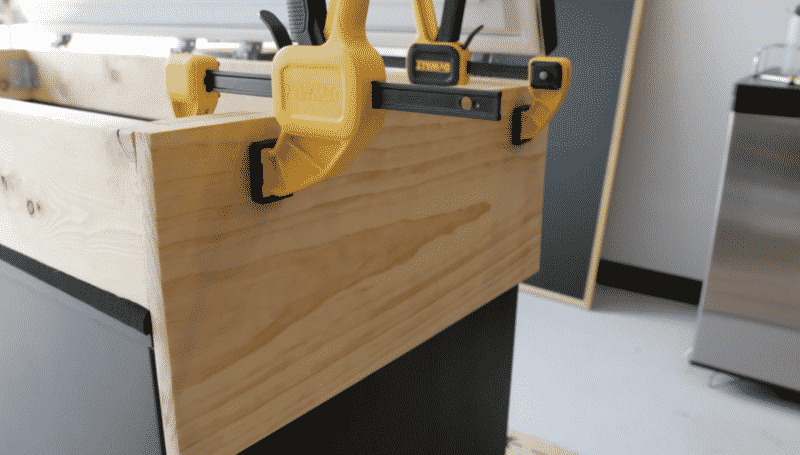
After measuring the collar and getting the three 1×12 premium pine boards cut at the hardware store, I used clamps to align it with the collar. I just wanted to make sure I got the right size boards and everything fit before I prepped the boards.
2. Sand and Finish The Boards
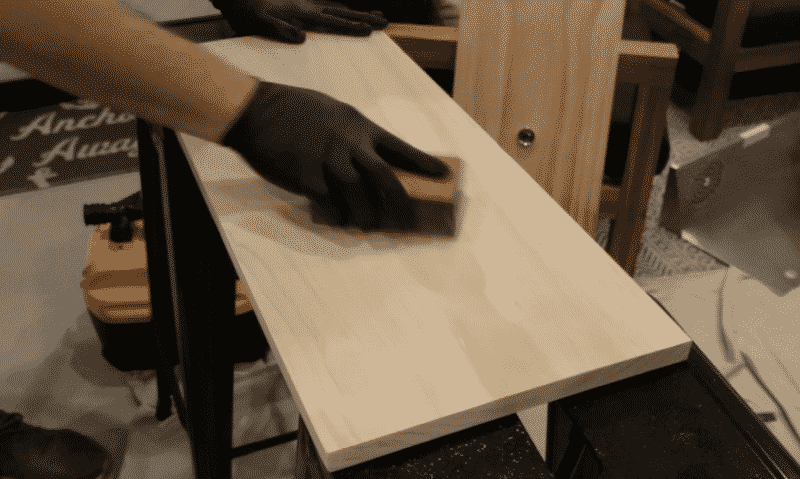
I used 120 grit and 240 grit sandpaper to prepare the board for finishing. I removed any sharp edges and splinters I found.
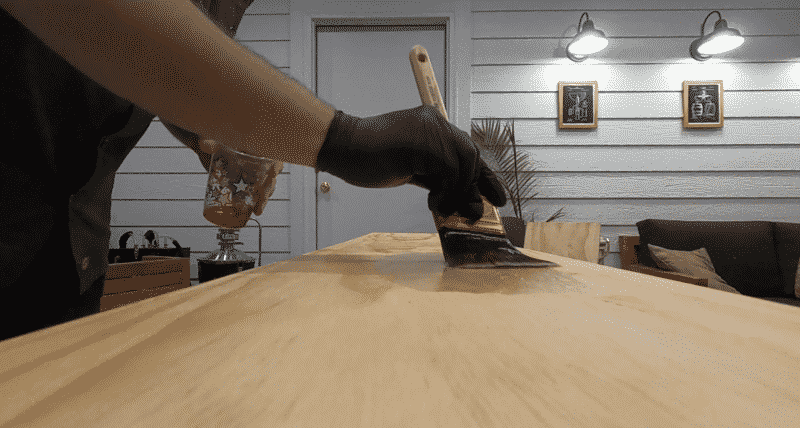
Then, I used two coats of Danish Oil which darkens the boards a bit and makes the wood grain stand out. Plus, it’s supposed to add a layer of protection since these boards might see the occasional splash of homebrew beer.
3. Attach Boards to Wood Collar with Screws.
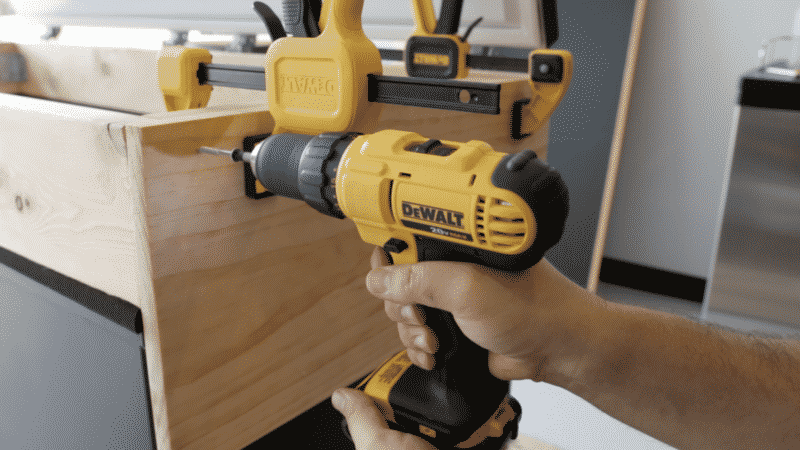
And finally, I attached the facial board directly to the collar using #10 2” zinc-plated wood screws. I just eyeballed where I thought the screws would look good.
Before I drilled in the big screws, I used a tiny drill bit to make pilot holes. This part was optional.
How to Add Beer Tap Faucets and Drip Try to a Keezer
Now comes the fun part: adding beer taps. The most important thing to note here is how to drill the holes. So let’s jump in.
1. Mark Where to Drill Holes
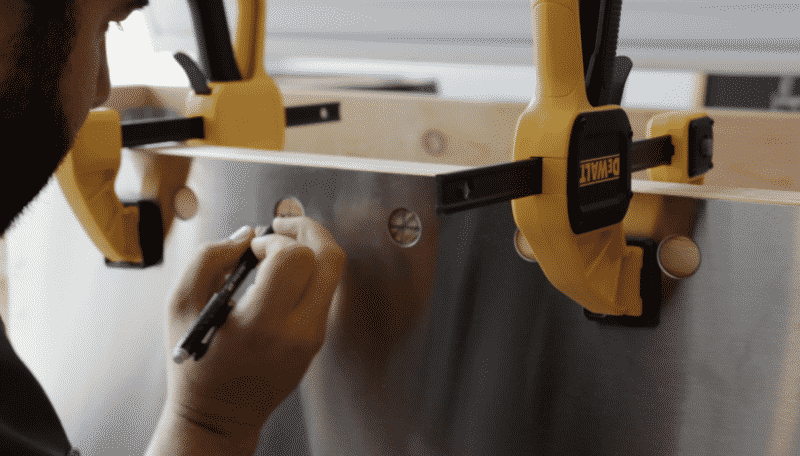
Thankfully, this part was pretty easy because the drip tray already has the hole marks. So using the clamps again, I lined up where I wanted the drip tray, which was directly in the middle of the keezer. I measured both sides to make sure they were equal and the drip tray was dead center.
I used a mechanical pencil to trace the holes directly on the facial board. Then, removed the clamps and the drip tray. I didn’t think it was a wise move to drill the holes with the drip tray in place.
2. Drill Some Pilot Holes
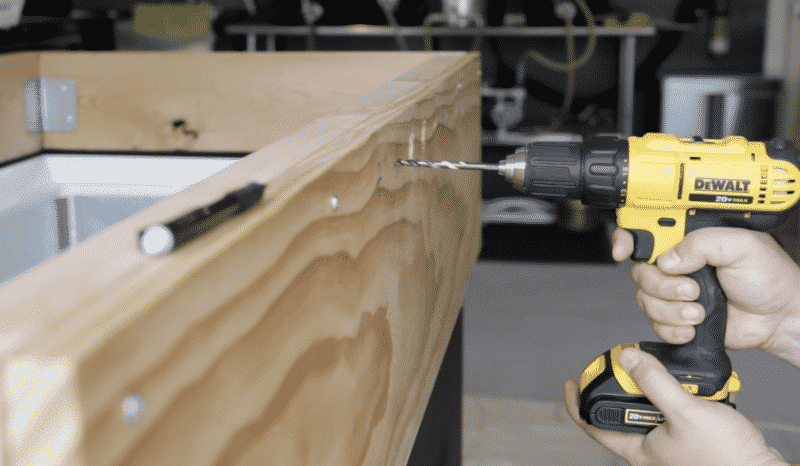
Using a small drill bit, I drilled a hole directly in the center of the larger tap hole all the way through both boards. This allowed me to drill from both sides to create a large hole for the faucet shank.
Remember, I have to drill a large 7/8″ hole through roughly 2-1/2 inches of wood. If I only used a hole saw on one side, it might not make it all the way through. Plus, drilling the hole from both sides creates a cleaner hole.
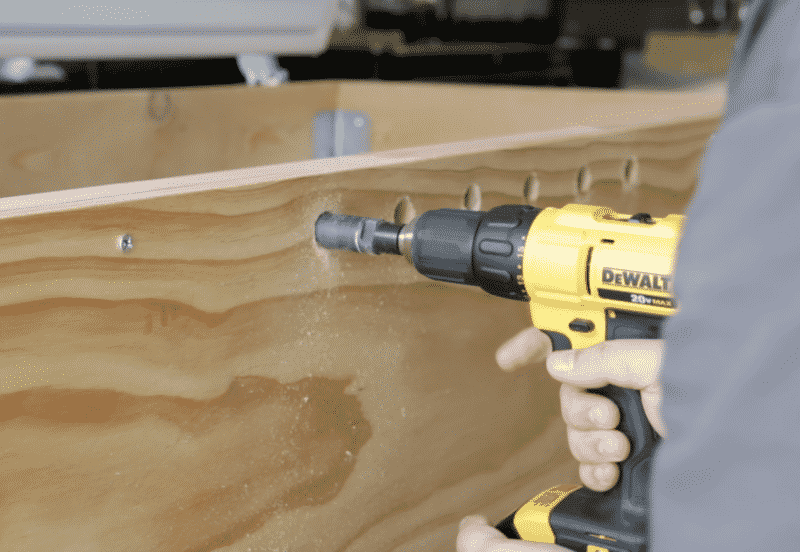
3. Drill The Main Faucet Shank Holes with a 7/8-Inch Hole Saw
Using the pilot hole as my guide, I started drilling with a 7/8″ hole saw halfway through the facial board and collar on the front of the keezer. Then, to finish the hole, I drilled from inside the collar, again using the pilot hole as my guide until I got all the way through both boards.
I used a metal file to smooth and clean up the finished holes.
4. Add The Faucet Shanks and Drip Tray
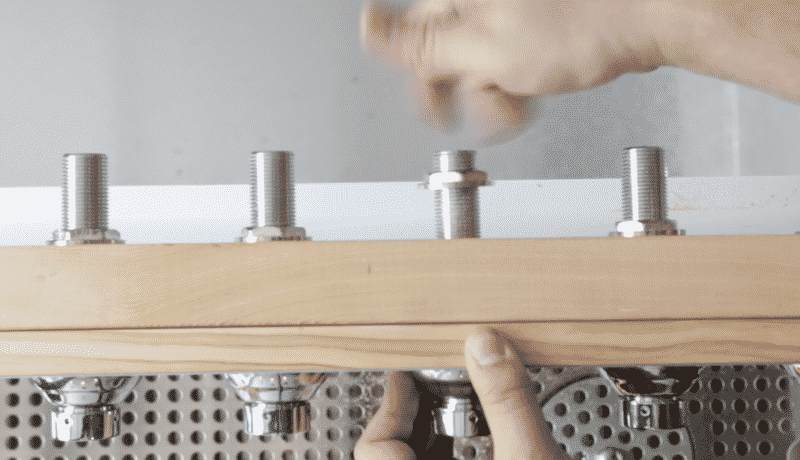
Next, I added the drip tray back with the clamps. Then added the furthest right and left shanks through both the drip tray and collar. I used a large adjustable wrench to tighten the nuts on the back of the shanks inside the keezer. This allowed me to remove the clamps and keep the drip tray in place.
5. Add The Faucets
Finally, I screwed on the Nukatap faucets using a special little faucet wrench to get them tight enough not to move when you pour some beer. And I also added a spring inside the taps so the handle snaps back when you’re done pouring.
A simple but necessary tool for tightening beer faucets (taps) to shanks.
Honestly, the spring is key here. I had issues where I (or a friend) didn’t push back the handle enough to seal the opening and beer leaked out all over the place. The spring brings me peace of mind. And that shit’s invaluable.
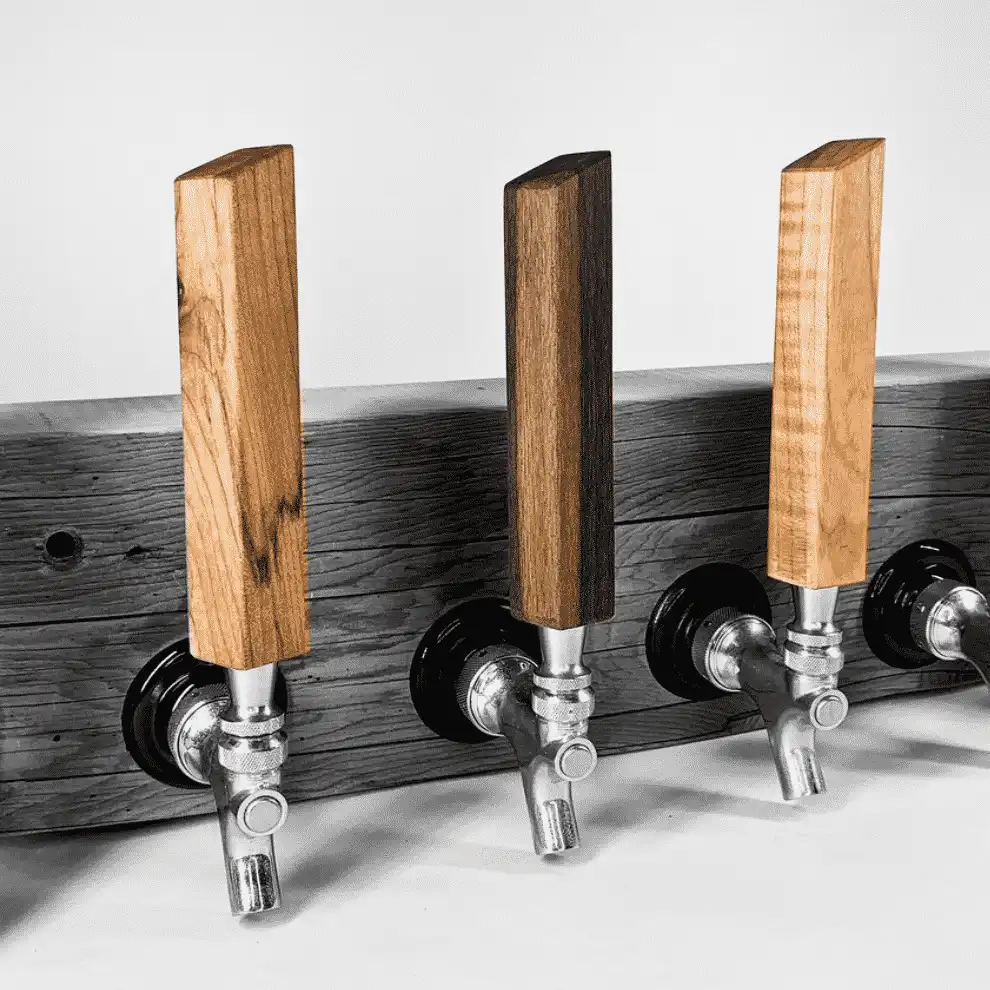
For the handles, I bought some simple custom wood ones on Etsy for $10.
An inexpensive way to add a quick but elegant look to your keezer or kegerator.
6. Connecting the Drip Tray Drain Line
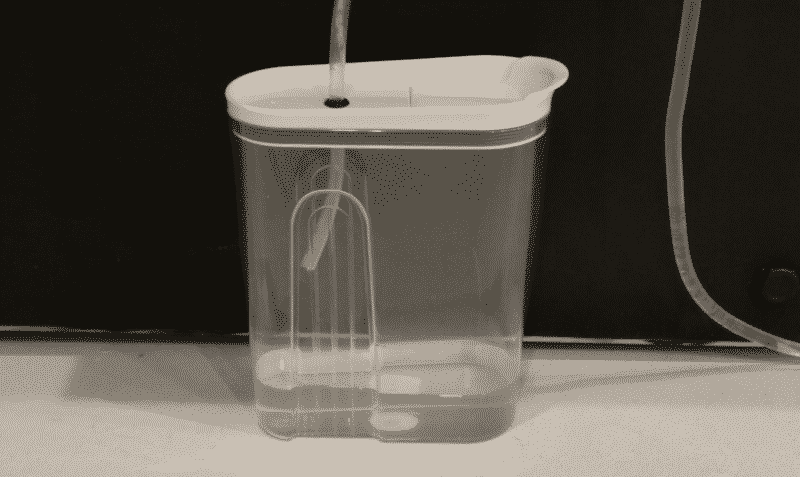
I connected a small piece of 5/16-inch inner diameter (7/16-inch outer diameter) clear food-grade vinyl tubing to a threaded barb on the drip tray line. Then, I found a small clear cereal container with an airtight seal at Target.
I drilled a small hole in the top of the container, added a rubber grommet, and fed the drain tube inside. The clear container allows me the see when I need to empty it. And the airtight quality of the container keeps the smell and bugs at bay.
7. Connecting the Glass Rinser Line
I’m simply using a pressurized keg of cold RO water to power the built-in glass rinser in the drip tray. I got this idea from The Portly Gentleman’s YouTube channel.
For my build, I’m using the same 5/16-inch line I used for the drain. I ran the line around the bottom of the outside of the keezer to the back. I drilled a small (incorrect) sized hole in the back of the collar to feed the line into the cold pressurized keg. I had to use a rubber grommet to create a seal in the collar.
I just added the lines over the threads for the quick disconnect since a barb would be too small. And Added a hose clamp. Honestly, it’s a pretty simple but effective self-contained system. Glad I got the big ass keezer to hold this extra keg of just rinse water.
How to Hook Up Beer Lines in a Keezer
At this point, I’m almost ready to drink beer out of this thing. I ended up moving my keezer in place before adding kegs. That’s just a backache waiting to happen.
Attach DuoTight Fittings
First, I attached DuoTight fittings to the ends of the faucet shanks. This is why I didn’t buy shanks with a tailpiece. I wanted the flexibility to add my own.
DuoTight fittings allow me to use a special beer line that can be pushed in to keep tight inside of using a hose clamp. If you ever worked with PEX line before, it’s like using Sharkbite clamps. Just put in the tubing, and it locks in place.
There’s a little lip on all the fittings that you can press down to release the clamp. This allows you to change out beer lines quickly when needed.
I also added DuoTight fittings to my black ball lock quick disconnects. You can now buy DuoTight quick disconnects. But at the time of building my Keezer, they were available yet.
Run EvaBarrier Beer Lines
I’m using four-millimeter (4mm) inner diameter and eight-millimeter (8mm) outer diameter EvaBarrer tubing. It’s stiffer and thinner than regular flexible beer line tubing, but it’s way better.
The tubing pushes and locks into the DuoTight fitting with ease. To cut the lines, I used a PEX hose cutter since the lines are hard to cut with scissors.
I need to run 15 feet of tubing per keg to balance my draft system. I’ve experimented with different lengths too. This length works best to create enough restriction in the lines to produce less foam.
I coil up the line using zip ties and keep them on top of the kegs, so they don’t freeze. I have issues when the line touches the sides of the freezer wall.
How to Hook Up Gas Lines in a Keezer
I added the gas and then the liquid lines. For the gas, I originally used a small 10-pound CO2 tank inside the keezer. But I quickly realized it was hard to read the gauges and wouldn’t be big enough to supply 10 kegs with gas. So I upgraded to a large 20-pound CO2 tank.
1. Set up the 20-Pound CO2 Tank and Main Regulator
I found a local welding supply store that sold me a large CO2 tank. The initial purchase was about $200. But the refills are a little under $20. Which turned out to be cheaper than swapping out 10-pound tanks a the local liquor store.
I added a simple two-gauge regulator to the tank and set the pressure to 30 PSI.
2. Drilling a Hole for The Main Gas Line
For all the gas lines, I’m using high-pressure flexible blue tubing that’s a 5/16-inch inner diameter and 9/16-inch outer diameter.
I drilled a small hole in the back of the collar to the exact dimension of the gas tubing using a 9/16-inch spade bit. Then, I simply fed the gas hose from the regulator and through the hole.
3. Adding The Secondary 4-Gauge Gas Regulator
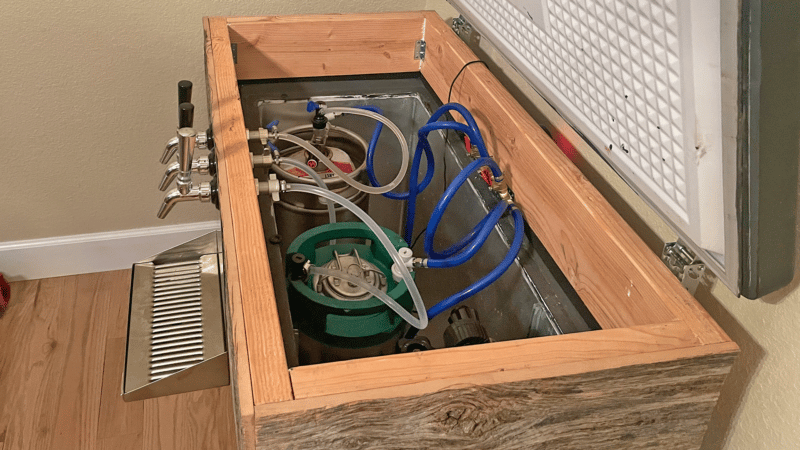
First, I had to figure out a solution to mount the secondary distributor inside the keezer. The unit I bought was too tall to mount directly on the collar – the freezer lip was in the way.
So I added a small extra chuck of the 2×6 collar wood to the side using the same wafer head screws I used to add the metal angle brackets. This allowed me to mount the regulator to the woodblock and give it ample space for the hoses to hang down.
The regulator came with all the mounting hardware, so that part was easy. After it was mounted, I attached the main gas line from outside the keezer to the secondary regulator.
- The first gauge is set to 30 PSI. This is for burst carbonation (or to quickly add carbonation to a beer I want to drink quickly).
- The second gauge is set to 20 PSI. This is for soda water (seltzer water) and beers I want a little extra carbonation.
- The third and fourth gauges are set to 15 PSI. This is my standard serving pressure.
The secondary regulator can only supply gas to four kegs. So I needed to add another gas manifold or distributor. The fourth gauge and outlet supply gas to the manifold.
NOTE: I live at 5,023 feet above sea level. So at my high altitude, I need to crank the serving pressure a bit to move beer.
4. Adding The 4-Way Gas Manifold
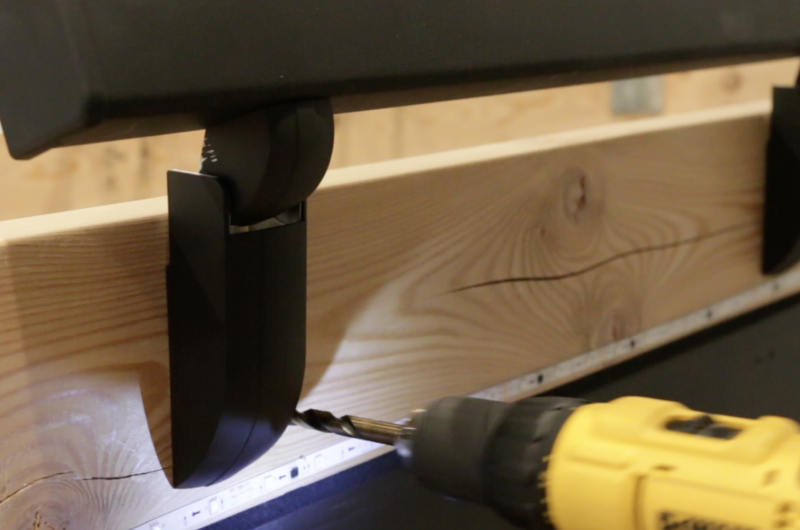
I mounted the simple 4-way gas manifold to the inside front (the tap side) of the wood collar. I mounted this with basic 1/2-inch wood screws that I had lying around. And I drilled it directly to the wood collar.
This allows me to supply gas to four more kegs. So in total, I can supply gas to seven kegs, one more than the number of taps I have.
5. Pressure Testing The System
I added hose clamps to all the tubing. I have a mix of wingnut hose clamps and standard hose clamps. I had trouble with leaking early on because the hose clamps I used were too large. So I found out how important it is to get the right size clamps.
I shut off all the valves on the secondary regulator and manifold to pressure test. And then turned on the gas for a second at the tank and then off. I waited 30 minutes to see if I lost pressure on the main tank gauge.
I didn’t, so I have a good connection between my main regulator and the hose going into the secondary regulator. At this point, I just repeat the test turning on one valve at a time to ensure no pressure is lost.
How to Upgrade Your Keezer to Impress Your Friends
At this point, I’m ready to serve beer and the keezer is technically complete. But I wanted to take things to the next level. And after playing with it for a while, here are some of the cool upgrades I’ve made.
Adding a Dehumidifier to Control Condensation
This won’t impress anyone, but it’s an upgrade. Condensation can become a problem in a keezer, especially in a warm environment, such as the garage during summer.
This is meant to be a chest freezer. So running it at fridge temps creates a lot of condensation and water. So I added a Damp Rid inside the keezer to minimize the water build-up.
Adding a Fan to Circulate Cold Air and Regulate Temperatures
The top of the keezer can get pretty warm since we added a wood collar, while the bottom stays colder. So to save energy and keep the temp more even, I installed a draft tower fan inside the freezer.
Your ideal keezer might be a minimalist, stainless box with sleek black tap handles or a massive chalkboard covered in custom art with LED tap handles. However, if you personalize the outside of your keezer, be sure to build it using quality components for function and longevity.
Remember to check all the connections after you build it to prevent leaks, and inspect them regularly as well. Of course, keep the lines clean to get the best possible tasting beer for all those people you’re going to have over to check out the awesome keezer you built.
If you have any additional questions about this keezer build that I didn’t answer, feel free to email me at [email protected]. I’ll provide any information I can with photos.
Inspiring Keezer Builds From People Who Followed This Guide
Kevin built his keezer from an old chest freezer, which turned out fantastic. He wanted to share so people could see how easily this can be built!
My Keezer Build Resources
- Homebrew Happy Hour Keezer Build [VIDEO]
- Homebrew Academy Keezer Build [ARTICLE]
- How to Paint a Fridge [ARTICLE]
- How to Paint a Refrigerator [VIDEO]
- Woodworking 101 [VIDEOS]
Happy Brewing!
