One of the reasons homebrewing is such a satisfying hobby is that it offers diverse opportunities for expanding your knowledge and skill in science, culinary artistry, and DIY projects.
It’s no wonder you’re interested in growing hops at home.
And considering that hops go for $2 to $3 per ounce (cost per gram may vary according to your location) or more, you may even save a little money. But the best reason to grow hops is that it’s a rewarding way to use your hands and expand your creative control over the process of making delicious beer!
Get to Know Your Hop Plants
Before you dive into growing hops, it’s a good idea to familiarize yourself with the hop plant, or Humulus lupulus. It’s a vine—more accurately, a bine because it lacks tendrils—and is deciduous and perennial. This means in winter, the foliage dies back, but the roots remain alive, and the plant comes back each year.
Hardiness Zones 3 through 8 are ideal for growing hops in the US. For locations outside the US, 35° to 55° latitude is ideal, but it’s still possible to successfully grow hops in areas outside these zones as well.
Hops are relatively easy to grow and are quite vigorous, some might even say invasive. They’re drought tolerant, but do well in a variety of climates with varying precipitation levels as long as drainage is good.
Planning Your Hops Garden
First, it’s all about location, location, location. Your hop plants will need a few things to thrive.
Sunlight
Hops need lots of sunshine, so a south- or southwest-facing area is best.
Full sun for six to eight hours per day, late morning to afternoon, is ideal, though in hotter climates, this may be too much. If that’s the case for you, choose a spot that gets some shade during the hottest part of the day to prevent scorching. You don’t want to cook your hops before you even start making beer!
Good Soil and Good Drainage
Hop plants do best when planted in the ground outdoors, though with a bit more effort, containers can work.
Either way, good drainage is essential to success. Soil with lots of clay can be problematic, and you’ll need to modify it to improve drainage before planting. Be sure to add plenty of organic matter such as compost and aged manure to your soil. Other additives such as straw and sand can help as well. Planting in raised beds or mounds will also help with drainage.
Containers can make drainage a bit more challenging and confine the root system, so you will likely see less yield from your plants than if you’d planted them in the ground. Be sure to use a high-quality potting mix with plenty of compost in order to ensure adequate drainage. Choose pots or barrels that are at least 20 inches (50cm) in diameter to give the roots a little breathing room.
Ideal Space and Structures
So you’ve given your plants enough horizontal space to spread out in. Now you must consider vertical space.
Remember that hop plants are vines, and can grow to 25 feet (7.5m) tall or more. With that kind of reach, they need a strong support structure to keep them from falling over.
Perhaps the easiest way to provide this support is to wrap twine around the vine, and run it to a vertical structure such as the eaves of your house or the top of a pergola. Then, when it’s time to harvest, it’ll be easy to cut the twine and lay the vines on the ground for easy picking.
If you plant next to your house, just be sure the plants won’t suffer any damage or erosion due to drainage from the roof or gutters.
If you’re planting multiples hop plants, allow ample space between each plant. At least three feet between hop vines of the same variety is sufficient, but you’ll want to have five to seven feet (1.5m to 2m) between different types.
Ready to improve your all-grain brewing process and dial in your system?
This video course covers techniques and processes for water chemistry, yeast health, mashing, fermentation temperature, dry-hopping, zero-oxygen packaging and more!
Click Here to Learn MoreWhere Do Baby Hops Come From?
We’re glad you asked, because it’s about time we had that talk. Rather than growing hops from seeds, your best bet is going to be ordering either rhizomes (a chunk of root cut from a female plant) or crowns (whole plants).
Different varieties do better than others in different zones, so check with the grower for details on the ideal climate before you buy your hop plant. In addition, they type of hop plant you buy depends on how you plan to use it. For example, the type of beer you want to brew, and whether you’ll be boiling the hops, or using a dry hopping technique.
Fall is a good time to order rhizomes, as you’ll be more likely to find the varieties you’re looking for. Suppliers will send them in early spring, so you’ll need to store them in a cool, dark place until you’re ready to plant them. Place rhizomes in a plastic bag in the fridge with a little bit of water or wrapped in a moist paper towel to keep them fresh.
How to Plant Your Hops
The best time to plant hops is between February and April depending on your climate and zone, and after danger of frost has passed and soil is workable.
Dormant roots of mature plants can survive temperatures as low as -20°F (-29°C), but frost will easily kill newer plantings.
Enrich & Prepare the Soil
When you’re ready to plant, till the soil, and remove grass and weeds. Do not simply till the grass and weeds under as they can come back up and compete with your hops.
Dig holes for the hop plants or rhizomes. Remember to give your plants plenty of room.
Make the holes at least two feet (60cm) deep and two feet (60cm) wide. Use a high-quality commercial gardening soil mixed with some compost and a good organic fertilizer to enrich the topsoil. Aim for about a 50/50 mix of native topsoil to the gardening soil mix.
Plant Those Hops Babies
If you’re planting rhizomes, create a mound of dirt on top of each one about one foot (30 cm) high for each one to help with drainage.
Make a small trench in each mound about two inches (5cm) deep, and long enough for the rhizome, and place it horizontally in the soil. If the rhizome already has buds, position them upwards, or if you see roots, point them downward.
Cover it with soil and pack it gently by hand, being careful not to pack it too hard. As you water the soil, it will compact naturally. Water lightly.
If you’re planting crowns, fill the hole almost full of soil. Place the plant in the ground, and mound up the dirt around it, packing gently. Water lightly.
Cover the hop plants with one to two inches (2.5cm to 5cm) of mulch to discourage weeds and pests. Then, mark your plantings with flags, so you don’t forget what varieties are where!
Keep the soil moist, but be careful not to overdo it.
You should begin to see sprouts within two to four weeks. When the vines are close to a foot tall, select five or six vines per mound, and remove the rest of them. After the first year, two or three vines should be more than adequate for your homebrewing.
Maintaining Your Hop Garden
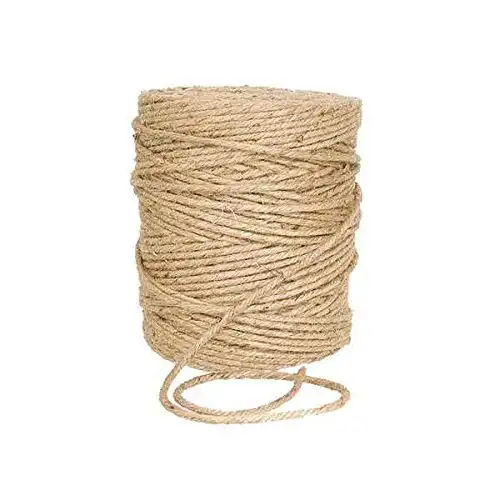
When it’s between one and two feet (30cm to 60cm) long, start training new hop growth around whatever vertical structure you chose. Train them clockwise in the northern hemisphere, and counterclockwise in the southern hemisphere. If you’re using twine, it should be coarse in order for the vine to catch on. Jute is a good option, and is often sold as hop twine by suppliers.
Keep plants watered, but don’t overdo it. Also, avoid watering from the top of the foliage as this can encourage excess moisture rot and pests. You may want to consider setting up a simple drip irrigation system using a water hose.
In July, remove the lowest four feet of branches and foliage to help prevent disease and increase air circulation. When you do this, be careful not to break or kink the main stem.
Then, in August, you can leave the bottom growth to help increase the crown’s hardiness, and help the plant grow stronger the next year.
Harvesting Your Hop Plants
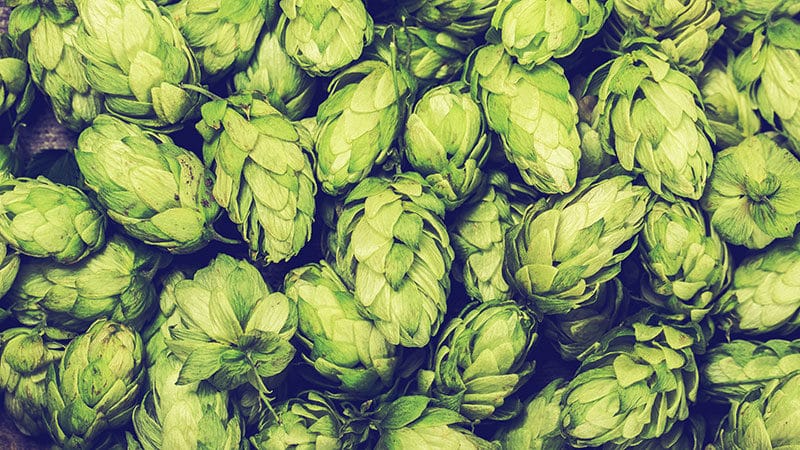
When they mature, hop plants produce hops cones, and they even look a little like pine cones, only green. Hops cones are usually ready to harvest between August and September, and will have a dry, papery feel with no dampness. You may see some browning on the lower bracts, but this is normal and a sign of maturity.
The yellow lupulin glands will be plump and more visible. If you crush a cone in your hand, you’ll smell a lovely, earthy aroma, depending on the type.
To harvest your hops, cut the twine holding the vines up, and lay the vines down on the ground. Remove as many cones as you need, but as few of the leaves and stems as possible.
By leaving the vines attached and letting them dry, you’re allowing sap to flow back to the root system, providing them with nutrients for the winter. To prepare hop plants for wintering, trim the vines to about a foot high after the first frost. Then cover the mounds with several inches of mulch.
Later, as your hop plants continue to mature, and the root system is more developed, you can simply cut the bines to about two to three feet above the ground. This will make removing the cones easier and keep you from having to use a ladder.
Keep in mind, the first year may not be a bumper crop because the plant is using most of its energy to develop a root system. By the second year, you should have a full harvest.
Drying and Storing Hops
After harvesting, hops can be used right away, or dried and stored for future use. If you’re planning to save them for later, you’ll need to dry them thoroughly.
If you have a warm, dry spot with some air circulation like a garage, you can just let them air dry for a few days. Spread them out in a single layer, ideally on some window screens or mesh-covered frames, and gently stir them up daily to make sure they dry thoroughly on all sides.
You can also use a dehydrator, or even an oven. If you use the oven, put the hops on a cookie sheet and keep the temperature below 140°F (60°C) with the door slightly open to allow air circulation.
Hops are thoroughly dry when they’re very brittle but still green. Be sure the inner stem within the cone is no longer flexible, which indicates there is still moisture within.
To store hops, either vacuum seal them, or pack them into plastic freezer bags, remove as much air as possible, and put them in the freezer. Be sure to use them within a year.
Growing hops at home may require some planning and work, but hopefully the promise of homegrown reward will inspire you to develop your green thumb. Hops growing—like homebrewing—is a labor of love that will only make your beer that much more satisfying to drink.
Happy Brewing!


