Ever since humans discovered we could transform grains, yeast, and water into tasty beer, we’ve been looking for ways to improve on our success. And while the ancients of Mesopotamia and Egypt contented themselves with brewing beer from bread and herbs, modern homebrewers have embraced a more refined range of techniques in every step of the process, from the mash, to the ferment, to the bottle or keg.
One of the most important steps, the mash, continues to generate debates almost as hot as the water-soaked grains used to create wort. When creating beer through all-grain brewing, you probably use a single infusion mash. But if you’re looking to add some unique characteristics to your brew, you may want to consider a more complicated mashing method known as a decoction mash.
Methods of Mash Instruction: A Mashing Glossary
In order to understand the benefits and drawbacks of decoction mashing as compared to other methods, it’s important to have a good grasp of the terminology in play.
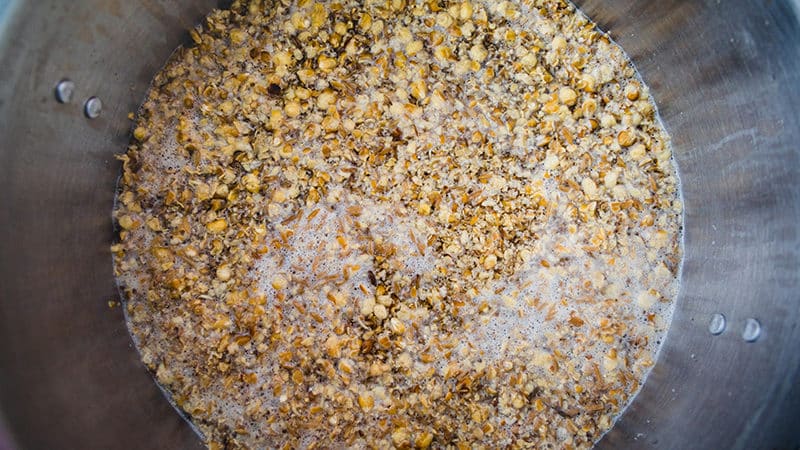
Mashing is simply soaking crushed malts (grains) in hot water to transform the starches in the malt into sugars. This transformation is carried out by specialized proteins known as enzymes.
Single infusion mashing is a basic mashing method in which you combine heated water (the infusion) with crushed grains. Then, you’ll hold the mixture at a constant temperature—usually between 148°F and 162°F (64°C and 72°C)—for a set period of time (usually an hour), and then sparge (rinse) with both recirculated liquid and additional water to create wort.
Step infusion mashing is similar to single infusion mashing, but involves resting the mash at two or more temperatures at different stages. You would do this by directly heating the mash, or by adding heated adjuncts, or unmalted grains such as corn, oats, or barley.
Decoction mashing is a variety of step mashing in which you’ll remove part of the main mash, cook it separately for a set period of time, and then return it to the main mash. Decoction refers to the actual portion of the mash you remove. This process takes considerably longer than a single infusion mash, but you may end up with benefits such as additional colors and flavors, along with extra sugars.
Resting is the term for a set period of time where you leave the mash undisturbed to develop a characteristic you’re trying to develop. For example, the protein rest allows the breaking down of protein chains that might cloud your beer, and the saccharification rest allows the starches in your grain to convert to sugars for fermenting.
Wort is the liquid extracted from the malt. It’s full of sugars that yeast can ferment into alcohol and other compounds, creating the delicious brew we call beer.
Why Use a Decoction Mash?
At this point you may be asking, “Why bother with the extra time and effort of a decoction mash if I can make amazing beer with a single infusion mash?” The answer lies in the nature of modern grain.
Science has given beermakers some pretty powerful insights into the nature of grain, and how best to modify it for optimal brewing.
But because people have been brewing beer since about 3,500 BCE, for much of human history, we didn’t know how to manipulate enzymes. Due to this lack of knowledge, old-school brewing meant using undermodified grains, or grains that had not been optimized for the best possible result when brewing.
The decoction mash was developed in a time when getting the most out of grain meant working to extract every possible bit of fermentable sugar from it through multiple boils. Single, double, and even triple decoction methods were developed by brewers in the days when thermometers didn’t exist.
Making great beer involved removing portions of the mash, heating them separately to a boil, and then returning them to the main mash over four temperature stages. This encouraged the grain to give up the goods, producing the best wort possible.
Theoretically, you could decoct your mash two, three, or even a dozen times. However, the three most common are the triple decoction mash, the double decoction mash, and the single decoction mash.
The triple decoction is the traditional method, while the double decoction mash eliminates the acid rest to speed things up. The single decoction mash is a bit of a shortcut to allow for the benefits of decoction without the long brewing day.

Hands-down the best digital thermometer for brewing. Period. Worth the price 100 times over. Plus, you can use it for cooking 👍
Ready to improve your all-grain brewing process and dial in your system?
This video course covers techniques and processes for water chemistry, yeast health, mashing, fermentation temperature, dry-hopping, zero-oxygen packaging and more!
Click Here to Learn More
Tannins and Melanoidins and Beers, Oh My!
A decoction mash will almost certainly boost the concentration of sugars in your wort and therefore increase your final yield. But using a decoction mash also increases the production of both tannins and melanoidins, two chemical interlopers with distinctive characteristics.
Tannins
Also known as polyphenols, these organic compounds can cloud your beer and add an extremely astringent flavor. Unsurprisingly, they’re considered to be unwelcome guests at the beer party.
However, the amount of tannins added during a decoction mash is actually much lower than it could be because the pH level of a thick mash is relatively low. The modest amount of astringency that does come through is part of the distinctive flavor and character of beers created using a decoction mash, which makes a little bit of pucker a good thing in this case.
Melanoidins
Like the melanin in human skin, hair, and eyes, these compounds add dark color to beer. They form when the simple proteins known as amino acids interact with sugars in the complex chemical phenomena known as Maillard reactions. Melanoidins don’t just add color, though. They also add flavors that range from toasted malt, to caramel, to coffee.
Some varieties of malt have a higher concentration of melanoidins. Using a decoction mash can add a significant amount of melanoidins to any malt during the mash process. This creates the second component to the distinctive flavors and colors associated with beers mashed this way.
In general, if you’re brewing a pale beer, you’ll want to keep melanoidins to a minimum. You can pack ’em into a darker brew, though, especially if you want that distinctive and delicious malty flavor.
How to Perform a Triple Decoction Mash
If you’d like to try your hand at this old-school method of mashing, you’ll need to keep a few things in mind before you begin.
Whether you’re crushing malts at home or buying from your local maltser, consider using an undermodified grain to complement the decoction mash. If you do choose a more modern, fully modified grain, then you can shorten some of the rest steps as your malts will need less time to complete their conversions.
Also, invite a friend to help. You’re going to need an extra pair of eyes and hands since you’ll be monitoring two portions of the mash at once. You’ll also need someone to share the results with. Well, maybe you don’t need to share, but it’s the least you can do to thank your buddy for helping out.
Finally, this can be a lengthy process. Plan on up to six hours, depending on your recipe, malts, and technique. In other words, don’t make any Netflix bingeing plans on brewing day.
Equipment for your Triple Decoction Mash
To perform this mash, you’ll need the right setup, including:
- stainless steel brew kettle
- Prepared grains
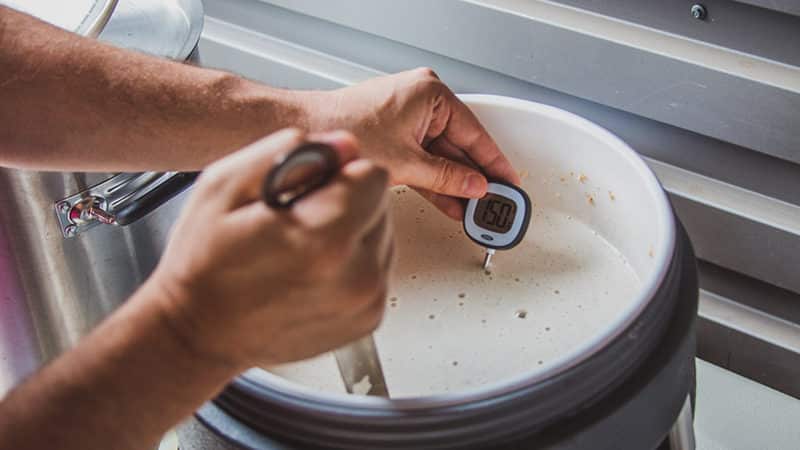
- Digital thermometer
- Water
- Separate kettle or kettle for heating decoctions
- Mash paddle or slotted spoon
- Calcium chloride or gypsum, as desired

The Triple Decoction Mash Process
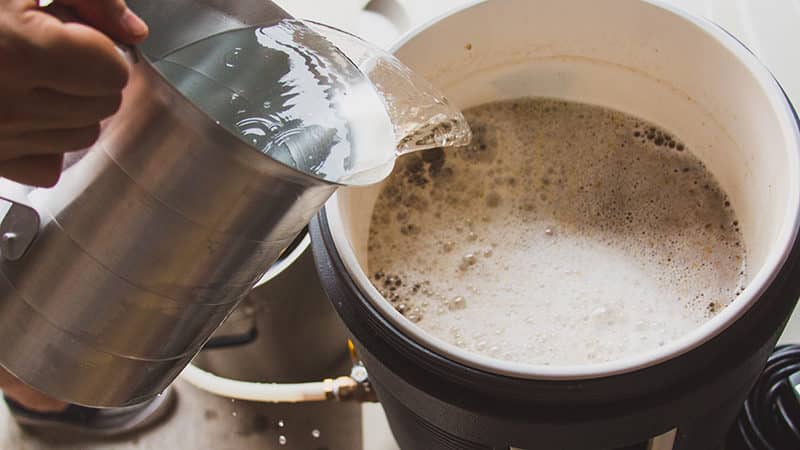
To begin, combine the grain and water in your brew kettle, with a temperature at or near 99°F (37°C). For pale beers, use 2.3–2.6 quarts of water per pound of grain (4.8–5.4 L/kg). For darker beers, use 1.4–1.9 qts./lb. (3.0–4.0 L/kg)
Note: You can combine your grains and water at room temperature, then bring them to the correct temperature and consistency by adding hot water. Mashing directly in your kettle lets you apply direct heat for easy adjustments.
After fifteen minutes, it’s time to pull a decoction. Remove one third of the mash (the thickest part), and heat it in a separate kettle or pot to 150°F (66°C). Once it reaches the target temperature, let it rest for 15–20 minutes. This will encourage the enzymes in the decoction to turn more starches into sugars. If you’re using a fully modified malt, you might find the decoction has fully converted the available starches into sugars at this point.
Alternatively, you can let the remaining two-thirds of the mash rest for several hours at 99°F (37°C) to encourage phytase—an enzyme—to acidify your mash by releasing phytic acid from your grains. This is known as an acid rest, and was once used to compensate for waters so pure, they didn’t allow for proper enzyme activity without it.
You can also do a modified ferulic acid rest at 104°F–122°F (40°C–50°C), which gives certain beers their distinctive flavors. If you’re making weissbier or another brew that relies on ferulic acid for flavoring, you’ll definitely want to do an acid rest.
After the rest, heat the decoction to a boil. If you’re making a pale beer, boil for 15 minutes. For dark beers, you can boil the decoction longer, up to 40 minutes. This will encourage the development of those roasty, toasty melanoidins.
Important: The secret to a happy decoction mash is stirring. You (or your brewing buddy) will need to constantly stir the decoctions to prevent scorching. You can also add a dash of gypsum or calcium chloride to your decoction—just a dash!—to help ensure your mash reaches a suitably low pH level.

Once you’ve boiled your decoction for the proper amount of time, return it to the main mash, and adjust the mash temperature to around 125°F (52°C). Perform a protein rest by holding your mash at this temperature for 15–30 minutes. Again, if you’ve chosen a fully modified malt, you can skip this rest and go straight to the second decoction.
After the protein rest (or immediately after your mash reaches the target temperature, if you’re using a modified protein), draw a second decoction. This should be, like the first decoction, the thickest third of your mash. Boil this decoction for 15–30 minutes, and then pour it back into your main mash.
After you return your second decoction to the mash, adjust the mash temperature to around 149°F (65°C) as necessary. Perform a saccharification rest by holding your mash at this temperature for an hour. If you’re using a fully modified malt, you can shorten this rest to 30 minutes.
Once the saccharification rest is finished, pull one last decoction. Boil it for 15–30 minutes, and then return it to the main mash. You’re now ready for your mash out, so the temperature of your mash should be around 170°F (77°C).
This final step puts the brakes on the last of the enzymes. The rest were already halted by boiling in the three decoctions. Now you’re ready to recirculate, sparge, and lauter your wort for the boil and then fermentation.

The Classic Double Decoction Mash
If you’re brewing a traditional German pilsner, bock, or other recipe that calls for it, you can use a double decoction mash to speed things up. You’ll skip the acid rest and the first decoction, and proceed directly to the protein rest.
The rest of the mash is the same, except for the rest temperature during your saccharification rest. Hold your mash at a slightly lower temperature than during the same period in the triple decoction mash, e.g. 142°F–145°F (61°C–63°C ). This will help to compensate for the converted starches lost by skipping a decoction.
A Single Decoction Mash: The Schmitz Process
Despite sounding more like a dry cleaning upgrade than a brewing term, the Schmitz process actually gives you a quick and easy way to incorporate the character of a decoction mash to your brew without investing half of your brewing day into a triple decoction mash.
It provides a “fast forward” by leveraging the power of your brew’s enzymes dissolved into the mash liquid to convert the starches in your mash into sugars while still allowing for complex flavors.
Equipment for a Single Decoction Mash
To perform a Schmitz process mash, you’ll need:
- Brew kettle
- Prepared grains
- Digital thermometer
- Water
- Separate kettle or kettle for heating decoctions
- Mash paddle or slotted spoon
The Single Decoction Mash Process
To begin, combine the grains and water in your kettle at 122°F (50°C), then heat your mash to 150°F (66°C), stirring constantly with your mash paddle or a slotted spoon.
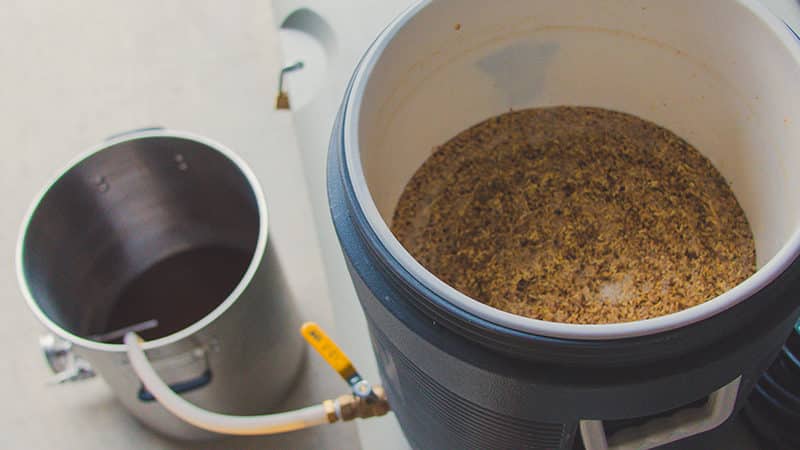
When your mash reaches the target temperature, stop stirring, and let the solids in the mash settle to the bottom of the kettle. Carefully remove the liquid part of the mash, and move it to your other kettle or kettle. Hold this liquid at 150°F (66°C).
In your main kettle, boil the mash solids (and any remaining liquid) for 15 to 30 minutes. Then add the decoction back into your mash to bring it into the saccharification range. For example, if your target temperature for your recombined mash is 150°F (66°C), you’d let your grains cool to that temperature.
You can cool your decoction with a wort chiller. Once you’ve returned it to your main mash, you can tweak the temperature with the wort chiller (if it’s too high) or by adding direct heat (if it’s too low).
Let your mash rest for 30 to 60 minutes at your target temperature to allow the starches to convert to sugars. Once that’s done, you’re ready to recirculate, sparge, and lauter for the main boil with hops and then fermentation.

After the Mash
Mastering the fine details of a decoction mash will take some time and practice. Keep your notebook handy, and record the details of your mash, making note of your ingredients, resting time, temperature, and mash consistency during the process.
Add these to your notes on the finished beer, and you’ll soon be able to tweak the process to consistently achieve the results you’re looking for, batch after delicious batch.
Happy Brewing!